Go to...  | Start A New Topic  | Search  | Notify  | Tools  | Reply To This Topic  |  |
 |
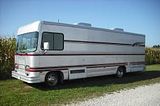
My coach is an 87, medical unit and has very few windows. I have 2 uninstalled windows that were in the coach when I bought it, and am wondering how hard it is to install windows, and what bracing I need to replace or reinforce. Can I just cut a hole in the wall and clamp the window in? Do I need to add reinforcing studs? wood or metal? | ||
|
 12/10 12/10 |
| |||
|
"Host" of Barthmobile.com 1/19 1/19 |
Try this link and read up. While it doesn't go into detail on a window install... It'll give you some real good advice on what you should be looking for, and potential pitfalls, when you do tackle this job.
| |||||||||||||||
| ||||||||||||||||
 |
Hi ForrestKing, Check out what I'd done, for a starting point. http://barthmobile.com/eve/for...?r=90110034#90110034 You might want to compare the width of the windows you have to the spacing of the studs in the wall. I was finding an assortment of spacing intervals. I tend to recall them varying from 9.5 to 11". There were some interval distances that predominated. You can cut a hole, and clamp the window in, assuming you have matched the widths. I didn't add any studs. But if you check my first picture, you'll see that there is a horizontal cross piece under the window. My new window height did not reach low enough. The thickness of the wall studs is 2", so I cut a 2x4 on a table saw to fit the distance between the horizontal metal piece and the bottom of the window. You will want to do this, because you won't want the weight of the window to be carried by the aluminum skin. Because of the geometries of the interior trim ring which fits in the window, the 2x4 is cut with a step-profile as viewed from the end, in order to provide the clearance needed. Part of the key to a successful installation is going to be the relationship of the cut in the outside skin, and with the interior paneling. They are not the same size. The hole which is cut in the interior paneling is going to be about 3/8" larger all around. This means you can not use the same template on the inside that you use on the outside, when tracing your cut lines. So, the key to success is going to be having center lines drawn for the position of the window, and then aligning your templates to this with their center lines. You might also have to move some other outlets around. You can also use the opportunity to route 12v outlets for portable electronics. On the passenger side, next to the chairs I'd installed, I'd wished I'd installed a bigger window. Here's a new one almost 3' wide on eBay for about $100+shipping: http://cgi.ebay.com/ebaymotors...fPartsQ5fAccessories Bottom line: it is not a hard job, it is just time-consuming to prepare for placing the cuts in the right location. Take your time, and imagine all the great sites you'll be seeing through your new windows as you do the job. Don't rush it. One last point about your interior paneling. It is riveted in place. You won't be able to remove all the interior paneling, depending upon if other interior walls were installed, or if other windows are in place. But you can remove them or loosen them as needed by drilling off the rivet heads. Be careful here, you can keep the rivet body in place on the stud, so that the rivet body can serve as an alignment dowel for placing the interior panel back in place. Happy Motoring! Matt 1987 Barth 27' P32 Chassis Former State Police Command Post Chevrolet 454 Weiand Manifold, Crane Cam, Gibson Exhaust | |||
|
| Powered by Social Strata |
| Please Wait. Your request is being processed... |
|
This website is dedicated to the Barth Custom Coach, their owners and those who admire this American made, quality crafted, motor coach.
We are committed to the history, preservation and restoration of the Barth Custom Coach.
We are committed to the history, preservation and restoration of the Barth Custom Coach.


