Go to...  | Start A New Topic  | Search  | Notify  | Tools  | Reply To This Topic  |  |
 |
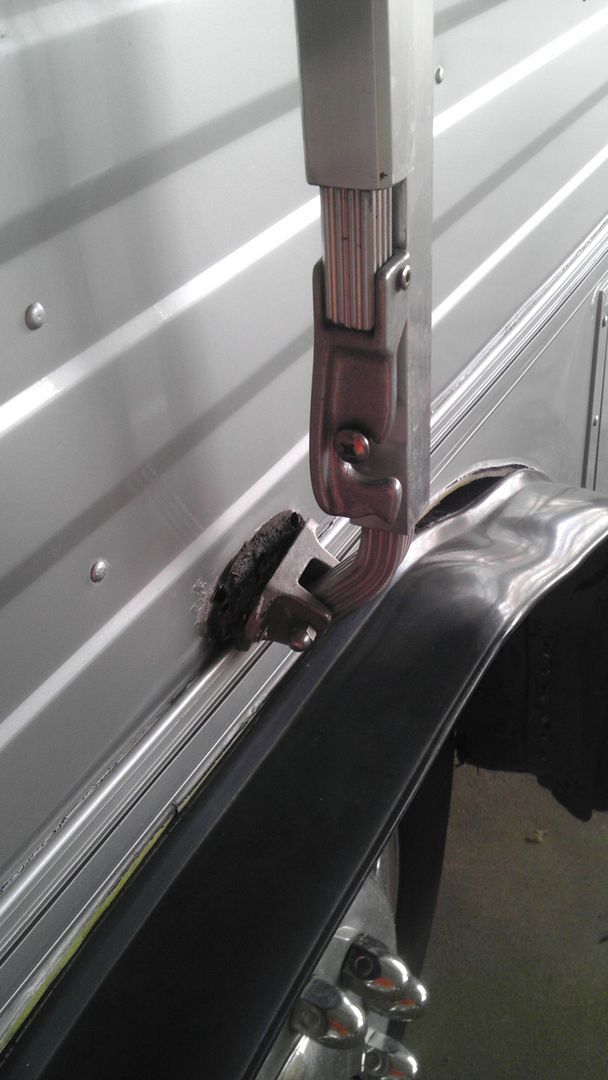 Hopefully I upload this photo correctly. The forward awning support leg bracket has pulled out of the side of the coach. Based on what I can see, this is above the floor line, but likely directly in-line with the step/hump in the drivers compartment inside. Has anyone made this repair before? Any suggestions on making it simple, effective and relatively low cost? I could put possibly install a backplate, but it might be tight. I was wondering if I can drill out the two rivets, if it were possible to drill two long sheet metal screws? Otherwise, I was told there are some expanding rivets on the market which might work? The one's I looked at did not look like they were long enough. Appreciate the feedback. ~ 1990 - 32' Regency with 8.3 Cummins on Spartan Chassis ~ | ||
|
 |
Call Zipdee awnings. they have replacement rivets that spread out like a toggle bolt. Had a picture of one but can't find it. Nick | |||
|
"Host" of Barthmobile.com 1/19 1/19 |
Myself, I would really have it mounted into the floorline and I would use long carriage bolts for it. That is how I did mine. Because you have it already installed, I believe the better course of action would be to go with a slightly larger diameter rivet. Based on what I see here, you shouldn't need to call zipdee. Go to a body shop supplier or a nuts and bolts distributor and bring the bracket with you. Explain to them that you're going into .040 sheet aluminum but you'll need to clear the thickness of the lower bracket to bite into the .040 base aluminum. Another thought would be to do what I did on my secondary support brackets. Basically, what I did was make up a support mounting bracket to lift my A-Arms up so I wasn't bumping into them all of the time. I'll post pictures of this mod. I was hoping to do a writeup on it but now would be a good time to show it off. I'll snap a few tomorrow and post for our members to see.
| |||||||||||||||
| ||||||||||||||||
FKA: noble97monarch 3/12 3/12 |
I would install Nutserts which basically install a sealed nut into the aluminum. You will actually drill a larger hole that the rivet uses and once the Nutsert is inserted in the hole a bolt draws it up and seals it. They are used on many roof mounted racks. Another possibility is to move the awning to the rear or front slightly. Remove the little lock screws on the upper C-rail along with the awning support brackets, then just slide the awning down the C-rail. Drill new holes and fasten. Cover the old holes with some self stick reflectors. I moved the awning on my old Barth to accommodate an Over the Door awning. Looked like it had always been that way.  Formerly: 1997 Barth Monarch Now: 2000 BlueBird Wanderlodge 43' LXi Millennium Edition DD Series 60 500HP 3 stage Jake, Overbuilt bike lift with R1200GS BMW, followed by 2011 Jeep Wrangler Unlimited, “I haven’t been everywhere, but it’s on my list.” | |||
|
"Host" of Barthmobile.com 1/19 1/19 |
I like Corey's idea on using a Nutsert for this setup. The trick is to get a good one that'll fit in tight. Too many of these Nutserts are made of junk. 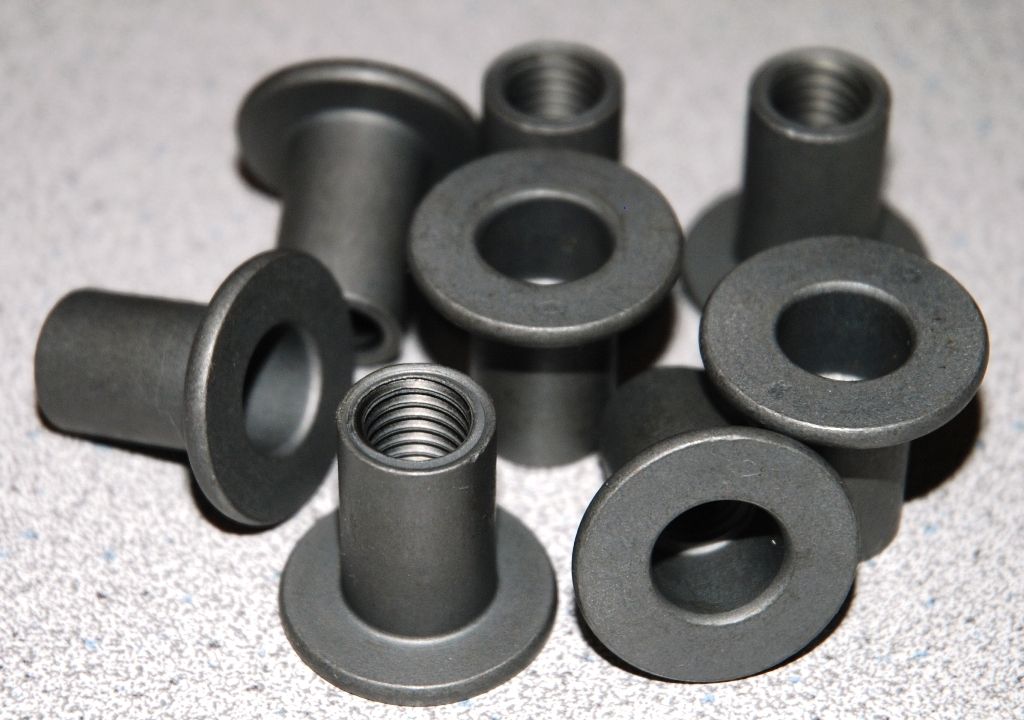 Yesterday I mentioned that I made up a secondary mounting brace to give me more room. This allows me to walk around the awning area without bumping into my awning support braces. This gave me a lot of extra room for very little outlay of cash. The only thing I lost was the laughs we got from bumping into them. Here are a few pictures. 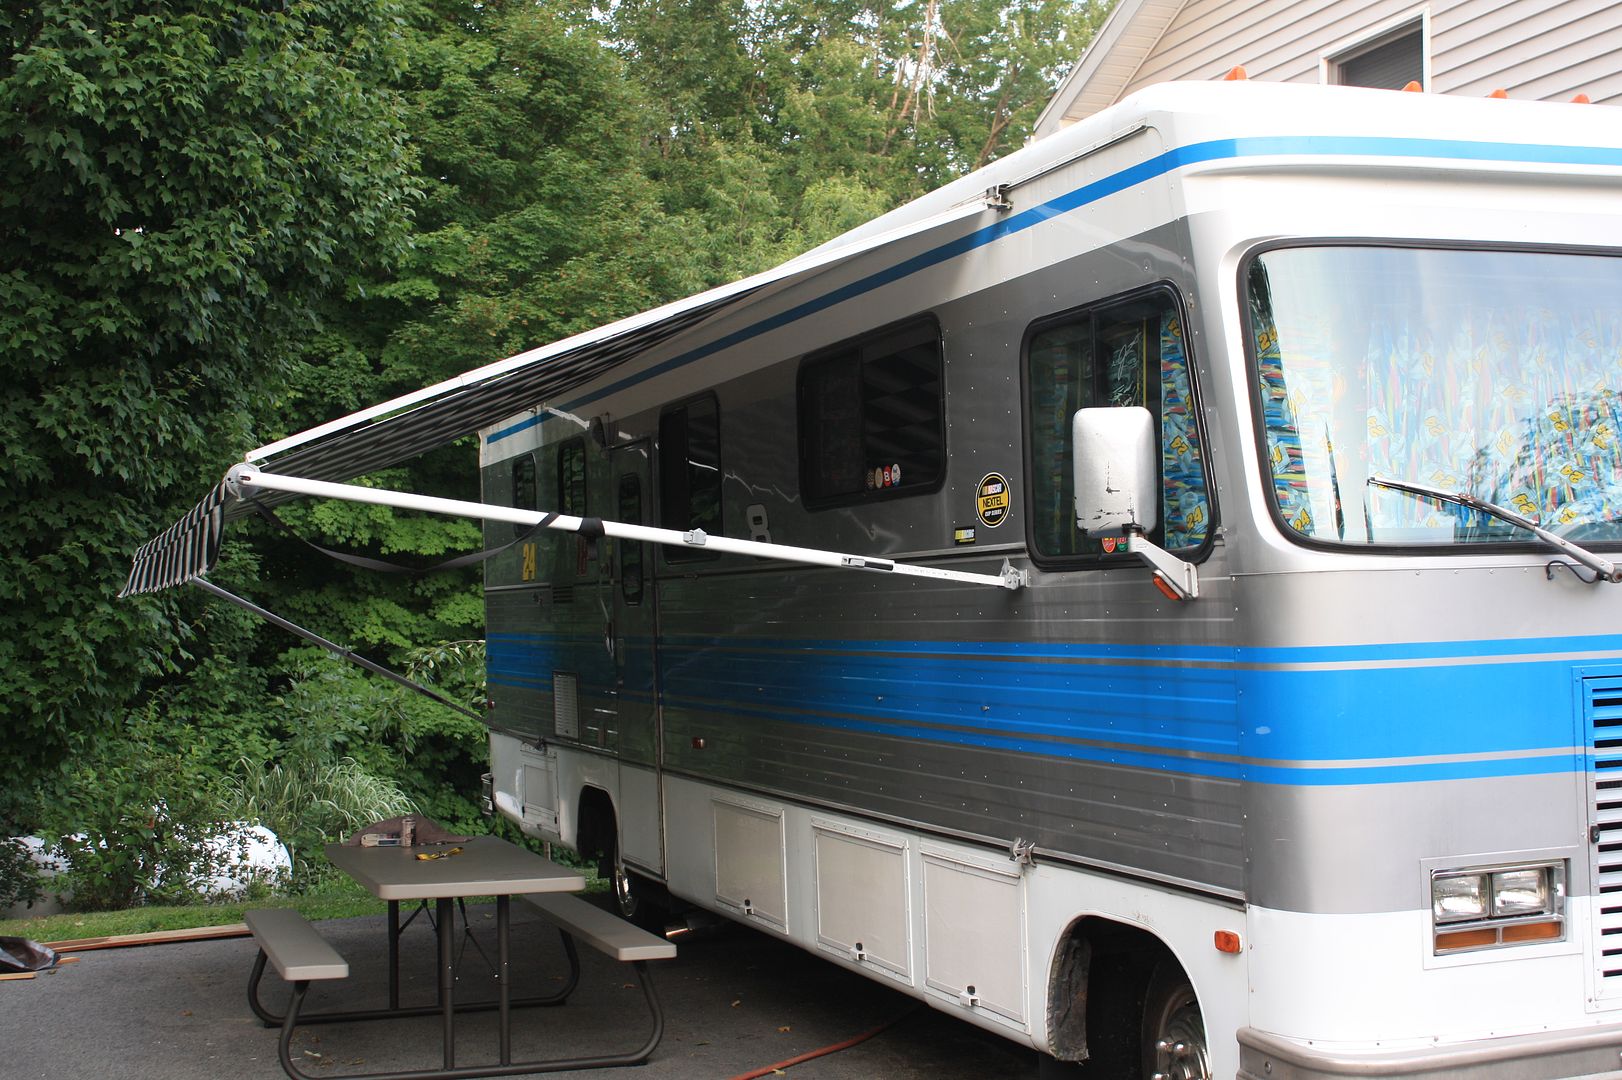   I made up the bottom aluminum mounting plates to make sure that I evenly distributed the load. I was also very close to vertical supports in the wall. Behind this brace is the good double sided tape we've talked about in the past. By using that tape it also gave me enough filler to use a wider aluminum plate.  In this photo I have 3 screws holding this one up. One behind the mount into the vertical wall support and 2 through the awning mounting ears. 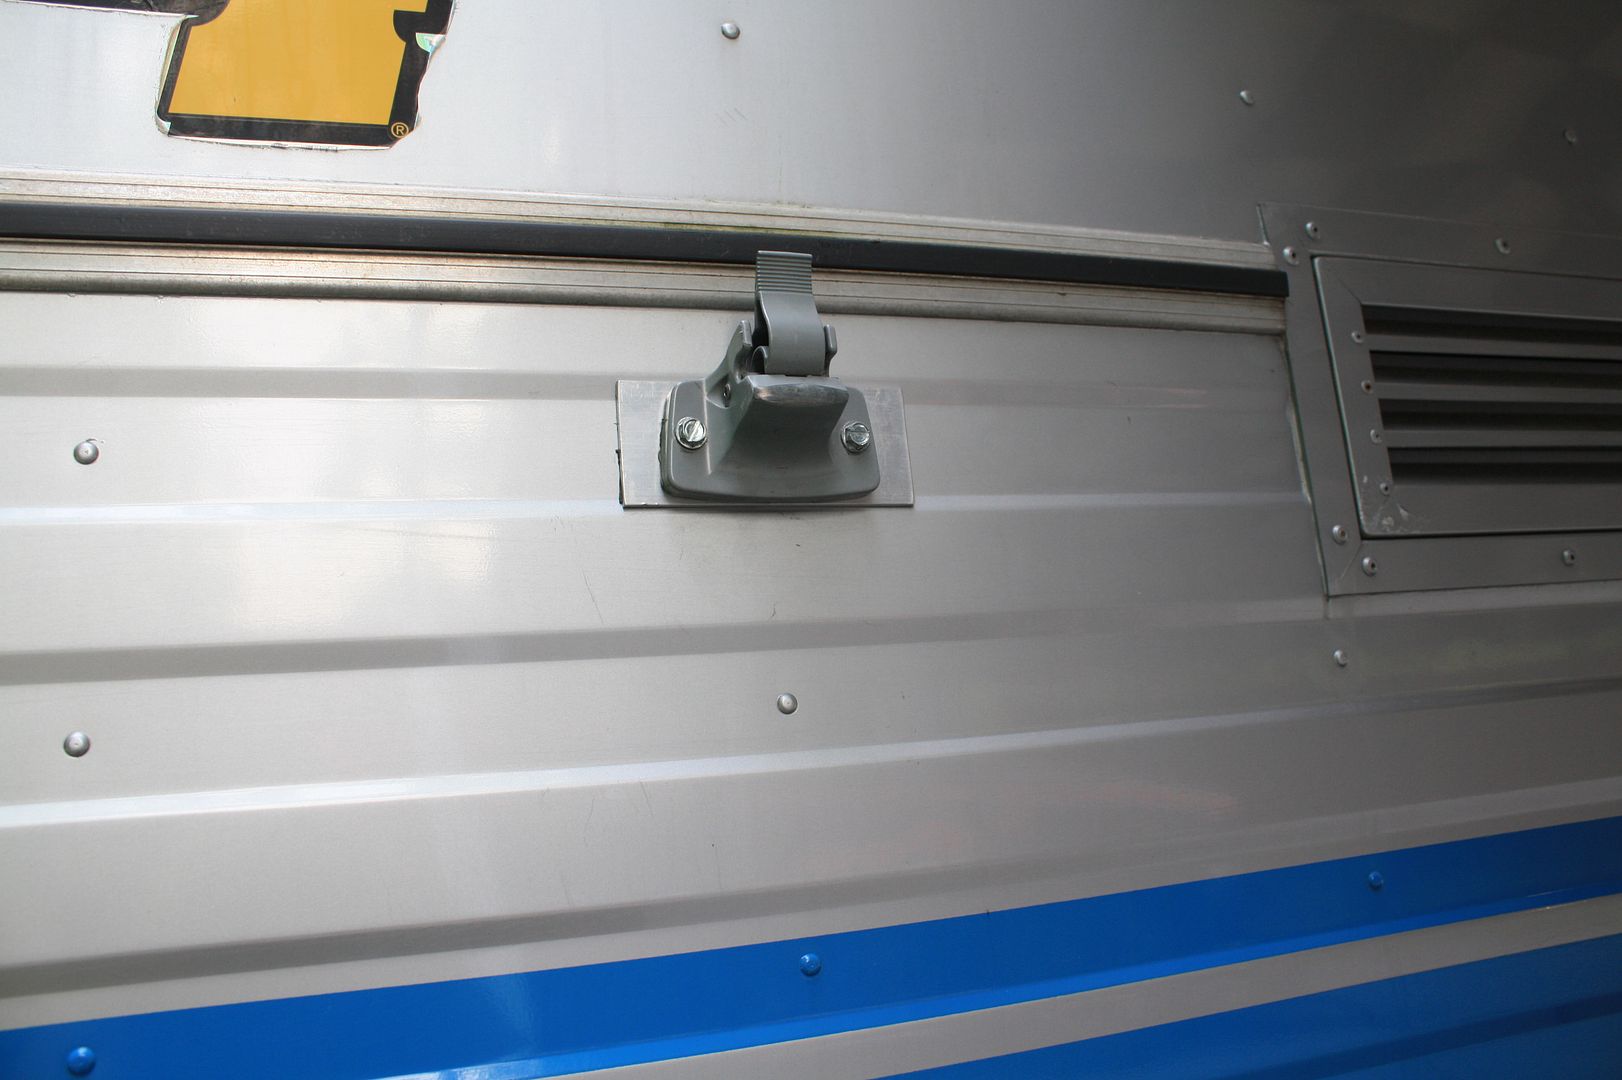 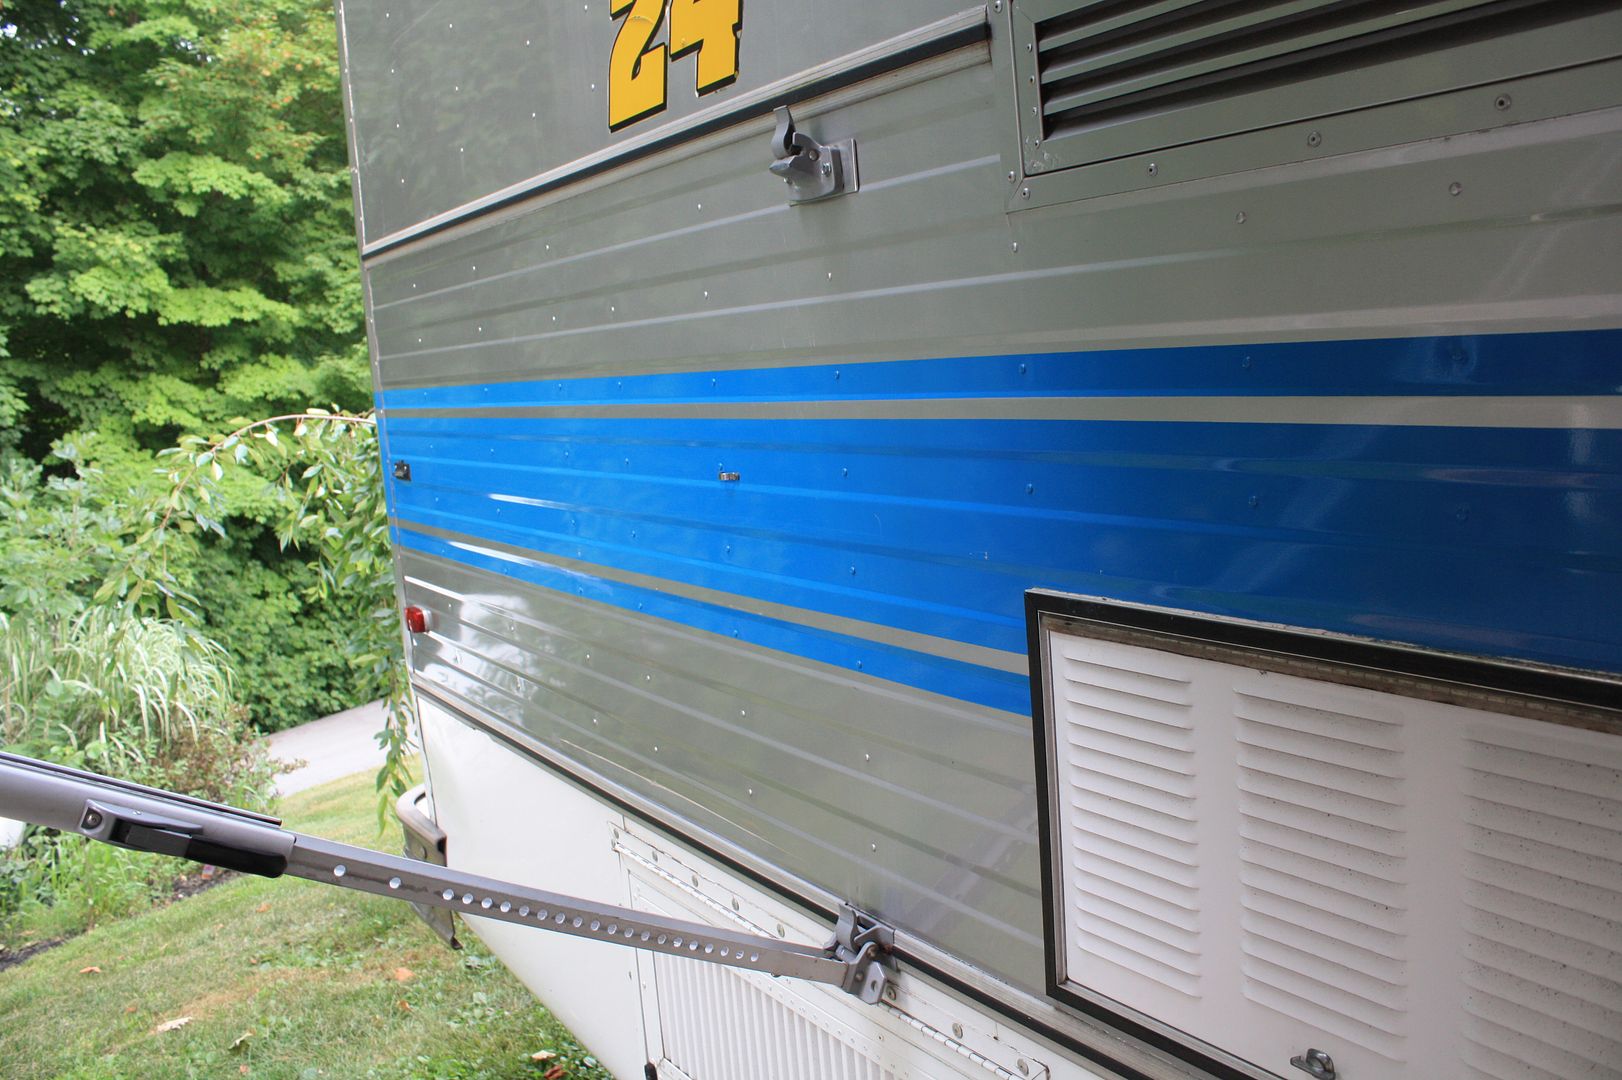  Out of all the modifications I've done, this was by far the easiest and cheapest to do and it's given me the most bang for the buck. I have plenty of room to walk under these, even at 6'1", without it touching me head.
| |||||||||||||||
| ||||||||||||||||
Super idea Bill - I never thought of that...... Ya remember what ya paid for the extra mounting feet? I'd need to mount them about 4" off C/L to catch a stud - think that'll still work? | ||||
|
"Host" of Barthmobile.com 1/19 1/19 |
My awning is an A&E. What kind of awning do you have? Can you supply pictures of your setup? This guy has the lower brackets listed at a starting bid of 20.00 for a set Ebay This Ebayer has over 10 of 'em at 11.00 each Ebay I waited for awhile and I bid on a few different ones until I got it for cheap. I think I paid about $12.00 total, including shipping, a few months back. It's always cheaper around winter time. If you have a ZipDee awning you might want to check out this setup that Nick had installed on his coach. Slider Bar 3rd image down. Allows you to raise the awning arms up to 24 inches higher to create additional space for free movement beneath the awning. No more ducking under or knocking your head. Here is Nick's writeup on this. His does not appear to be on a support beam. ZipDee slide bars 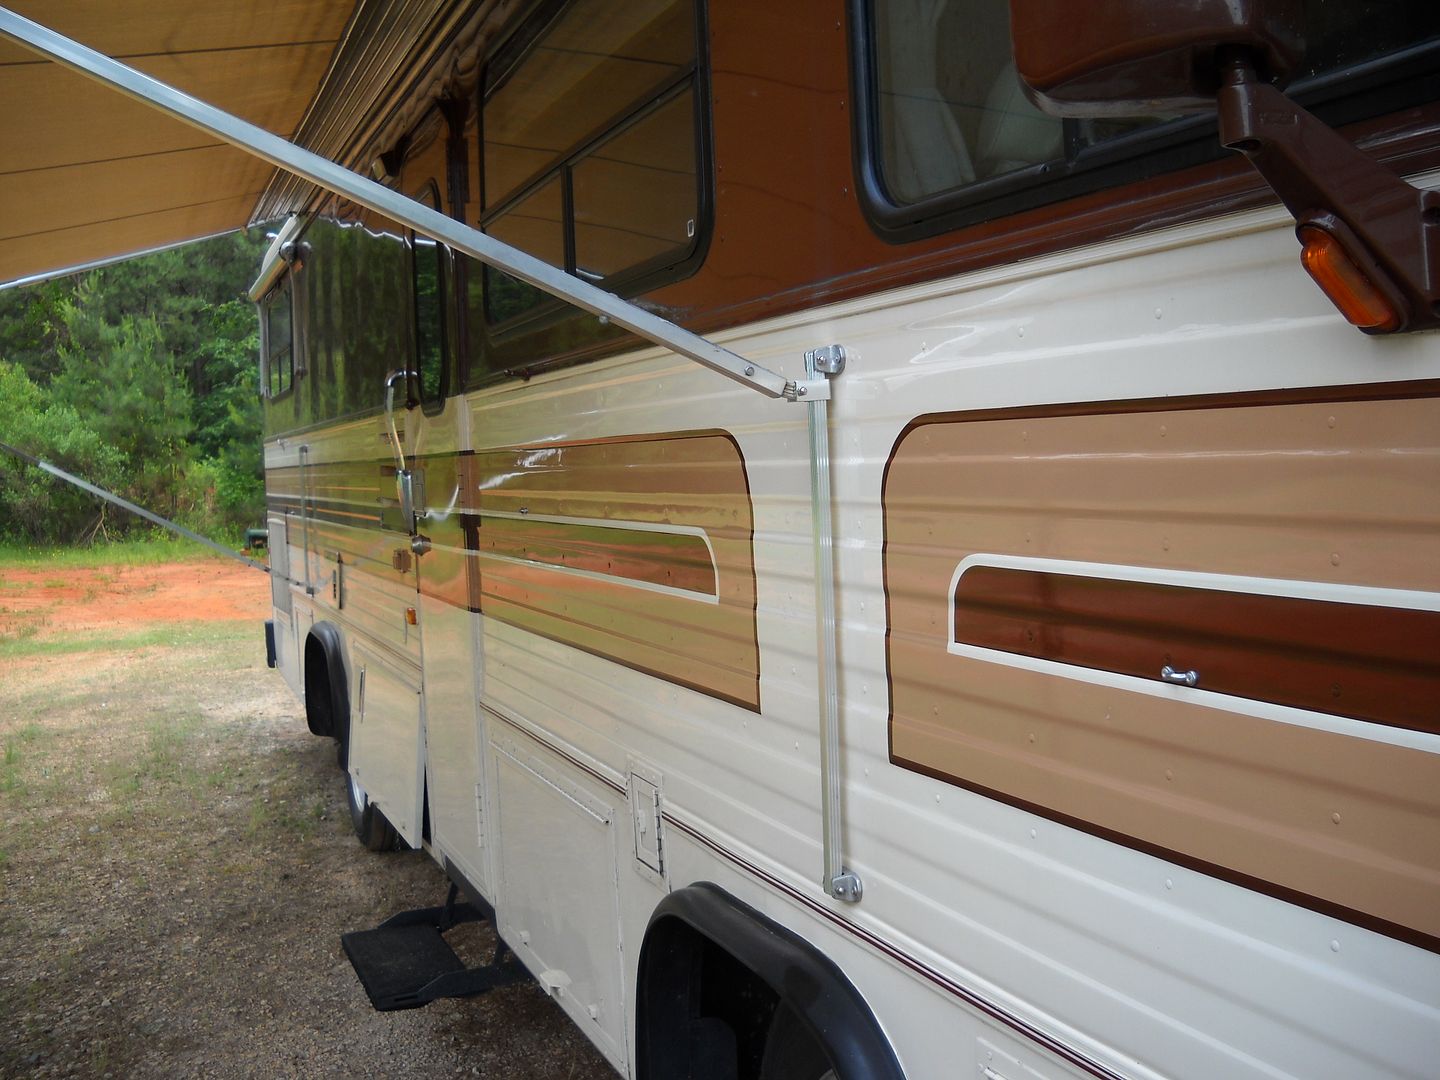
| |||||||||||||||
| ||||||||||||||||
| First Month Member |
Which ones do you like, and which ones do you not like? I use JB Weld when I put a nutsert on a critical area. That stuff really holds and seals on bare metal. . 84 30T PeeThirty-Something, 502 powered | |||
|
"Host" of Barthmobile.com 1/19 1/19 |
I don't know how to answer that... I've seen some crap that is like a nutsert and I wouldn't install it. I went back to the vendor and was given stronger ones. I would guess that they make different ones based on expected load. Maybe I should have said something with a wide bite on both ends??? Me too.
| |||||||||||||||
| ||||||||||||||||
 |
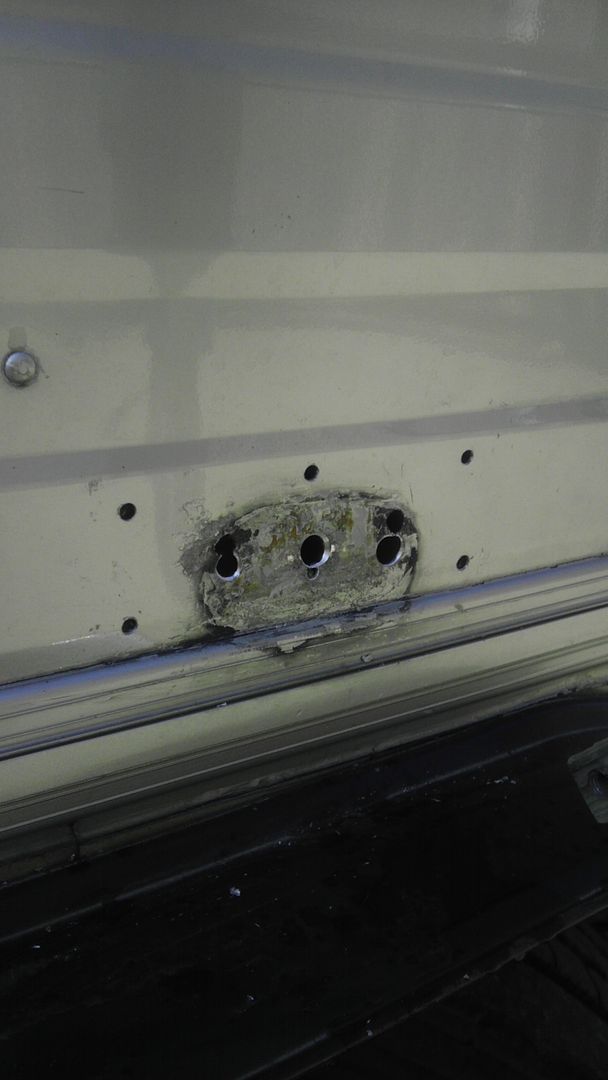 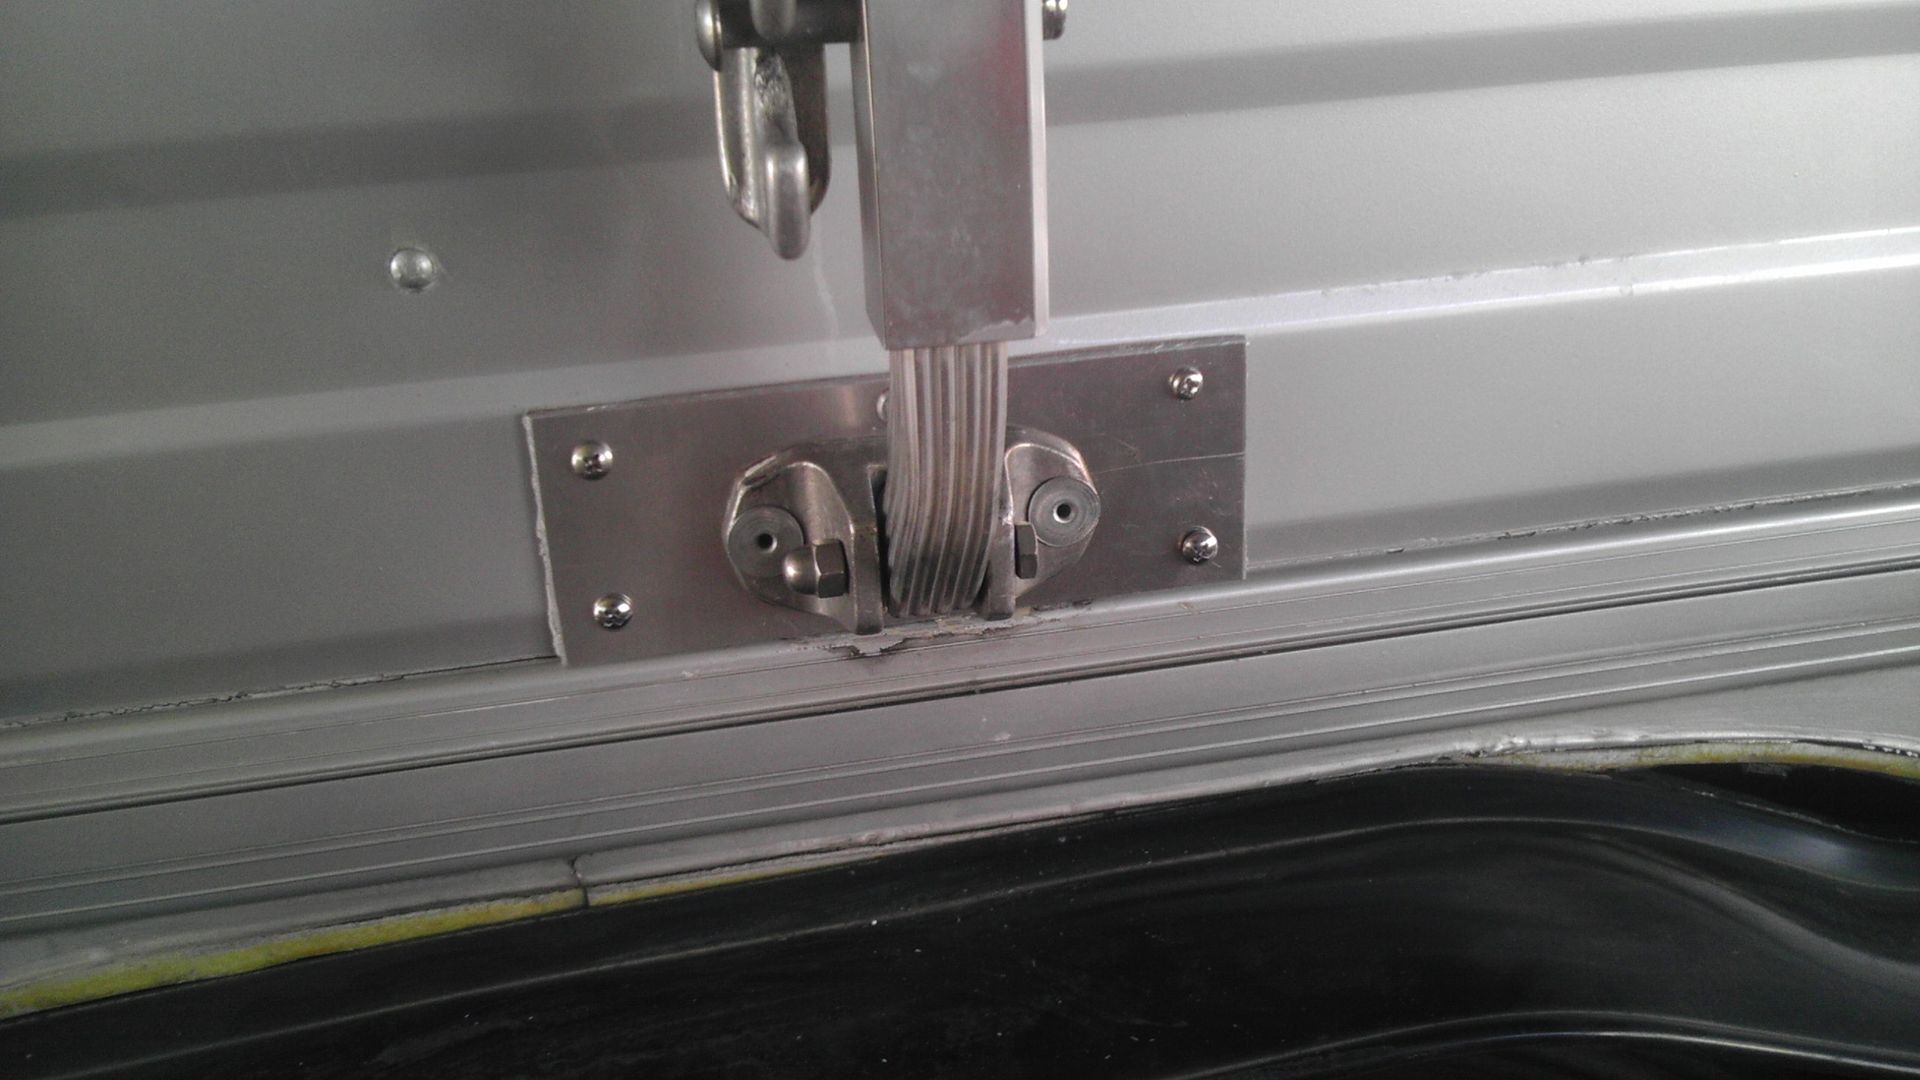 After getting some help from friends with more skills and tools than I have, we removed the bracket and found several holes and slightly "torn" looking aluminum so we decided to build a small aluminum back plate - pre-drilled into the side of the coach and two holes on each end appeared to hit metal beams in walls so we put screws in those and one rivet in top center. Then we put rivets through the bracket into the plate/wall. Put silicone on the back plate before screwing into position. This sure looks like a secure and sound method of re-attaching and cosmetically is not too bad. The back plate is about 1/8" thick so should not interfere with operation of the awning. If I weren't in a hurry, I would have had them help me with a matching plate for the other bracket too but so far it is secure looking (with two screws) so I did not want to push my luck with time and generosity of my friends and their equipment. Thanks for your help and suggestions. Preparing a trip to the Keys in one week! ~ 1990 - 32' Regency with 8.3 Cummins on Spartan Chassis ~ | |||
|
| Powered by Social Strata |
| Please Wait. Your request is being processed... |
|
This website is dedicated to the Barth Custom Coach, their owners and those who admire this American made, quality crafted, motor coach.
We are committed to the history, preservation and restoration of the Barth Custom Coach.
We are committed to the history, preservation and restoration of the Barth Custom Coach.


