Page 1 2
Go to...  | Start A New Topic  | Search  | Notify  | Tools  | Reply To This Topic  |  |
Official Barth Junkie |
Hey you GM P3X chassis guys, have you hugged your brakes lately? Or even looked at them? Or wheel bearings? In my never ending quest to find things to look at and work on Barth, I checked a few more things I hadn't looked at yet. This was actually inspired by my purchase of 2 front tires. While I had the wheels off to paint rims, mount and balance the tires, I figured I should inspect the brakes and wheel bearings. 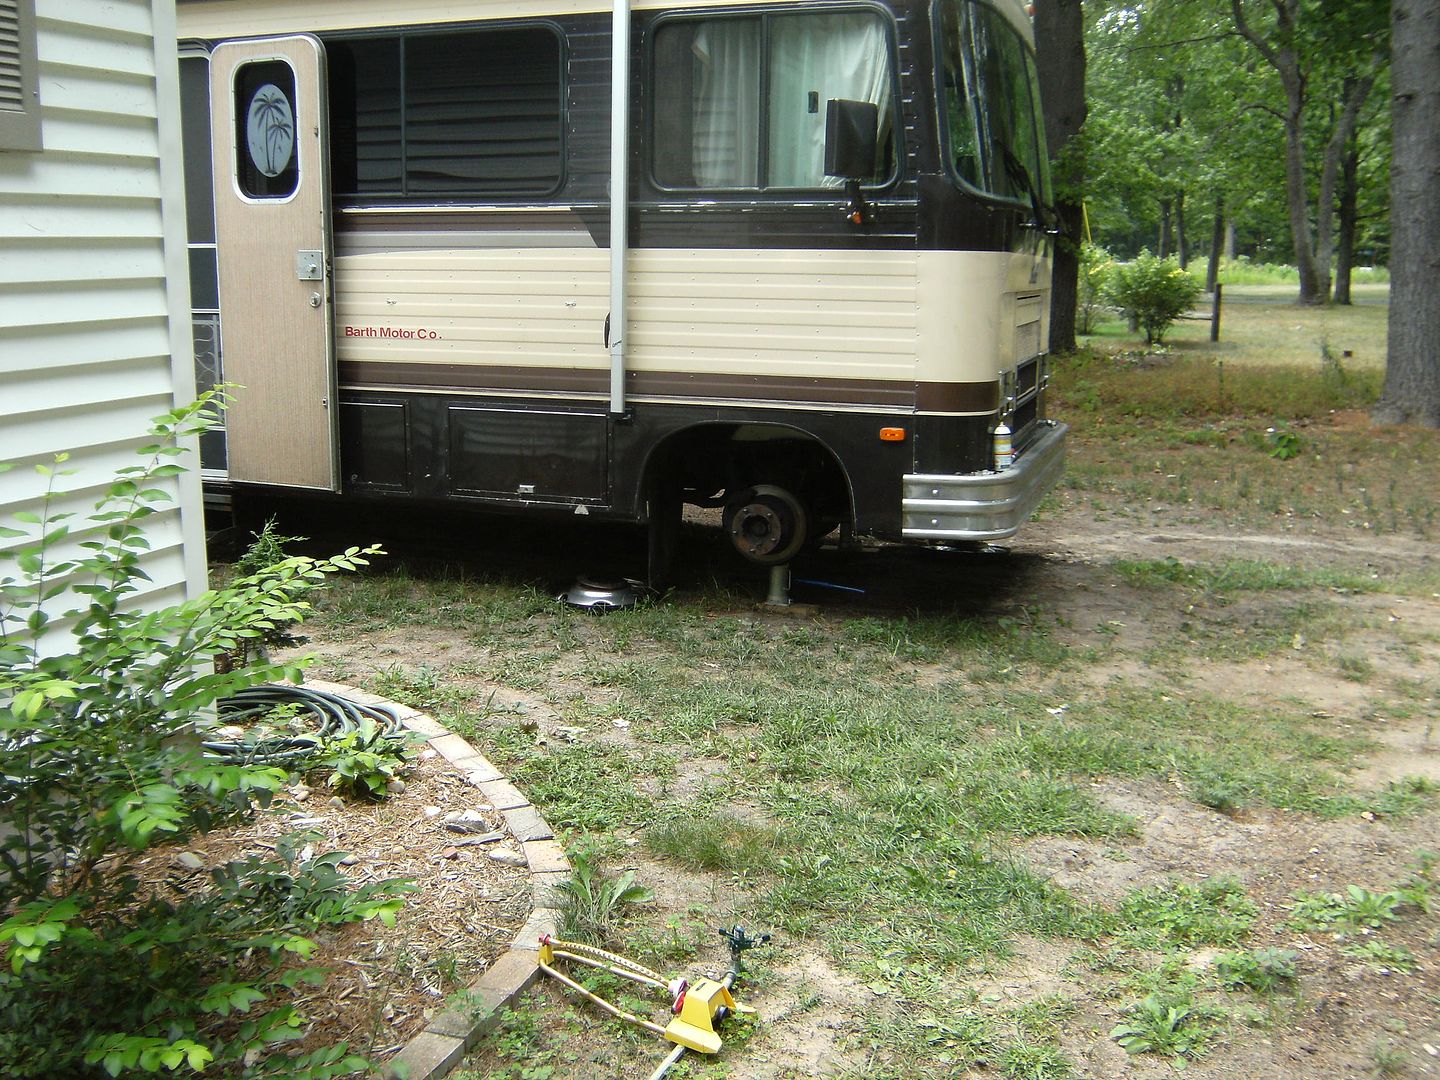 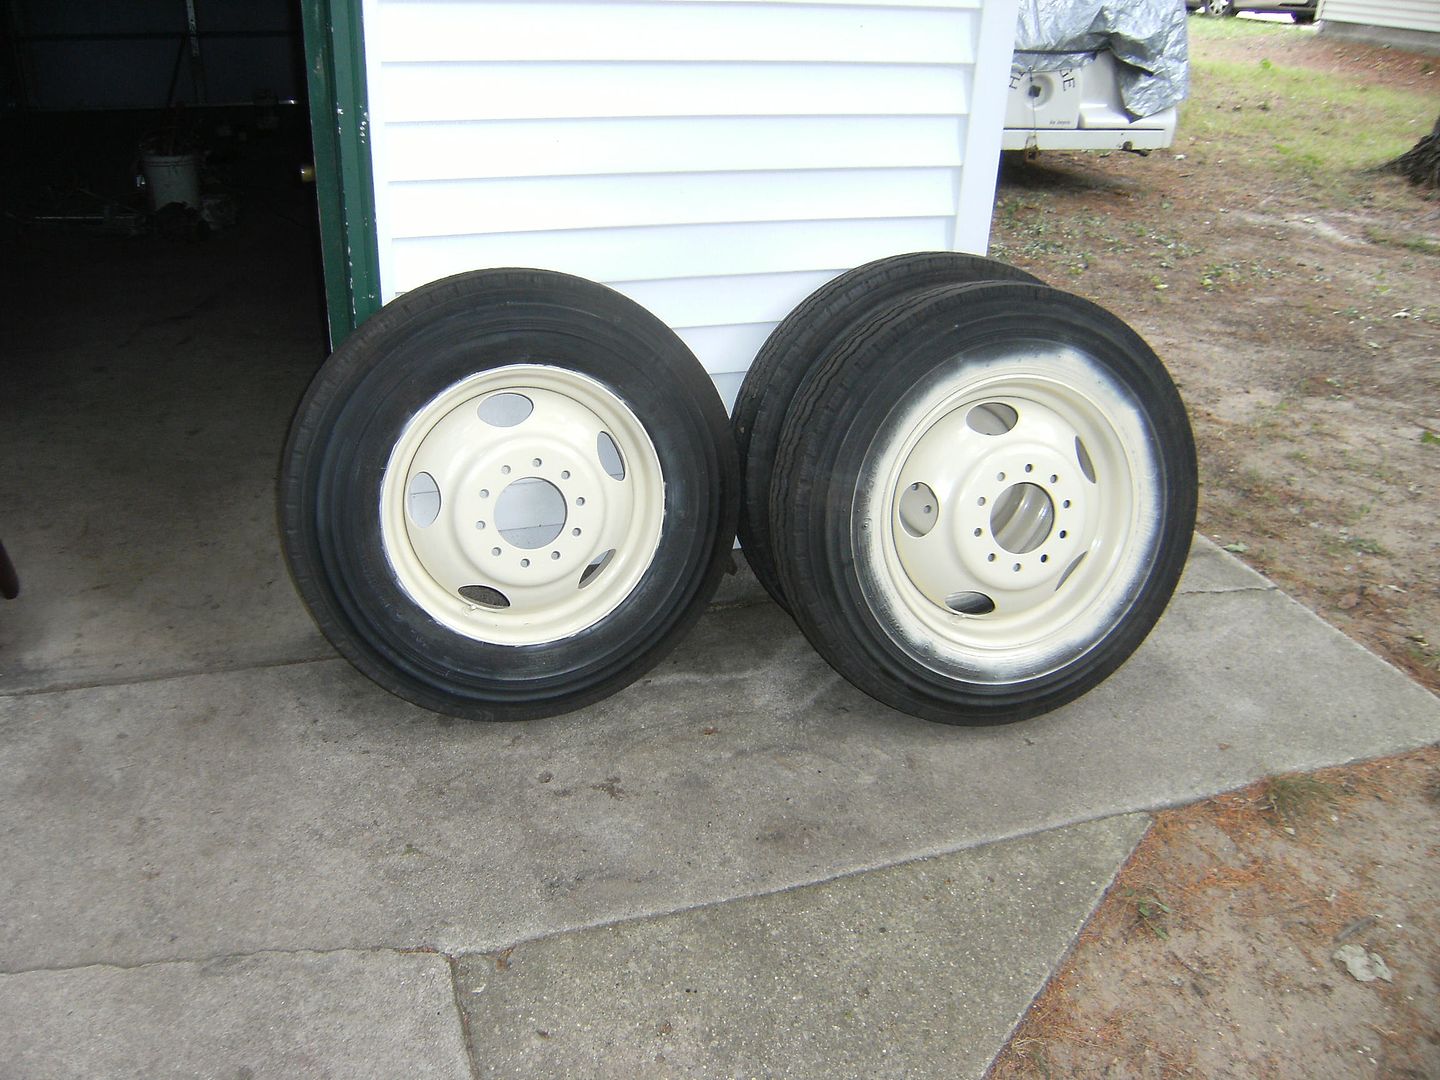 If you intend to replace or repack the bearings (inner: Timken #LM501349, outer: Timken #15103-S) you'll need a grease seal for each hub. (National # 8974 S) My coach has 4 wheel discs: RPO JF9 Front and rear calipers are identical, (pads, too, of course) Left side Cardone 18-4167 Right side Cardone 18-4166 pads: PMD149H or MKD149 Loosen the wheel nuts before jacking… they are tight! Jack up the coach (I used a hydraulic jack under the control arm with the leveler jacks for backup. Use jackstands under the frame if you intend to go under the coach!) Remove the nuts, wheel cover, and wheel: (You can inspect the rotor, brake hose and pad thickness now if that is all you intend) These look good. 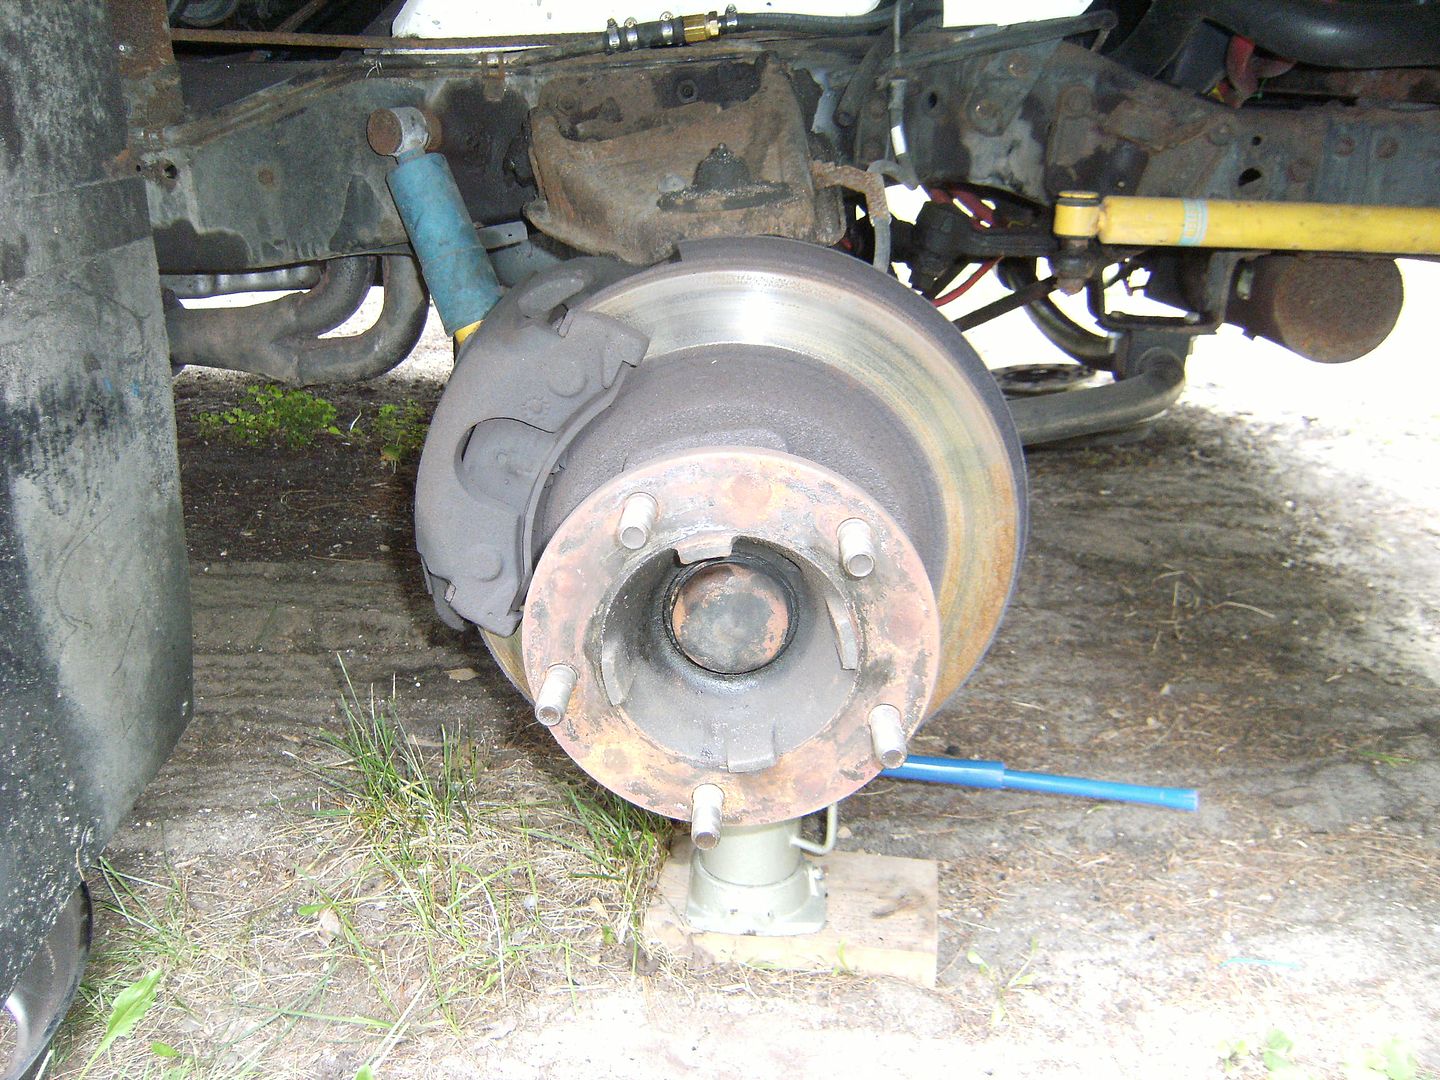 To remove the caliper, remove the small bolt holding the sliding key at the bottom of the caliper. Drive the sliding key sideways and out. 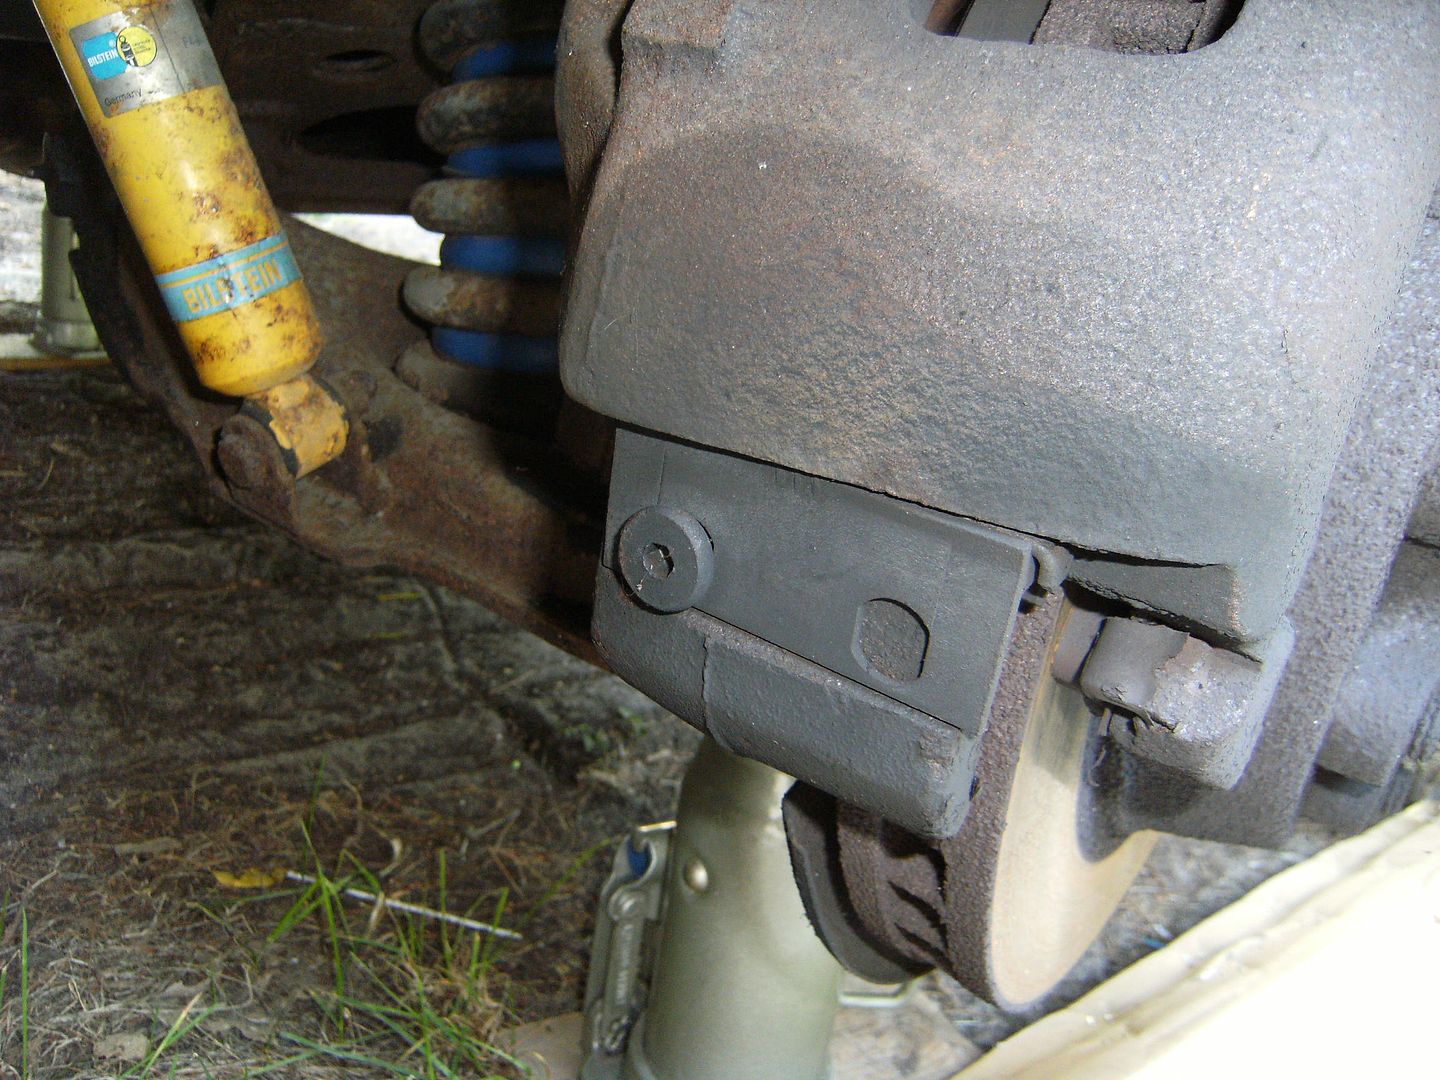 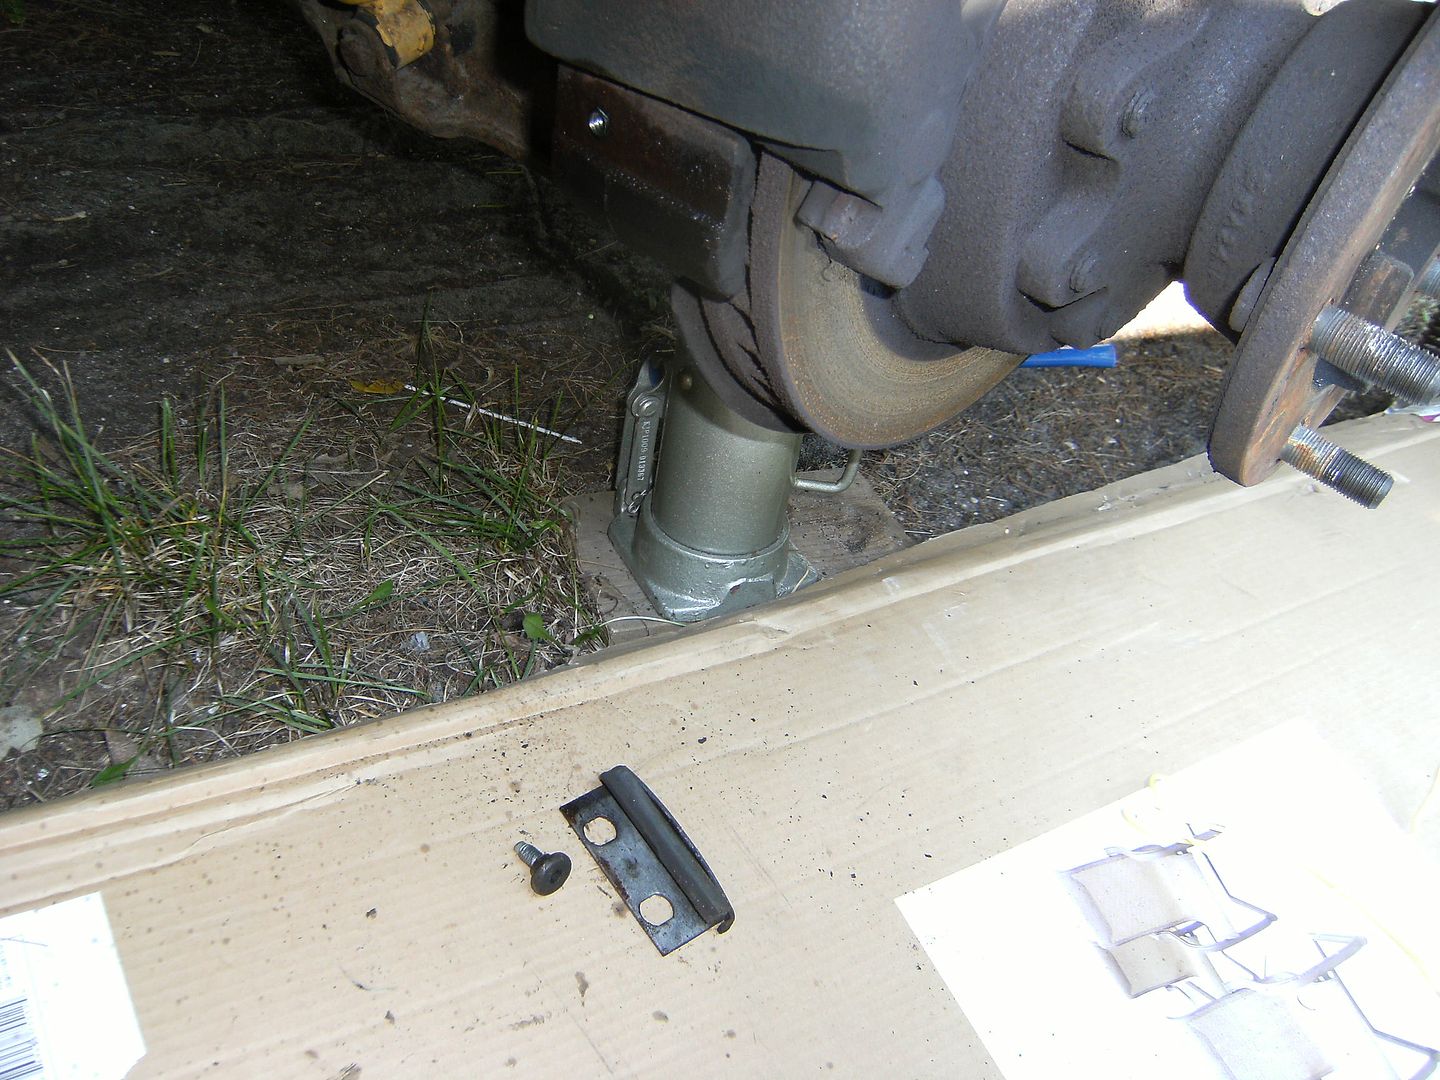 Use a clamp to collapse the caliper piston. This makes it easier to slide the caliper off the rotor. (If you are replacing the pads, run the piston to the bottom to make room for the thicker new pads) 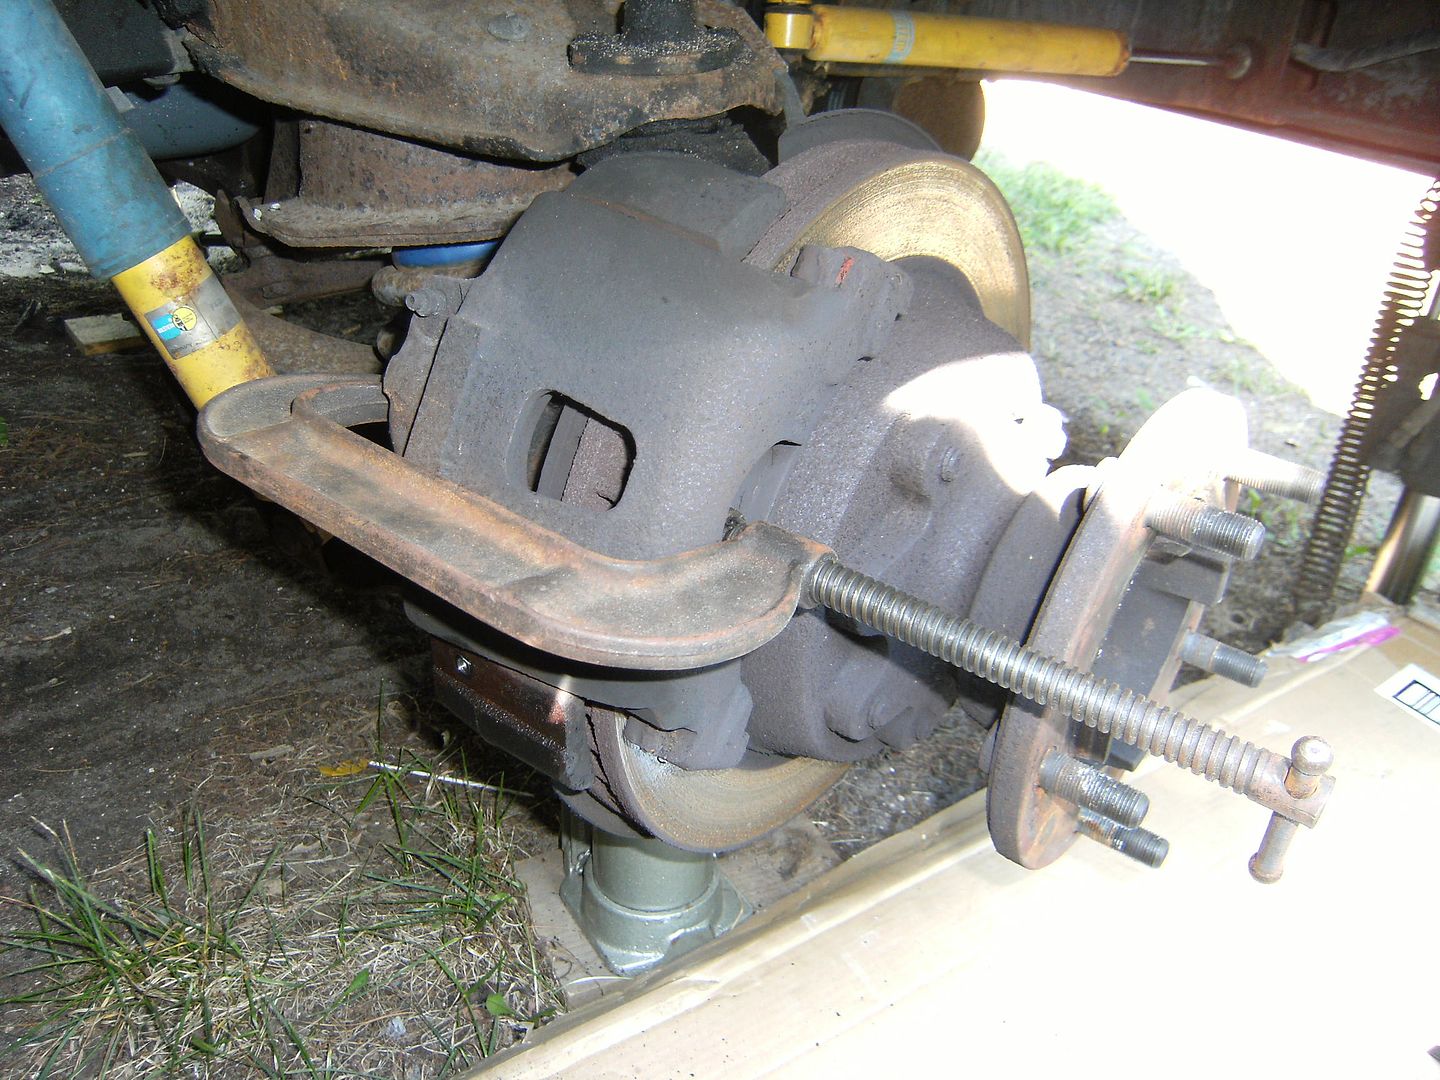 Slide the caliper off the rotor. (Pads can now be removed/replaced) Tie the caliper up so it doesn't hang on or kink the brake hose. 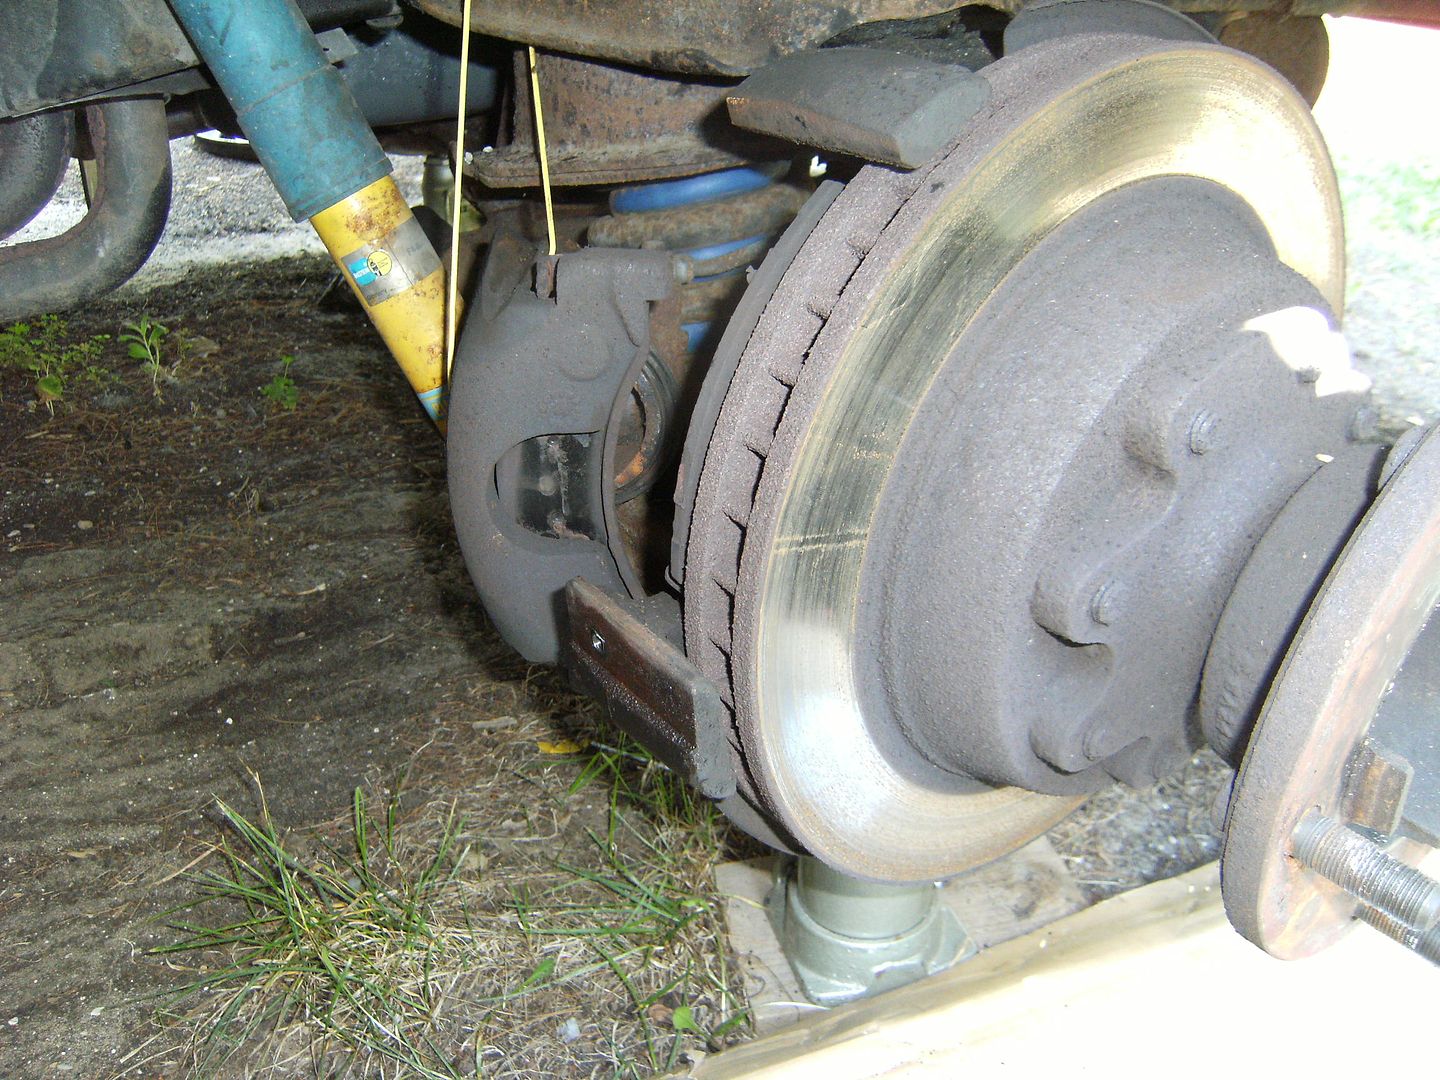 Remove the grease cap from the hub. (There is a hole in the side of the hub recess which allows access to knock it loose.) Remove the cotter pin, spindle nut, washer and outer bearing. Pull the hub off the spindle. 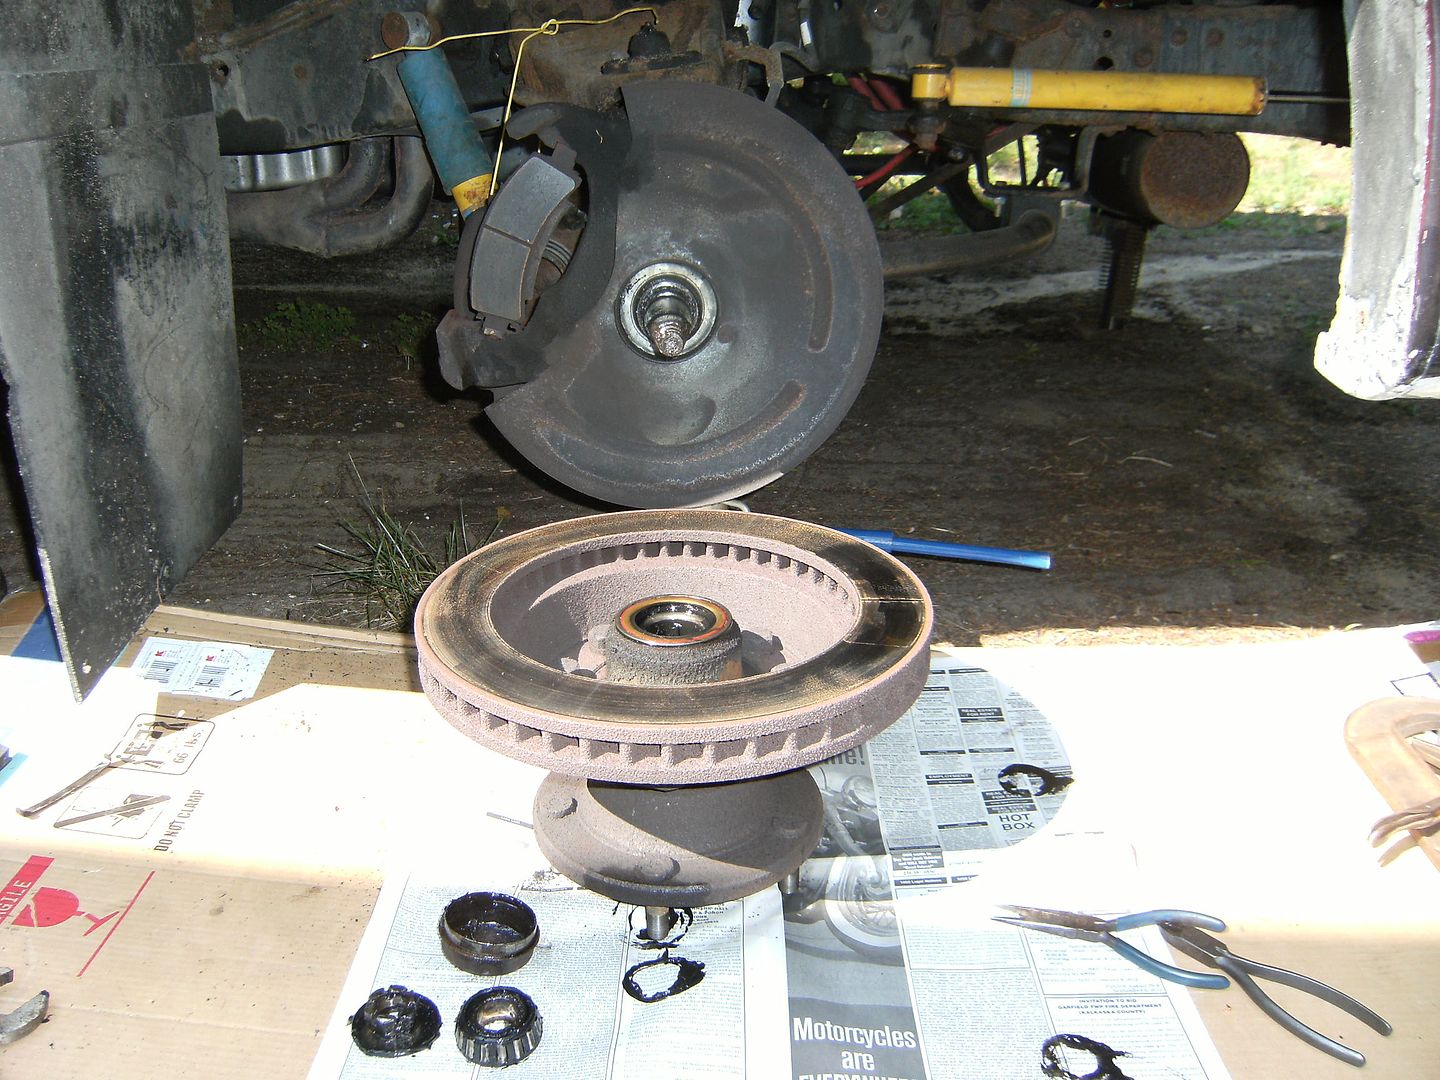 (At this point the rotor can be unbolted from the hub and replaced if needed.) Pry the grease seal out of the hub. Remove the inner bearing. 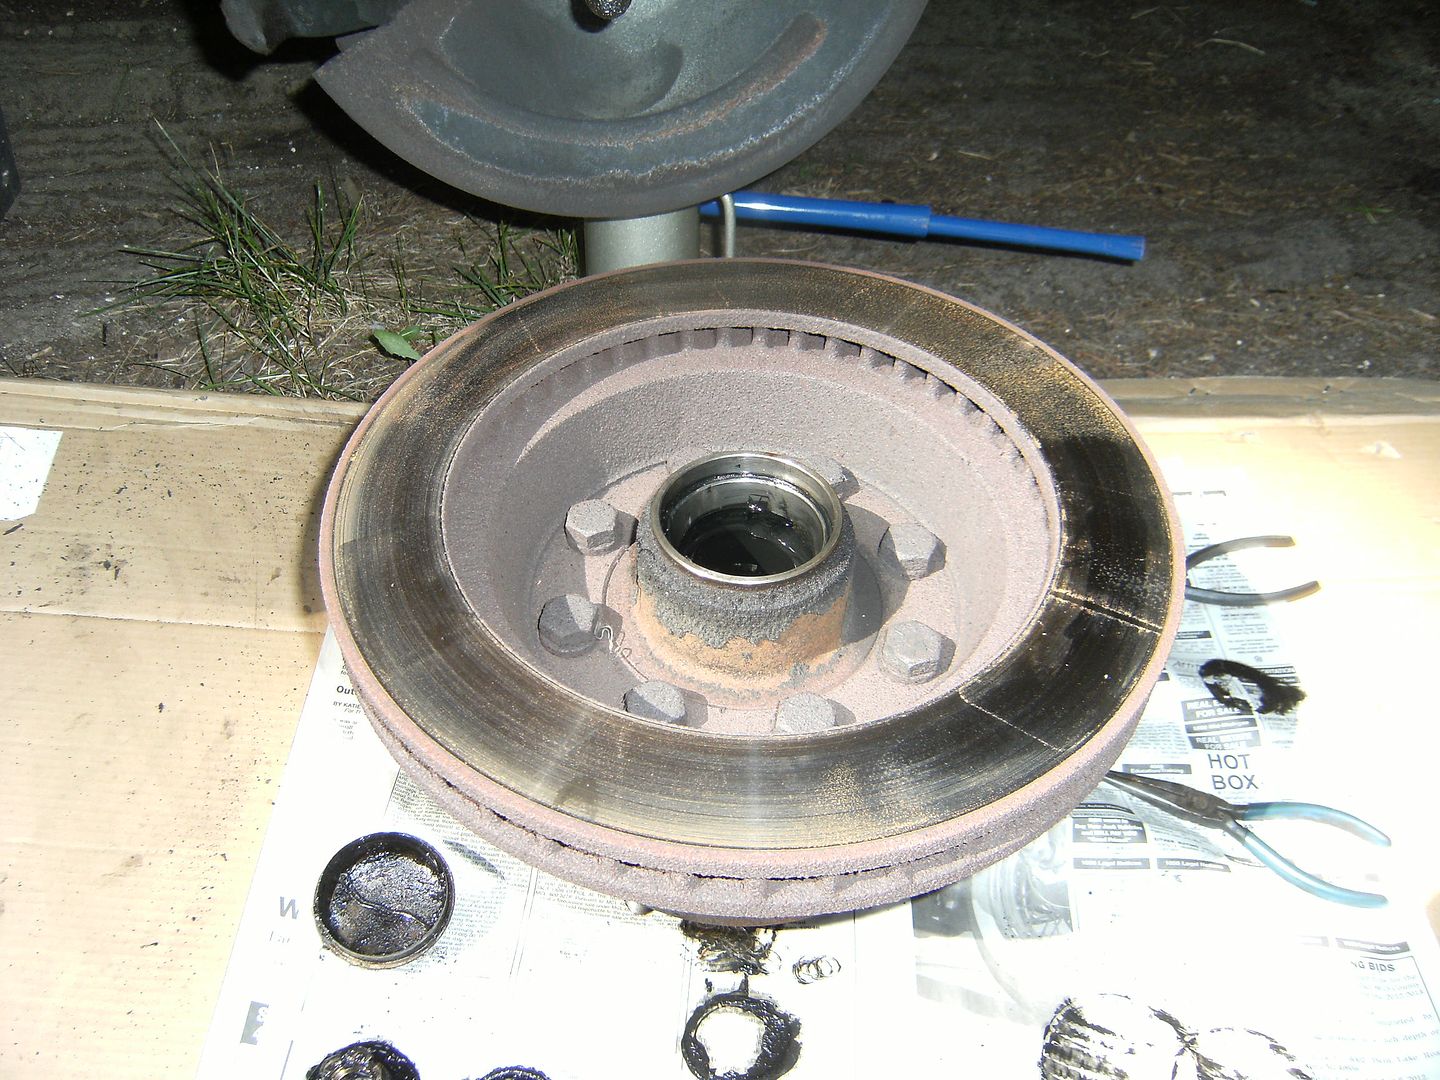 Clean all the greasy pieces… Inspect the bearings and races. Repack/replace the bearings, grease the races. Install the inner bearing and new seal. 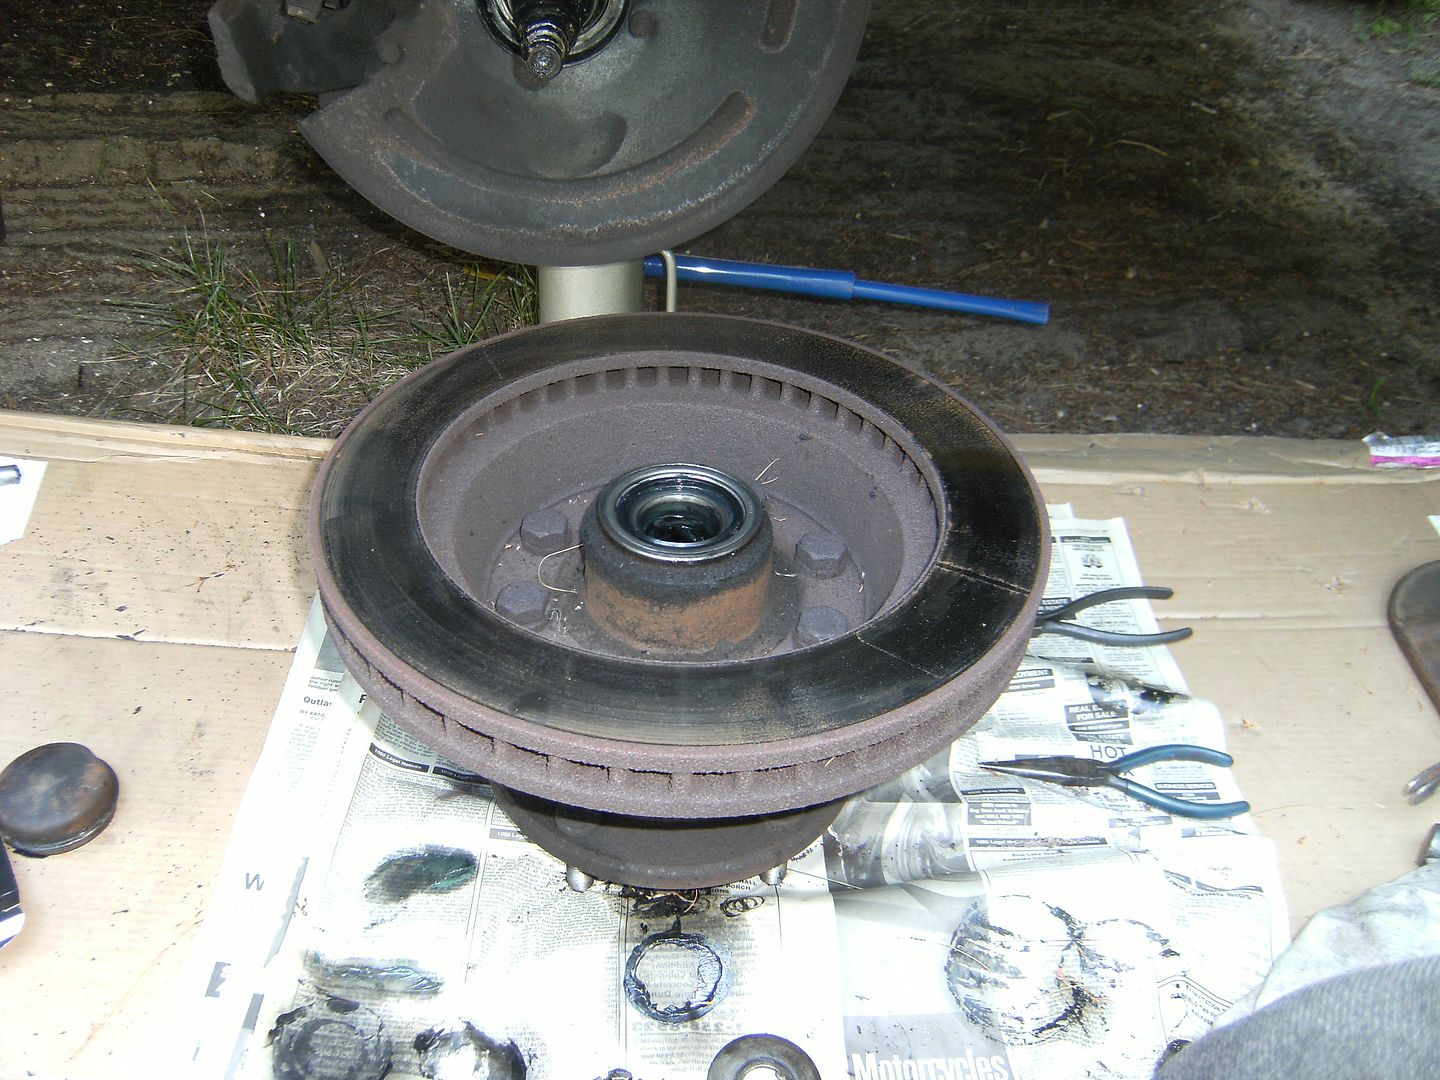 Slide the hub on the spindle. Install outer bearing, washer and spindle nut. GM recommends: Torque the nut to 12 ft/lbs and rotate hub to seat bearings, back off, hand tighten, back off to nearest notch (not more than 1/2 flat) and install the cotter pin. Reinstall the grease cap. Make sure the pads are in the correct position and slide the caliper back into place. Install the sliding key at the bottom of the caliper and the locking bolt. Now that we're in the area, check the steering and suspension parts. Grease the fittings!  Remount the wheel, wheel cover and lug nuts. Torque the nuts snug. Lower the jacks a bit to put some weight on the wheels, then torque the nuts to 140 ft/lbs. Lower vehicle. There will be some slack in the caliper the first time, just pump the pedal a few times… good to go! Don't you feel better now? Tires, brakes, bearings, grease job! I feel so good I'm taking Barth out West to Colorado and beyond! 9708-M0037-37MM-01 "98" Monarch 37 Spartan MM, 6 spd Allison Cummins 8.3 325+ hp | ||
|
Great write up Steve! How far beyond are you going, I will be in Reno all next week. Think you will make it that far or to the Left Coast? Ed 94 30' Breakaway #3864 30-BS-6B side entry New Cummins 5.9L, 375+ HP Allison 6 speed Spartan chassis K9DVC Tankless water heater | ||||
|
Very nice demo. I will be referring to this when the time comes. Recently had the brakes/bearings checked and they are good for now. Kirk 1989 22' Regal 454 | ||||
|
| First Month Member |
Going whitewall on that one? But seriously, very good tutorial. I would add that I like Mobil 1 wheel bearing grease, as it tolerates downhill heat when the brakes are used a lot. If you never smell your brakes, this is not an issue. I also like to really blast the sliding surfaces of the calipers with aerosol brake cleaner, Then use a light coating of high temp brake lube on the caliper sliding contact points. I put the parts in position, wiggle a bit, remove and wipe off excess and then reassemble. I like either TS-64 or Silver Goop. Retorquing lug nuts at the first overnight stop is a good idea. . 84 30T PeeThirty-Something, 502 powered | |||
|
Official Barth Junkie |
Good points, Bill. I often sand the discs lightly to remove the edge crud, also sand/smooth those sliding parts on the caliper. The lube is a good plan. You're dating yourself on the wide whitewalls! (They might look good though) The masked tire is the "new" 04 spare. The others were the throwaways (the old spare was 3 digit date coded 148...either 1998 or 88!) The useless spare was one of the reasons for the tire swap. Decide to move the spare. It weighs 112 lbs and the rear mount bracket is 28 lbs. Essentially 140 lbs tongue weight without a trailer. Being a aircraft "weight and balance" guy, I decided to carry the spare more centered on the roof. Got rid of the 28 lbs carrier. Not sure it is important but it can't hurt. I can get to my rear storage without hassle now also. PS: My lawyer says I shouldn't be talking about brakes because people might think I know what I'm doing and actually BELIEVE this stuff. Disclaimer: Just remember don't believe anything you find... this is the internet after all 9708-M0037-37MM-01 "98" Monarch 37 Spartan MM, 6 spd Allison Cummins 8.3 325+ hp | |||
|
 |
Remember, if you use aerosol brake cleaner, be sure to do it outside. Some of that older stuff will mess you up good. W4JDZ | |||
|
"Host" of Barthmobile.com 1/19 1/19 |
Nice job and part numbers too
| |||||||||||||||
| ||||||||||||||||
Captain Doom |
Great writeup and how-to. I can't do my coach because I don't yet have a 500 lb-ft impact wrench, but I've done the van ('87 1T Ford diesel...found several parts missing from the right rear drum. Rusty '94 28' Breakaway: MilSpec AMG 6.5L TD 230HP Nelson and Chester, not-spoiled Golden Retrievers Sometimes I think we're alone in the universe, and sometimes I think we're not. In either case the idea is quite staggering. - Arthur C. Clarke It was a woman who drove me to drink, and I've been searching thirty years to find her and thank her - W. C. Fields | |||
|
 8/11 8/11 |
Great write up with pictures, I need to check mine. It's nice to get those wheels cleaned up too. I like your Bilstein shocks I recently installed a Bilstein damper (made a huge difference) and will someday get the shocks perhaps next spring. Keep those write ups coming you do a great job, haha nice disclaimer! Buy the way did your wife carry that 112lb spare up the ladder for ya? I wonder how many other Barthers carry a spare, I thought about it but I would have to buy another tire and wheel. And then see if my wife could carry it up the ladder. | |||
|
Official Barth Junkie |
She wouldn't carry the spare up there! She did pick them up at the tire store, the tire jocks got a hoot from loading them into the back of her Prius! Not sure a spare is a smart idea... if I've got one I'm likely to try to change it. Hopefully I'll never need it. (I'll just keep it up there till I see some poor sucker on the roadside who needs it real bad and give him a "great deal"! 9708-M0037-37MM-01 "98" Monarch 37 Spartan MM, 6 spd Allison Cummins 8.3 325+ hp | |||
|
| First Month Member |
Depending on where it is carried, a wheel change can be done with very little effort and no strain of any kind. Ours is under the bed. A piece of the bed pedestal is removable, allowing the wheel to be rolled down the aisle and out the door. The lugs are broken loose with a cheater bar and an adjustable fulcrum, allowing body weight to do all the work. The axle is jacked just clear of the ground so the studs are centered in their holes. The wheel is "walked" off the studs. The spare is walked into position and the nuts are tightened loosely, and then the jack is lowered enough to hold the wheel while the nuts are tightened enough to center them, and full torque is done, with full weight on the wheel. Again, using body weight and the fulcrum. Sometimes this requires that I operate the jack while Susan puts the wheel on by a combination of tilting, rocking and "walking". I have done it single-handedly, but it involves a lot of back and forth activity. There is absolutely no lifting of any kind during the whole process. And a good thing, too, as my frailties preclude any heavy lifting. If I ever do this on the road, I will use my leveling blocks as cribbing just to be safe. . 84 30T PeeThirty-Something, 502 powered | |||
|
I would suggest blocking under the frame any time you jack it up. If the jack fails for some reason, if it slips off or sinks into the ground, or even if an earthquake happens to hit,....how are you gonna get the coach back up if it is sitting on the ground? Something to consider. Also i have been told that anytime you put on new pads or shoes you should have the drums and rotors turned. | ||||
|
Official Barth Junkie |
Good advice. I use the same technique to mount the wheels, i.e. leave the wheel on the ground and use the jack to line up the lugs, then "walk" it on. It's one reason I like hydraulic jacks, you can move them a little or a lot as needed. I've had good luck when sitting on a milk crate, facing the wheel, using one foot on each side of the wheel. You can wedge your foot under the side of the tire to lift it slightly or move it a bit. Actually my worst concern is the placement of jacks. With a flat, the jacks might not always fit under the same lifting points and it seems the ground is never level where you pull over. If the jacks are safe the tire part isn't too bad. (With my luck the flat will be the inside one on the rear duals, oh boy...) Dragging the thing up on the roof ain't no fun and my wife isn't like Tere and she wouldn't do it for me! (I'm just gonna wait for that poor guy on the side of the road!) PS Thanks to all of you for the positive feedback and comments on my posts. I know that a lot of the old timers out there already know how to do this stuff (as evidenced by the comments and critiques) but I figure when I'm doing something it is probably something others may end up doing and may not know how. Part numbers can save time too. Also remember that what I do isn't always the only way, so I try to mention alternatives. I try to get photos that clearly show the details and I edit (repeatedly) the pics and prose to try to make things logical and sequential. Your feedback tells me I'm doing OK. (The 454 crank job is up to nearly 3000 views!) This is the kind of stuff that makes BM.com a superior site, IMHO. I don't know of other sites with our level of technical experience and the willingness to share it as well. 9708-M0037-37MM-01 "98" Monarch 37 Spartan MM, 6 spd Allison Cummins 8.3 325+ hp | |||
|
Glassnose Aficionado |
Steve, your posts are definately appreciated by all, and the best part is they are archived for future reference. Next time I need things checked I'll know how to do it myself instead of paying a stranger who might not even do it right. Saves money and gives one a lot of gratification to boot. Thanks. 79 Barth Classic | |||
|
 8/11 8/11 |
Ditto, plus the added input you get from others is what makes this site great. Even if you've done some of this in the past it's really great to have a refresher. What age do you become an old timer? Am I an old timer if I used a timing light, set points in the past? By the way I need to get the old timing light out and check the timing on my Barth. I want to see if it's set at factory specs, I think it's more advanced. What great fun! Steve enjoy you're trip, post pictures. I love reading about the adventures of all the Barthers out there. | |||
|
| Powered by Social Strata | Page 1 2 |
| Please Wait. Your request is being processed... |
|
This website is dedicated to the Barth Custom Coach, their owners and those who admire this American made, quality crafted, motor coach.
We are committed to the history, preservation and restoration of the Barth Custom Coach.
We are committed to the history, preservation and restoration of the Barth Custom Coach.


