Go to...  | Start A New Topic  | Search  | Notify  | Tools  | Reply To This Topic  |  |
"Host" of Barthmobile.com 1/19 1/19 |
Looks like the right side is done. I reinstalled the door locks and finished the painting touch up around the door frame. 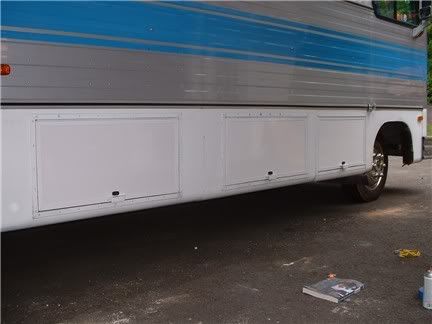 | |||
|
"Host" of Barthmobile.com 1/19 1/19 |
The only problem I see is the replacement pieces are nicer then the original. The OEM body panels are dull. 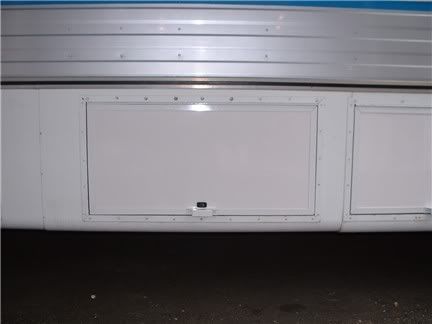 The white lower section is starting to loose it's luster. If I take my hand and rub the body panel I can make my hand turn white. The sections above the floor held up well, it's just the lower white skirting that is dull. | |||
|
"Host" of Barthmobile.com 1/19 1/19 |
Maybe all I need to do is give her a real nice bath. Nah, time to talk the wife into a new paint job. 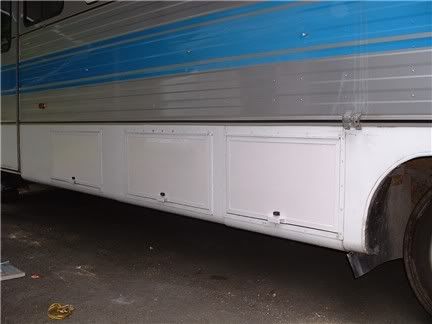
| |||||||||||||||
| ||||||||||||||||
"Host" of Barthmobile.com 1/19 1/19 |
Cost was $100.00 for the panel, paint supplies and rivets. Don't forget the labor, 8-10 hours of my time to do this job. I still need to go to Home Depot or Lowes and pick up a couple of springs for the cable holders. The Barth is going into the decal shop on Tuesday for some Nascar accents. Going to Pocono Raceway on the same weekend as the Northeast Barth Owners campout. Sorry to say that, because of my long standing history of going to the Pocono Racetrack, I will not be able to meet everyone who is making the trek. I am so sorry I can't make it. If anyone is passing by the track and wants to stop by and say "Hi" let me know. | |||
|
"Host" of Barthmobile.com 1/19 1/19 |
Didn't happen. I showed up at the decal shop to get her lettered and the owner of the shop took on another job for the day. I will not be going back to that guy again. I thought I would post the after shot of the left side with the new door. That did happen. No more closing the doors on the cables anymore. before new door panel and quarter panel on drivers side. 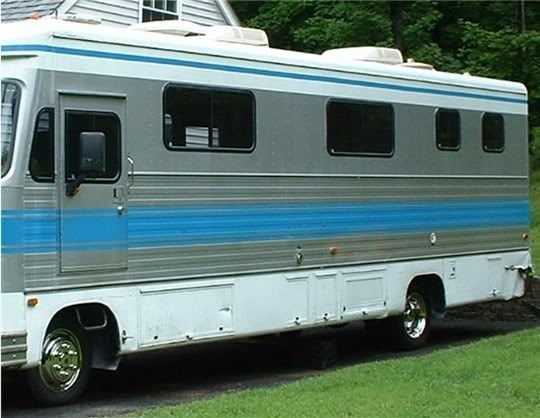 Looks a little better now... 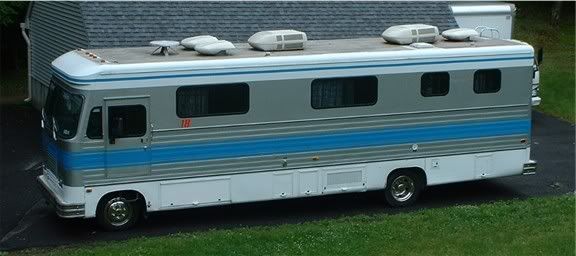 | |||
|
"Host" of Barthmobile.com 1/19 1/19 |
They call this a "Flashback", I thought you might like a view of what it looked like the day I first took it home. That 18 sticker on the after shots look alot better then the "Health Dept stickers"  For any new members wanting to know more about the transformation from a Mobile Medical Lab/Free Clinic/Community Medical Outreach vehicle to what I have now click on This Link. Yes, the bathroom was the first to get redone. Oh yeah, I almost forgot. "Responding to ones own post" is a little like talking to yourself... They have a word for that... "crazy"! | |||
|
It's not crazy, I've enjoyed reading and viewing your work! Keep it up! I hope to make Richmond this fall in my Barth. She will not be the prettiest girl at the dance but she will be mine! BTW, I will probably have a 43 sticker on there some place. Doug Doug Bywaters Near Skyline Drive Virginia!  | ||||
|
| "5+ Years of Active Membership" |
Nice job Bill. I filled the bubbles in mine with JB weld and sealed them with some POR-15 brand sealant. Its pretty indestructable appearing. Painted over them. Need to do one in the back where the piano hinge got bent. Do you have a source for new hinges? Better an ugly Barth, than a pretty Winnebago. 1987 Barth P-30 with 454 Former Hospital Board Room converted to coach by Barth in 1995. | |||
|
 4/08 4/08"5+ Years of Active Membership" |
I have been following this post as my doors, like many others are reaching a point where this is a concern. I also have one door that now has a couple of spots that are now holes. Like so many other repairs by Bill NY this job is following classic repair proceedures and given his ability is leading the way for others. I am curious to see how to best paint the panels once repaired. A white panel on my coach would not work. It will need to be painted. Would it be best to have it painted prior to re-riveting the panel into the frame? Bill G Bill & Georgene Goodwin 92 (Feb.) Regency 36ft 300hp Cummins Gillig Chassis (1990 build date) 2014 Honda CRV toad 10Kw Power Tech Gen w/ Kubota diesel engine Can accomodate Barth visitor with advance notice  | |||
|
"Host" of Barthmobile.com 1/19 1/19 |
Trailer rear door blanks come in a variety of sizes and finishes. You could go with polished aluminum, high gloss stainless, plastic coated, and pre-painted aluminum panels in 3/4 and 1/2 thickness. What you decide is between you and your wife/banker I wanted to eliminate any chance of this happening again. If you look closer you will see that the door blank that I purchased has no separate panels. Reading my description will tell you that I looked at the insulated door blank and it was the same "type of" material that we use on our coaches. 20 years later, these new trailer doors still get this type of galvanic reaction. With the panel I purchased, it has zero chances of happening again. If you need insulation in your door, get the insulated door blanks. I didn't, and I'm happy with the results. Like most products and services offered, you'll have to figure this one out by looking and weighing the pros and cons. Talk to your local trailer shop. Ask them if they will replace your door blanks and match the color. There are several sites on the Internet that will make you a door. Send them your old door(s) and they will custom fabricate or rebuild your doors. Money for most of us is an object that will allow us to move forward on a project or stop us in our tracks. The way I did it is cost effective and (dare I say?) might be better then the original. Seeing that insulation and color wasn't a stopping block for me made my choices easier. But to dream... If I owned your coach and money wasn't an option... I would opt for the insulted door blanks and have them cut down to size. They would be painted first and then installed into the door channels and then welded back together. The door blank would be sealed to the door channels with a caulking type of product that could be painted. The whole assembly would be re-painted again and then installed on the coach. Of course, in this scenario, I would just have the butler pick it up from the shop... Bill N.Y. | |||
|
| The Old Man and No Barth |
Trapped water was my problem for sure. The plywood substrate was saturated when I dismantled the door. Since all my doors are the same age, but not all show corrosion, it's reasonable to presume that some have leaked, others not. The key is probably to be sure all possible entrances - rivet heads & seams specifically, are sealed. And it takes awhile for damage to occur. My coach was 14 years old before the problem appeared. I just wish I had N.Y. Bill's knowledge, & access to the material he used, before I tore into mine. | |||
|
| First Month Member |
When I first started worrying about these problems, I ran out and drilled two holes in the lowest part of each door. Three in the long ones. With the doors almost closed, I blew compressed air in one hole and waited for water to run out the other. None appeared. My usual anti rot is copper napthanate, but in this case, the cure might be worse than the disease. I do let a little Boeshield run into the lower edge where the door skin meets the lower channel, just to discourage any corrosion. . 84 30T PeeThirty-Something, 502 powered | |||
|
 4/08 4/08"5+ Years of Active Membership" |
Bill NY, Thanks for your lucid response. Always detailed and much appreciated. I'll be doing most of the work myself except the aluminum welding and painting. If the old doors lasted 15 years, I'll be satisfied with the same type of replacement panel, insulation is not important, but I would like the aluminum skin. In another 15 years, the panels will not be the most important worry of the owner. I really wanted to get your advice on painting. My question now is whether or not the panels need to be painted twice. You recommended that they get painted once before installing in the frames and once after. Would only painting after they were completed be adequate? Bill G | |||
|
"Host" of Barthmobile.com 1/19 1/19 |
You mean I have to stop dreaming? I was trying to protect the edges in my dream. When I stripped my doors down the edges were not painted. They were bare cuts without it being sealed again. There was some minor corrosion along all parts of the edges. Well then, painting the panels once to the desired color would be more than adequate.
| |||||||||||||||
| ||||||||||||||||
 3/11 3/11 |
After trying to repair the blisters that Bill H is dealing with I started checking my industrial friends. Eventually I came across Whiting Door Company in Western New York. They make aluminum honeycomb panels in a variety of thicknesses and components. I measured each of the 8 doors that have evidence of blisters (because of the luan and insulation)and then discussed what I wanted. They offered to fabricate aluminum skin panels with aluminum honeycomb cores in the sizes I needed. I could choose the gauge of the aluminum for the face and inside and the overall thickness of the panel. The original is 0.020 thickness with the luan etc. sandwiched. I chose .050 for both sides with overall thickness of .75 inches. They treat the entire components to retard corrosion and cut to size. While each order may differ, I received 8 panels to insert in my existing edge channels (they can also make the whole thing), all ready to mount and then paint to match the coach. My price - under $500 depending on shipping (I am in Texas so it's more). As an alternative to making them yourself you might want to call them. Whiting Door Company (716)542-5427 The extra thickness and lack of wood and foam will make these outlast me and the next three owners. Tom 1993 Regency 32 foot, 300 HP Cat. 1993 32' Regency Wide Body, 4 speed Allison Trans, Front Entry door, Diamond Plate aluminum roof & 1981 Euro 22' w Chevy 350 engine and TH 400 tranny | |||
|
| Powered by Social Strata | Page 1 2 3 |
| Please Wait. Your request is being processed... |
|
This website is dedicated to the Barth Custom Coach, their owners and those who admire this American made, quality crafted, motor coach.
We are committed to the history, preservation and restoration of the Barth Custom Coach.
We are committed to the history, preservation and restoration of the Barth Custom Coach.

