Go to...  | Start A New Topic  | Search  | Notify  | Tools  | Reply To This Topic  |  |
 6/12 6/12Formally known as "Humbojb"  |
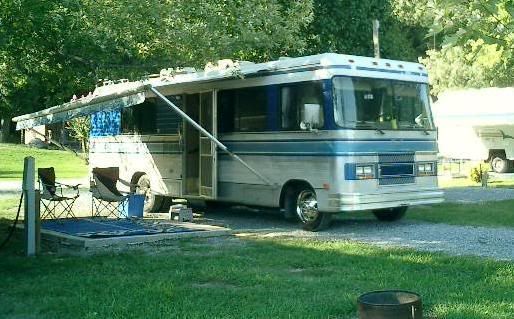
In getting the Regal ready for painting, I cleaned out all the old sealer on the outside, around the rubber gasket that holds in the left and right front windshields. In doing so, it felt like there was some corrosion behind the rubber seal. Then I noticed some crud, sort of like rust, that had fallen down, inside the motor home, on the dash in front of the steering wheel. I also noticed that the metal surface on the inside of the motor home, around the top left hand corner or the windshield, had corrosion on it. Can someone tell me exactly how the windshield frame is made? Is it something more than an aluminum assembly of some kind? Pictures would be great. I'm trying to decide whether to take the windshields out, remove the rubber gasket and see what kind of a situation I have or whether to just let it go. I don't want to create a problem but if I got a windshield frame that is rusting, that worries me.
| |||||||||||
|
Jim, You're seeing the end-product of a less-than-desirable Barth design....The "A" pillar aluminum skin was riveted to a square tube steel frame member via the vertical rivet line on the pillar C/L. Since a fiberglas cap meets aluminum skin and a rubber windshield gasket tightly bent at the corner, it's a natural spot for water intrusion. Water + dis-similar metals = a battery. In the absence of moisture, the process almost stops. The windshield gasket needs edge sealing, as does all the various joints in that area - can't depend on rubber gasketing alone. In my case, I cleaned-up corrosion as much as I could, then carefully sealed windshield gasket and all joints with polysulfide...it's an every- two-year ritual for me..... For the initial clean-up, a heat gun and wood wedges allowed me to peel up exterior windshield gasket, about 10"-12" at a time, to clean area under gasket w/ 800 grit paper. Also a good opportunity to lay a bead of sealer under the windshield gasket. After blocking moisture access, interior flaking ceased, although I did paint interior pillars w/ black metal paint as a belt-n-suspenders approach. My pillars are bare polished aluminum, so I can't say what's gonna happen with new paint in that area. (no bubbles or blisters for me - the only advantage of bare-metal polishing! | ||||
|
 6/12 6/12Formally known as "Humbojb"  |
Lee, I think I understand what I have. My fiberglass caps are just on the corners. The middle part is aluminum. Nevertheless, am I correct to say that the window frame is steel, and aluminum and fiberglass are riveted to it? I think what you're suggesting is clean it out as best you can, maybe put some rustproof stuff down behind the gasket if I can, then put a bead of caulk behind the gasket on the outside and then reseal again between the aluminum/fiberglass and the gasket. I gather you're not suggesting I take it apart. Jim
| ||||||||||||
|
Jim, You're front cap design is the newer version....mine has a one piece fiberglas cap that encompasses both the corners and all the way across the top of the windshield, although I'd think the steel superstructure underneath is very similar. Somewhere in Bill's CD is a factory puff-piece brochure that had a good pic of the front end framing before the skin was applied - I can't seem to find it now, but you may have better luck. It may answer your questions....... Popping the windshields & gasketing would certainly expose any corroded areas, allowing you to clean-up the area to the max, pre-paint. For me, I elected to do the best clean-up I could with the glass in-place..... resetting the windshields could be akin to trying to put the toothpaste back in the tube....not something I'd want to tackle. On the other hand, we have local vendors who come to your house to R&R windshields in your driveway. If that's available, and you want to start from Ground Zero, maybe they could R&R the windshield without breaking the bank........ Sidebar: If you replace any hand-bucked solid rivets with pop rivets, be sure seal the centers with a tiny dab of sealant to eliminate moisture migration - it doesn't take much moisture to start the electrolysis process between dissimilar metals. | ||||
|
Captain Doom |
I would guess that Jim and Tere's nose cap is the "old-new". Mine has the most common cap, and the windshield is surrounded by fiberglas, and there are no steel A pillars. Rusty '94 28' Breakaway: MilSpec AMG 6.5L TD 230HP Nelson and Chester, not-spoiled Golden Retrievers Sometimes I think we're alone in the universe, and sometimes I think we're not. In either case the idea is quite staggering. - Arthur C. Clarke It was a woman who drove me to drink, and I've been searching thirty years to find her and thank her - W. C. Fields | |||
|
| Powered by Social Strata |
| Please Wait. Your request is being processed... |
|
This website is dedicated to the Barth Custom Coach, their owners and those who admire this American made, quality crafted, motor coach.
We are committed to the history, preservation and restoration of the Barth Custom Coach.
We are committed to the history, preservation and restoration of the Barth Custom Coach.


