Page 1 2
Go to...  | Start A New Topic  | Search  | Notify  | Tools  | Reply To This Topic  |  |
Official Barth Junkie |
I have been meaning to get back to the rear panel and battery area. Very dirty, lots of road grime, many corroded components remain. I want to seal the area off from road slop and dust. Notice the wide gap at the bottom of the photo. 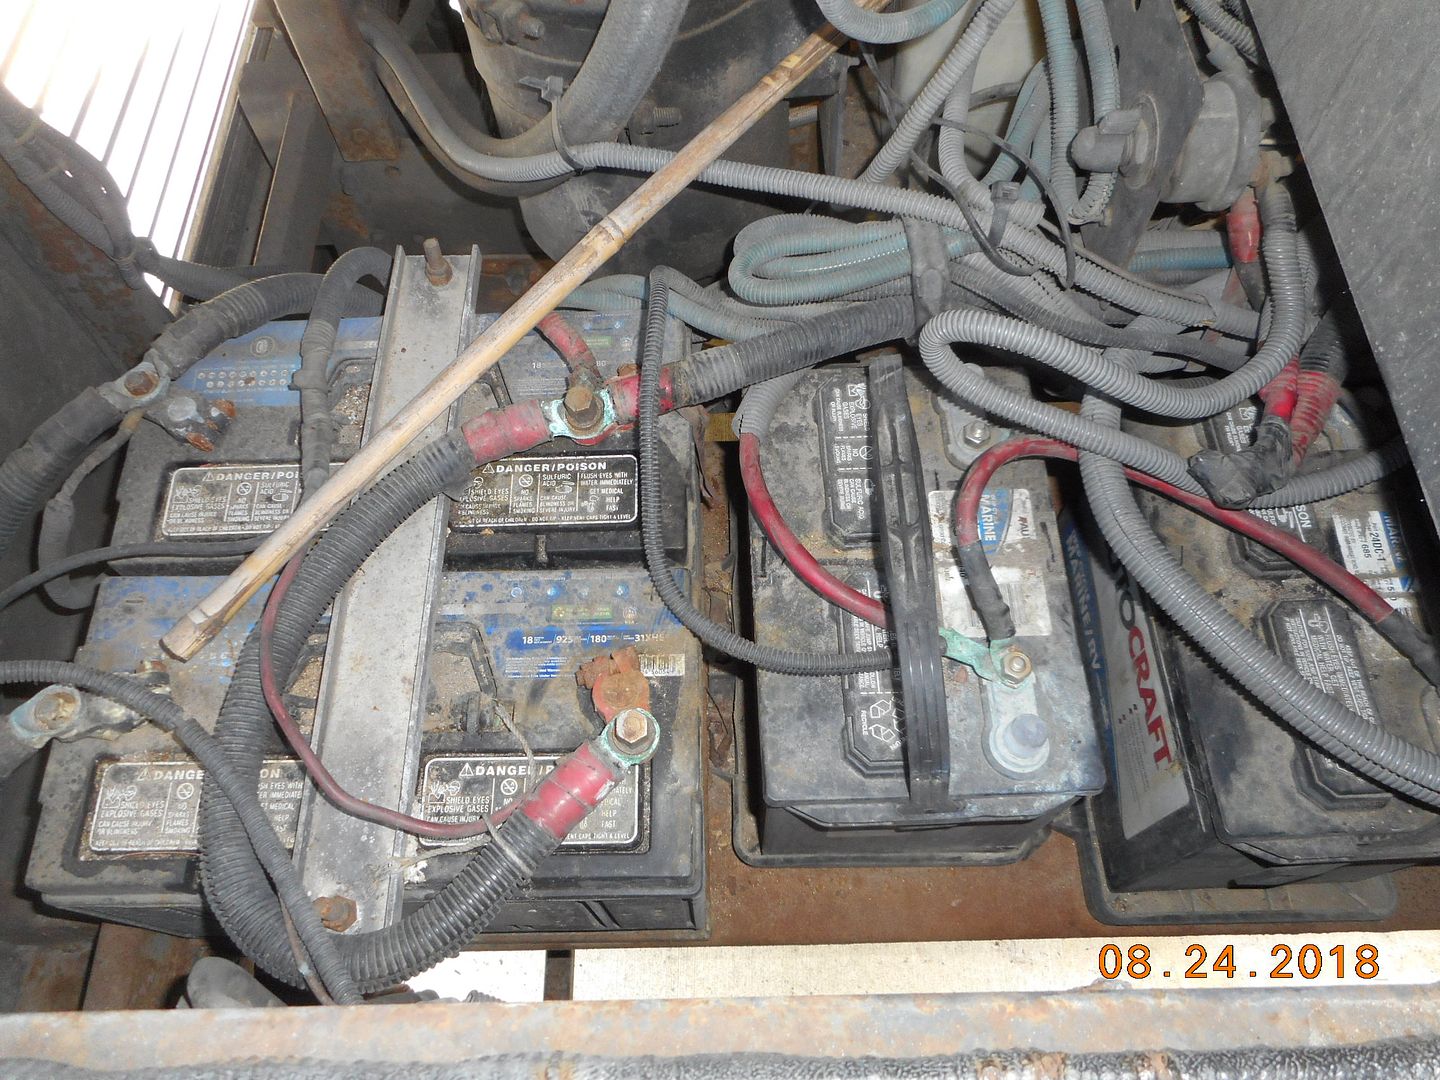 Besides, the battery wiring is a rat's nest. The 4 batteries are connected together, plus load cables, going through remote latching disconnect relays, too many wires, too many connections. I still wanted to replace the master relay as I did in the front panel a while back. 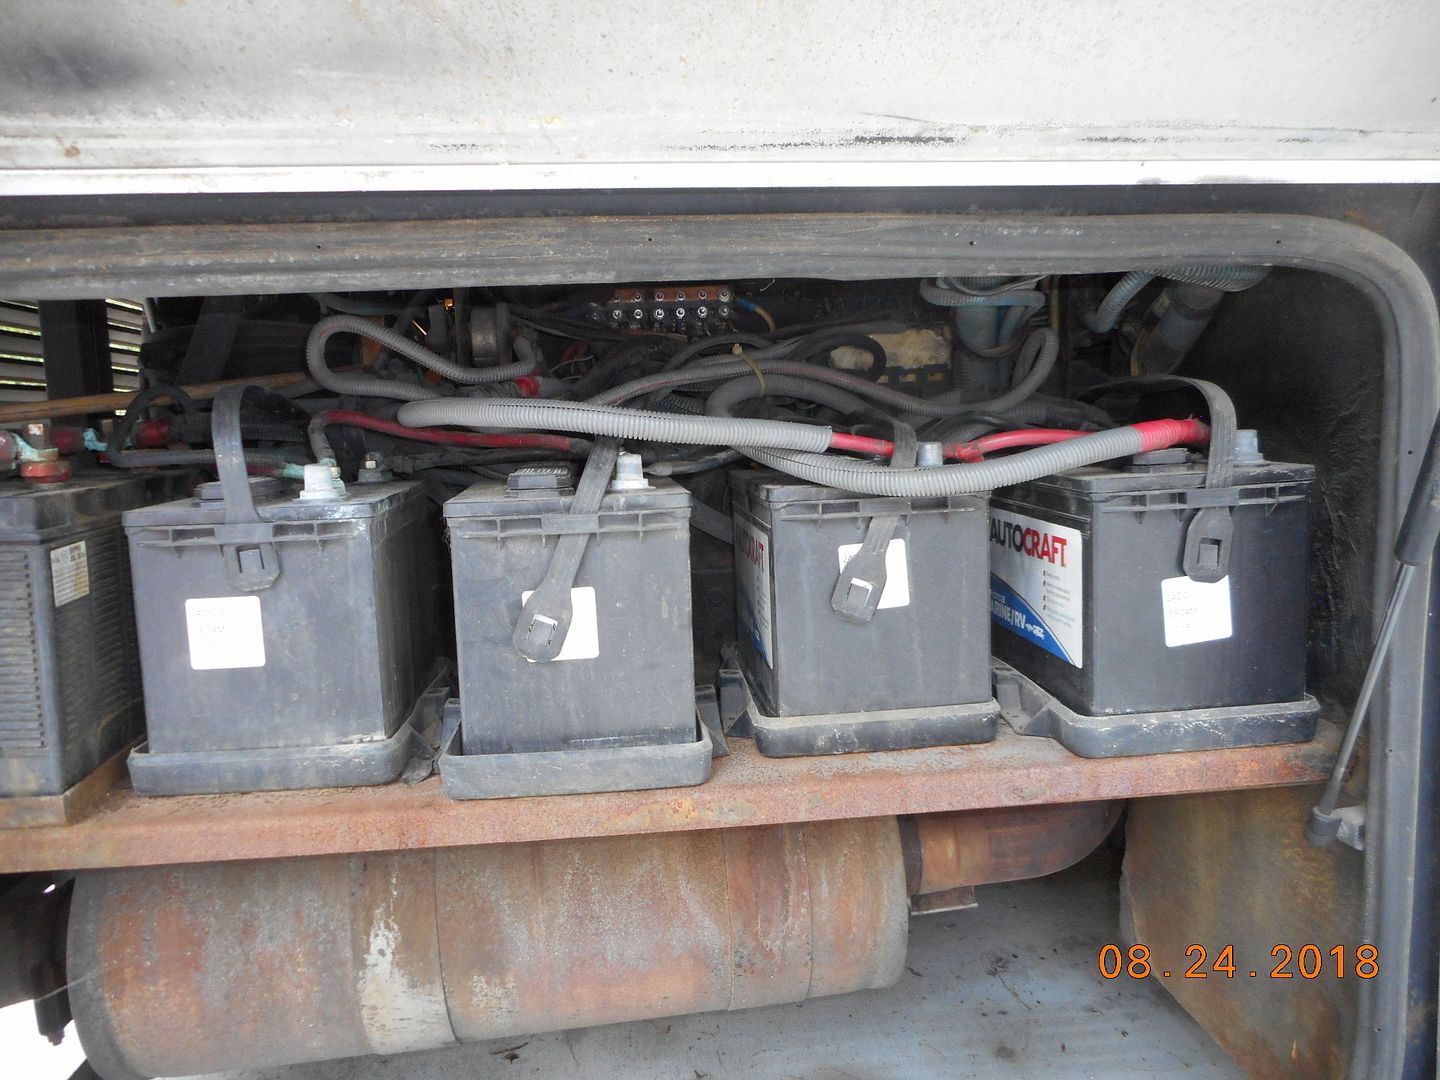 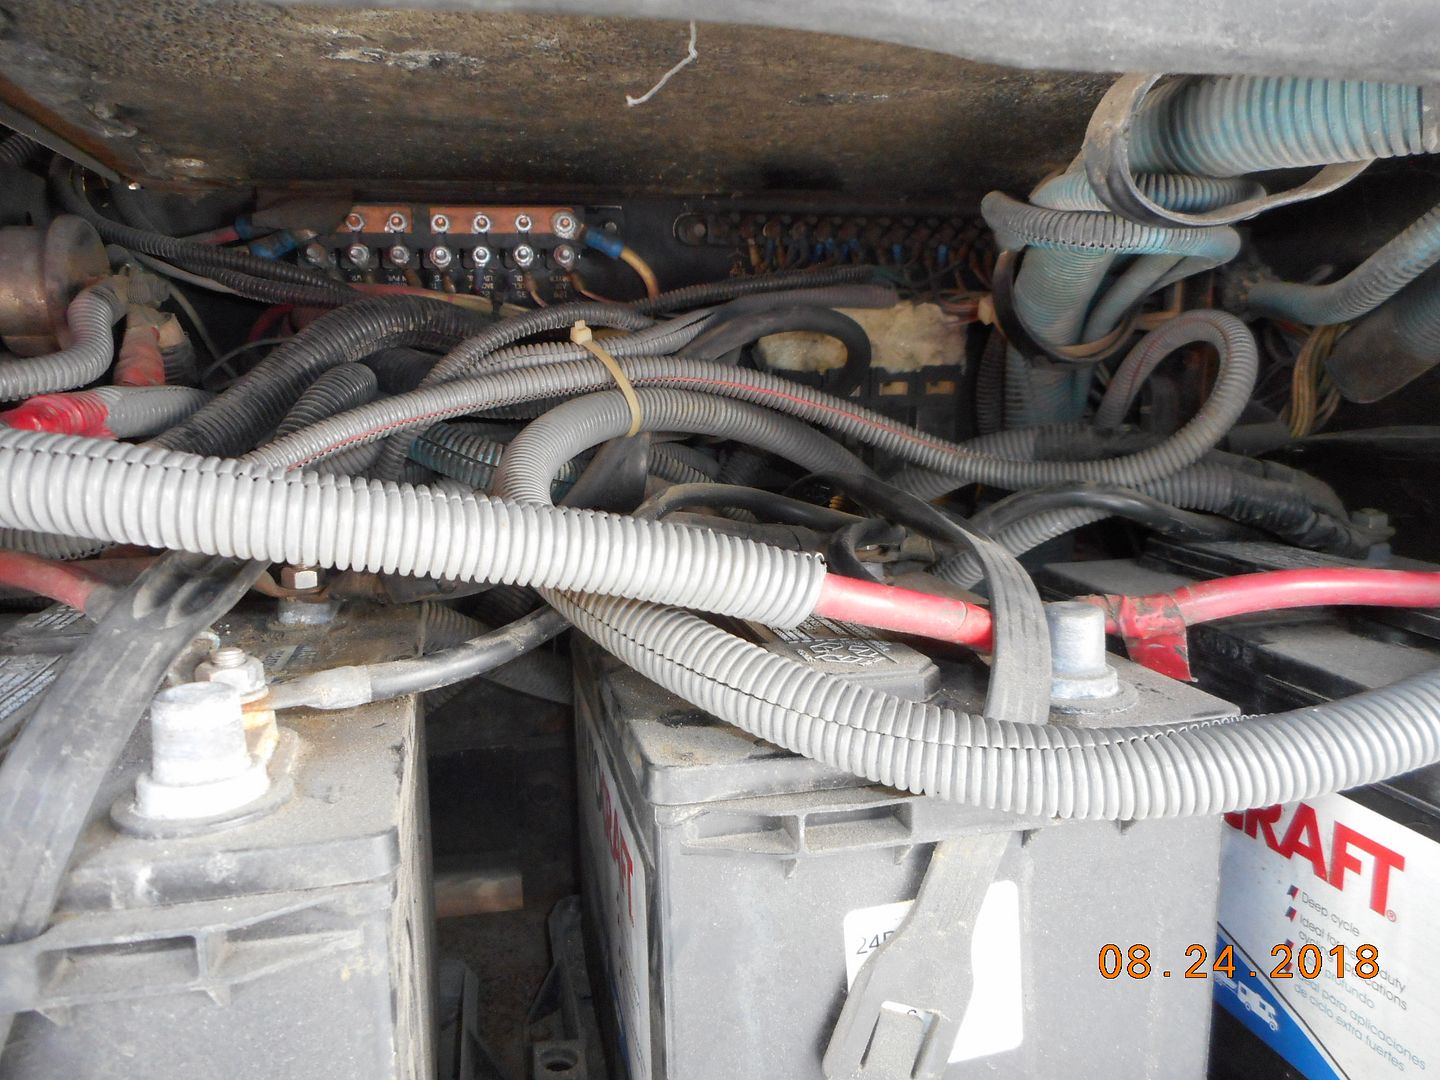 I finally got around to some of it. I removed the 4 size 24 batteries and their trays. I removed the extra wires running to the disconnect relays and reconnected the cables to their original locations. Over the years I have spent a lot of time redoing wiring on old equipment. I have found that many people who work on vehicle wiring do not know what they are doing. That combined with poor workmanship and you have a bigger project than you thought. Case in point: I am not sure why someone would need a remote disconnect for the chassis battery wiring, especially the starter. Spartan built in a hefty manual disconnect switch in the rear chassis panel. It disconnects everything EXCEPT the huge wires to the starter. Whoever installed the remote disconnect relay messed it up. First, they used a longer smaller wire to run from battery cable to the relay. They connected it so ALL the current, including the starter, runs through that small relay. Worse yet, the return from the disconnect relay also ran ALL the current through the Spartan master switch! (Master switch is in the center, top. Notice the smaller snakey wire coming off to the left, then running forward) 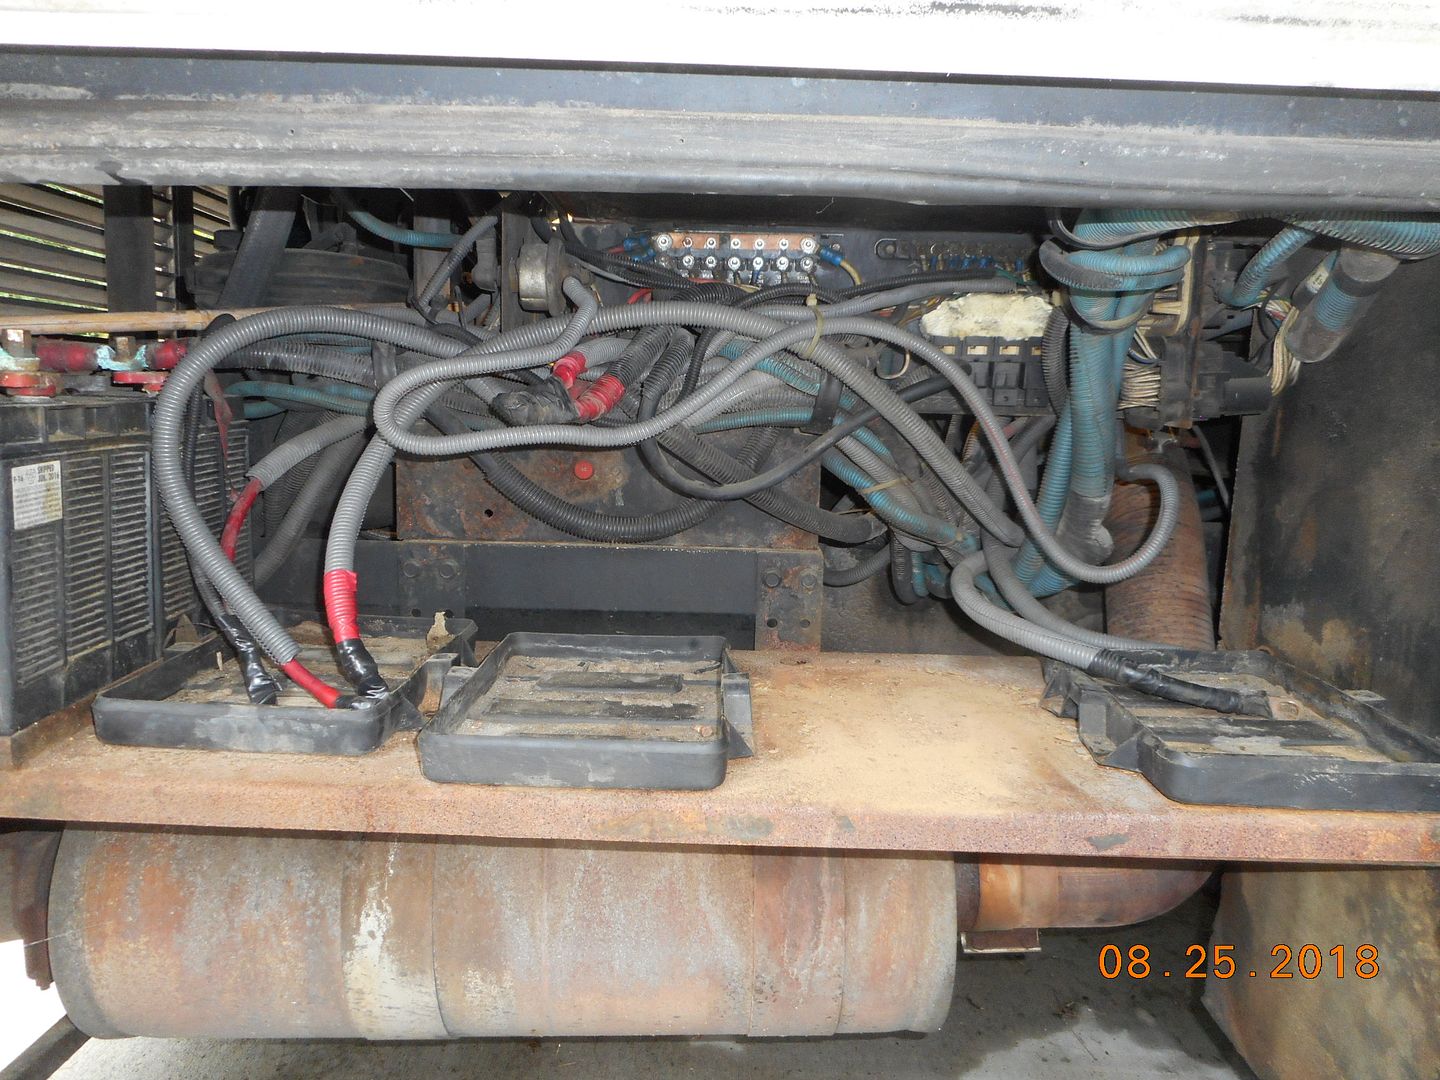 Not surprising, the disconnect relay had fried and had already been bypassed. Somehow the Spartan master did not fry. I removed several feet of smaller cable. 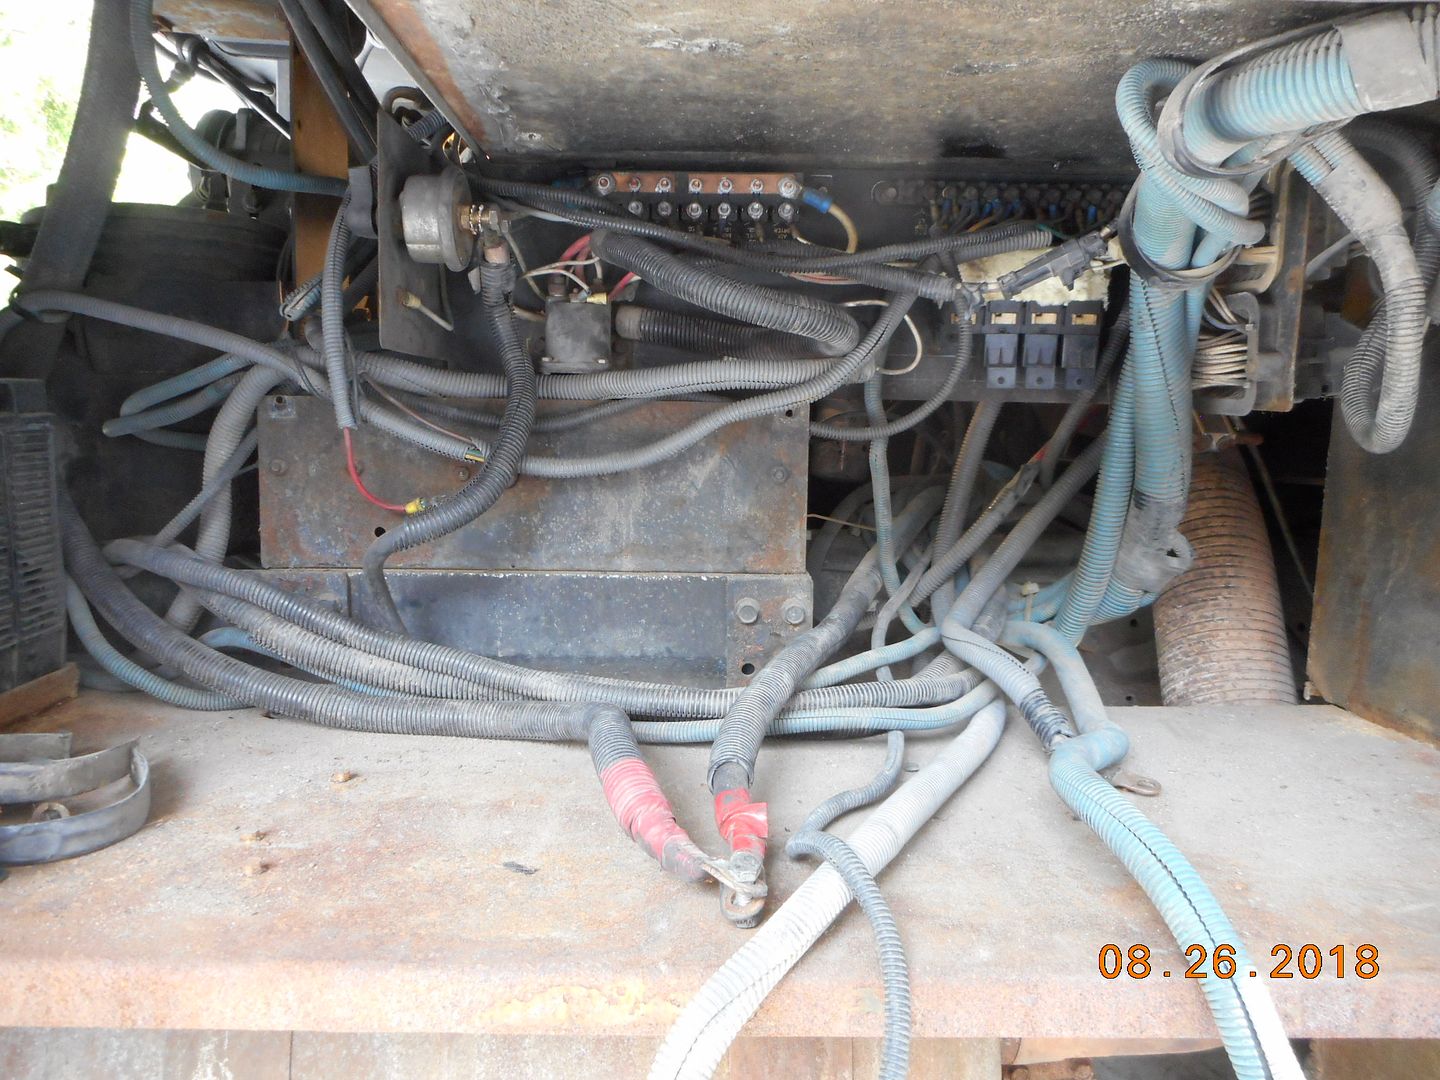 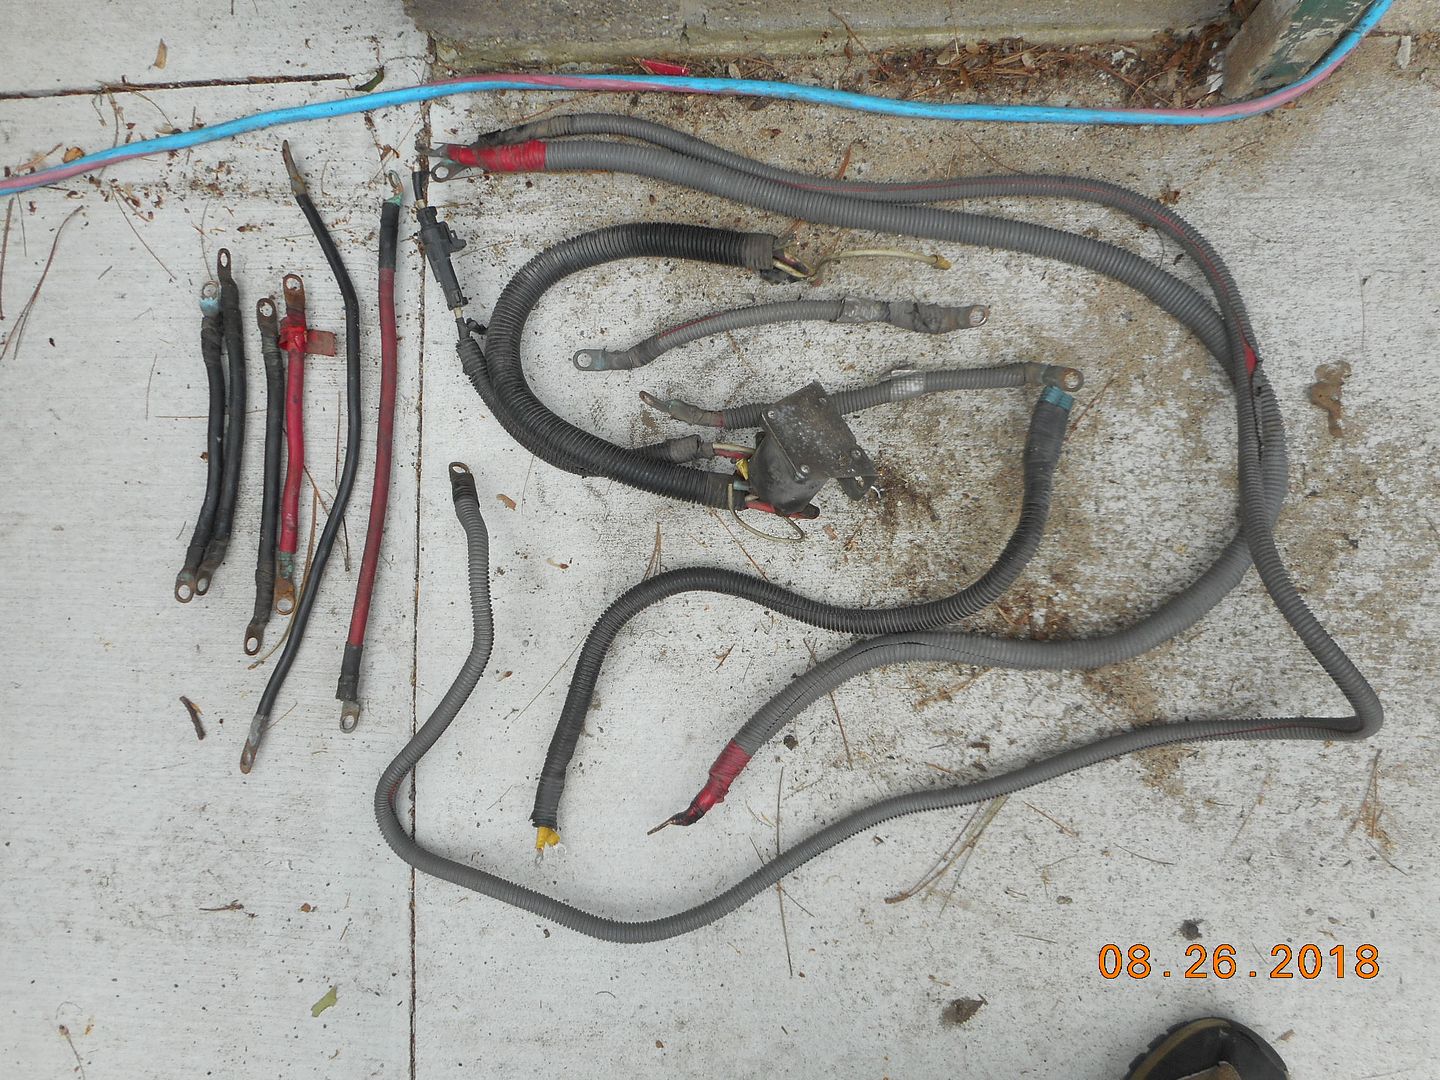 I finally replaced the rear panel master relay. Discussion of relay here https://www.barthmobile.com/eve...433948097#1433948097 I reconnected the battery main directly to the starter feed. The Spartan master now switches all the current to the front and rear chassis panels, but not the starter. 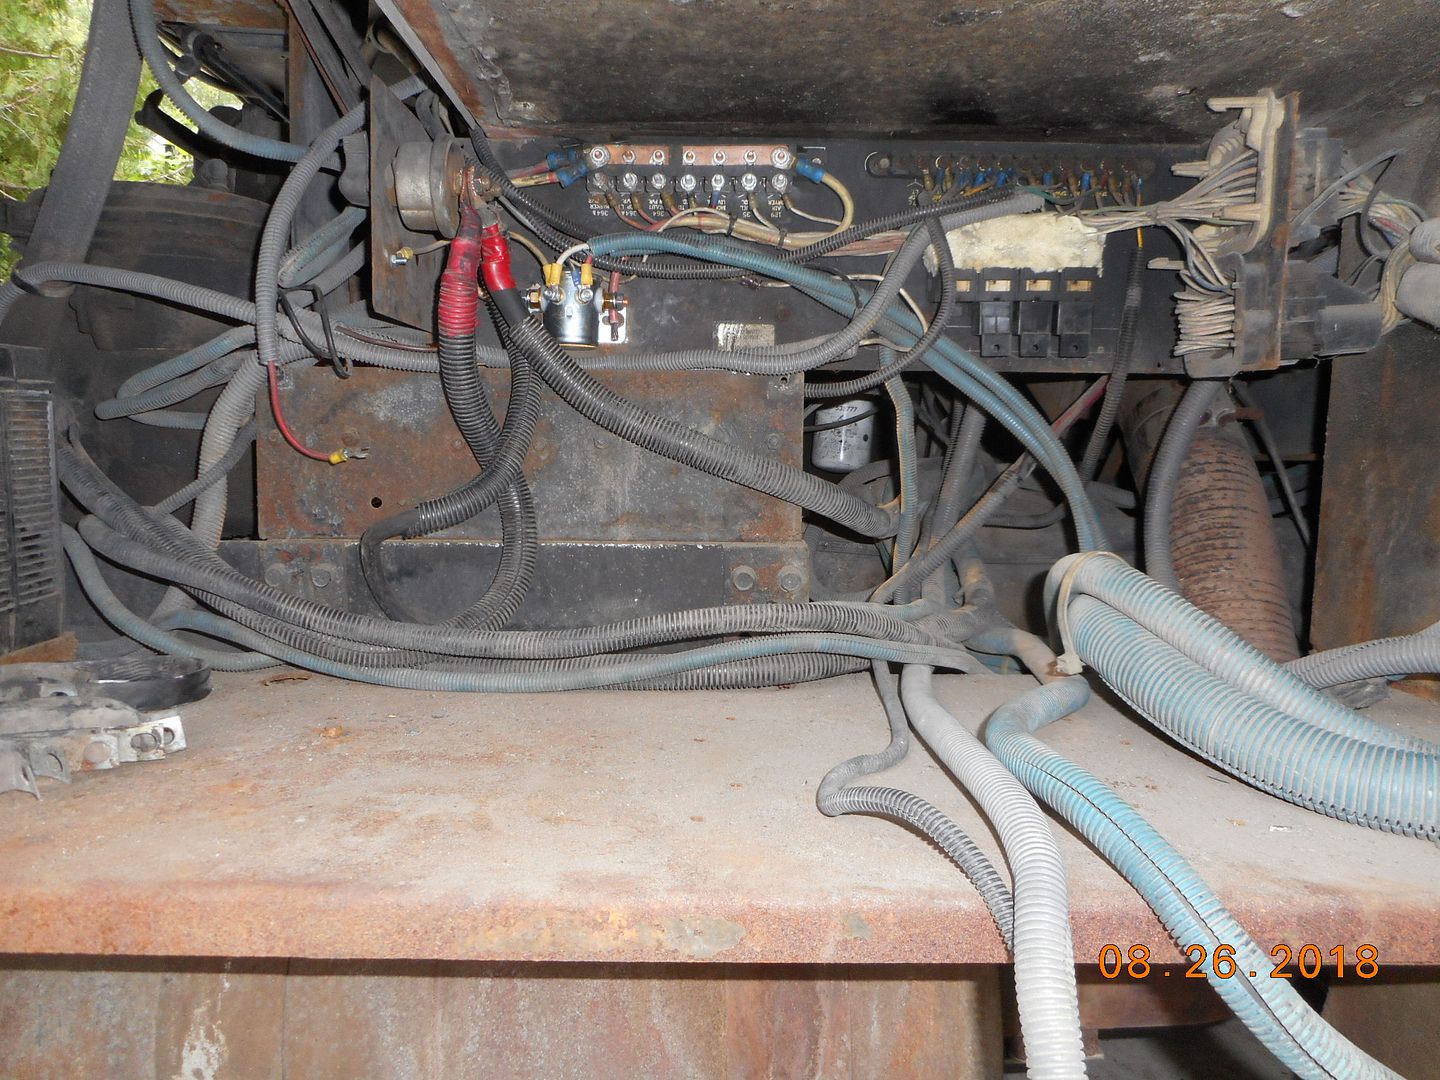 So far, a good start. Next I will block off the huge gap at the front of the compartment and bring all the cables through the center together. I will also seal off the wide gap between the outside edge of the battery shelf and the outer door. I will make a small cover for the rear chassis panel, to protect the relays, breakers and connections there. The battery shelf needs paint. One way to get rid of all those connectors between batteries: get a bigger battery! This will be installed instead of the 4 separate ones. 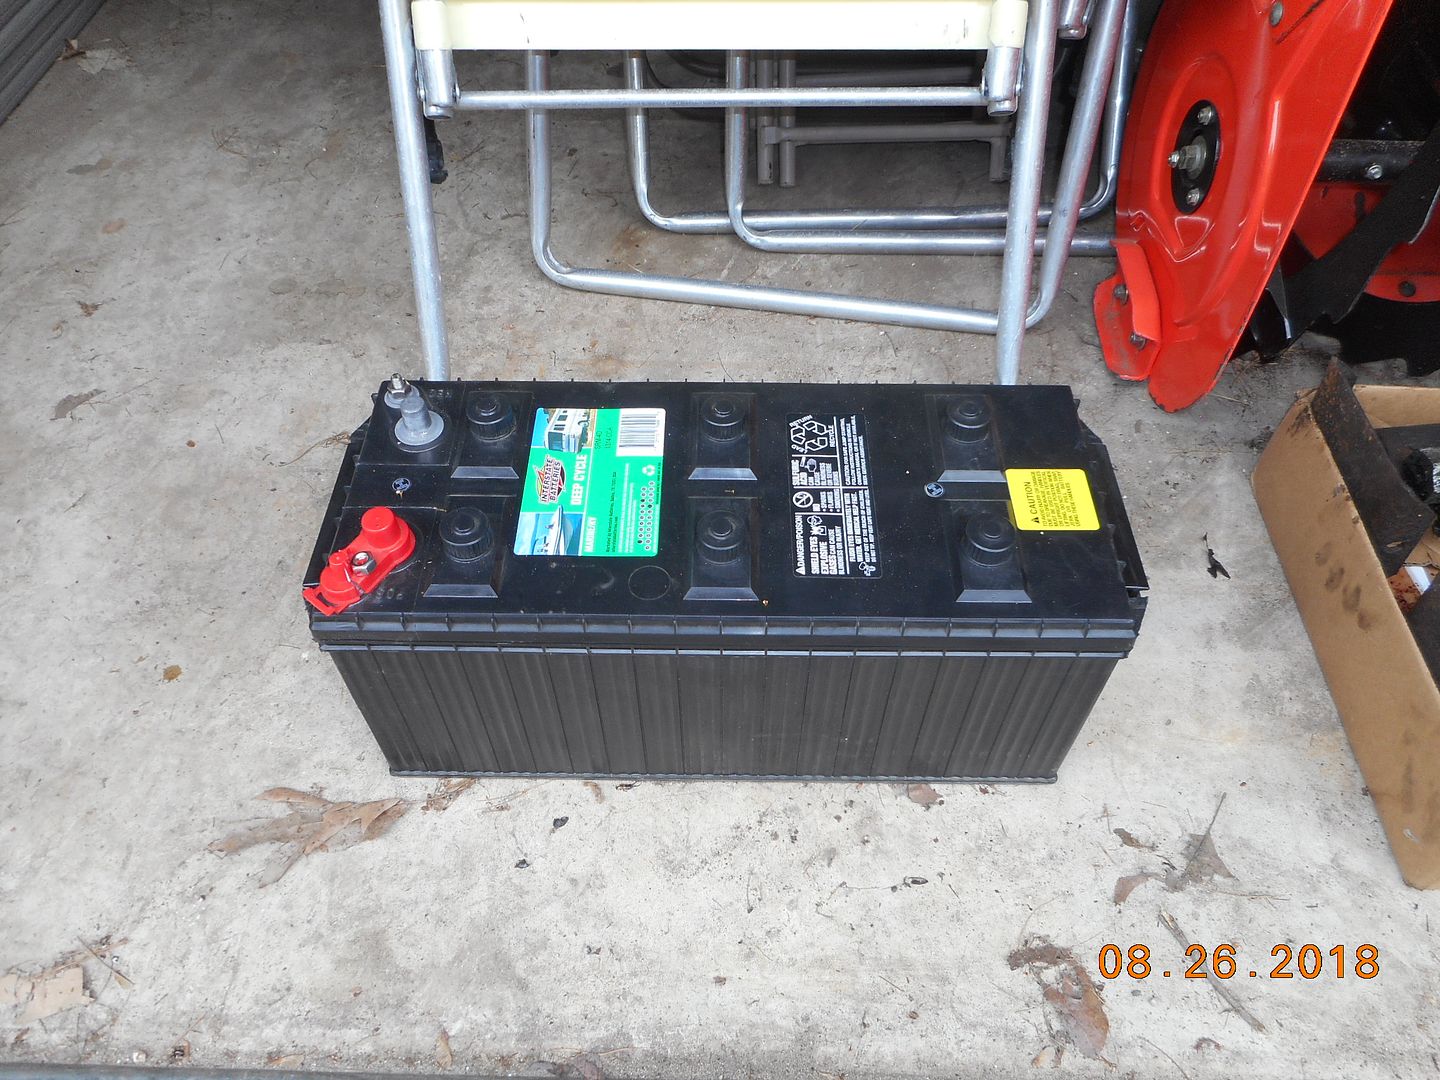 After painting the shelf, I will mount this battery in place. Then reconnect the coach system wiring. I already removed the old modified sine wave inverter we never used and replaced it with a 60 amp Progressive Dynamics convertor. to be continued: 9708-M0037-37MM-01 "98" Monarch 37 Spartan MM, 6 spd Allison Cummins 8.3 325+ hp | |||
|
You really have a rats nest or can of worms there! That is a mess! The second from the last picture, upper right shows a couple of bulk head connectors, check those, but DO NOT separate them unless you want to remove and splice all the wires. If those have been exposed to the elements, they are a ticking time bomb! BTDT! If you open them, they will fall apart! Is that the muffler right below the battery? Ed 94 30' Breakaway #3864 30-BS-6B side entry New Cummins 5.9L, 375+ HP Allison 6 speed Spartan chassis K9DVC Tankless water heater | ||||
|
Official Barth Junkie |
Yeah, there is a "battery heater option" built in. Another reason I want to seal off the airflow from below. I will treat those bulkhead connectors with respect, ie leave them alone! I will now start closing off the battery area, boxing in the electrical panel, paint the rusty parts and retie/rehang the wiring harnesses, leaving better access. Lots of loose ends, literally. 9708-M0037-37MM-01 "98" Monarch 37 Spartan MM, 6 spd Allison Cummins 8.3 325+ hp | |||
|
I made a battery tray out of stainless for my coach batteries. I also use POR15 for my rusted parts. A stainless shield over and around the muffler like is used for auto cat converter might help reduce heat transfer to the battery compartment. Ed 94 30' Breakaway #3864 30-BS-6B side entry New Cummins 5.9L, 375+ HP Allison 6 speed Spartan chassis K9DVC Tankless water heater | ||||
|
Official Barth Junkie |
Making some progress. Cleaned and painted the shelf. I removed a couple more wires, rerouted some others. We are down to 2 (+) cables and 2 (-) cables, with clear access to the electrical panel. I have some pieces cut to block off the panel and the inside corner. 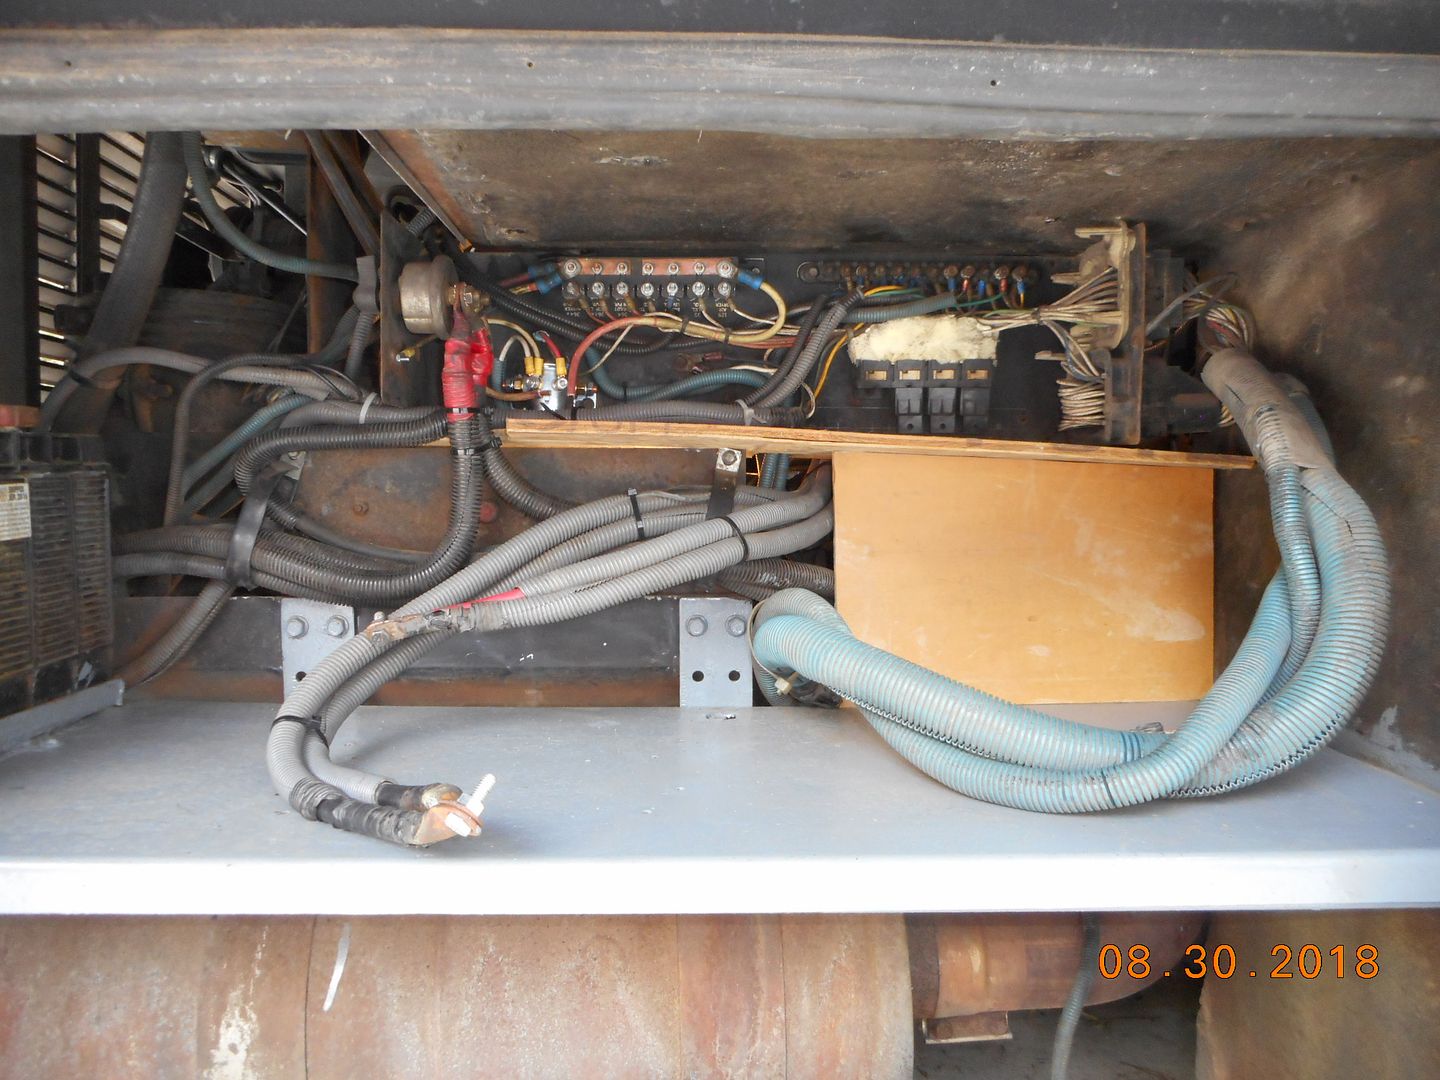 I will cover the front of the electrical box, also I am planning to seal in the cable ends (upper right corner) with foam. 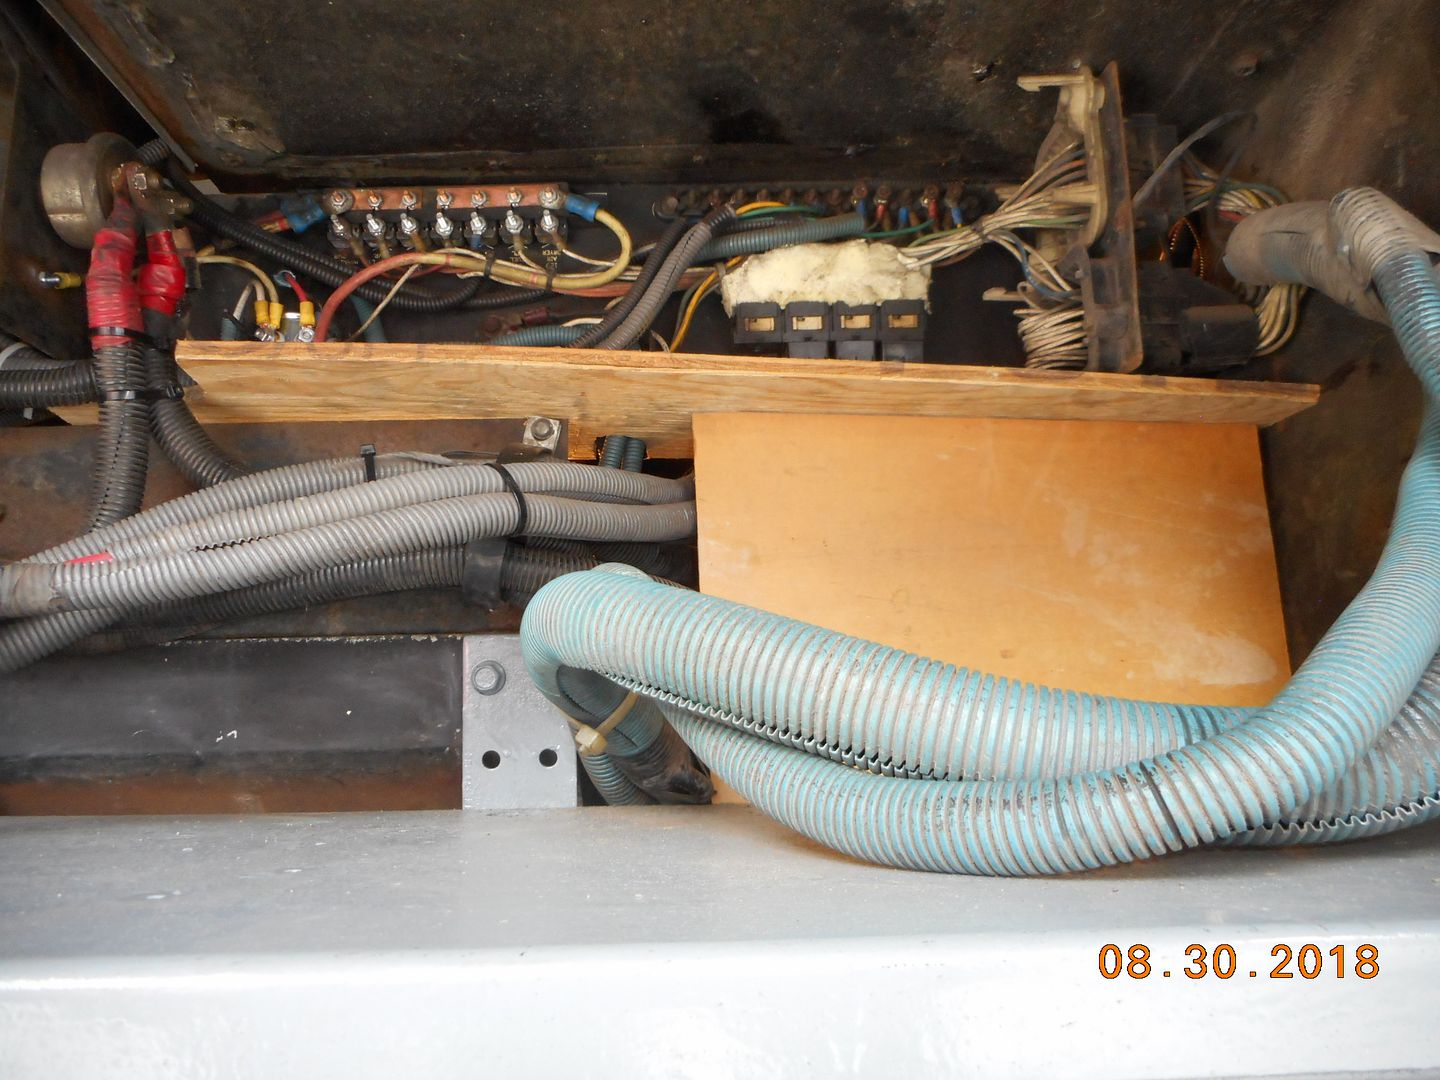 I have now removed over 25 ft of cable. 9708-M0037-37MM-01 "98" Monarch 37 Spartan MM, 6 spd Allison Cummins 8.3 325+ hp | |||
|
 5/10 5/10 |
Remember to use "Chassis Saver" paint to stop rust and prevent. Marvin swears by it, paint right over rust, no Ospho etc. Get it at NAPA 1999 Bluebird Custom 33' 8.3 Cummins diesel pusher Former owner 1989 Barth Regal 25' | |||
|
Official Barth Junkie |
I finished boxing in the electrical panel. I covered the upper right corner. I will foam in the connectors from the engine side. They will be protected from salt, water and corrosive battery fumes. The lower corner is also filled in. I left a 3 inch vertical gap in the center for all the cables. I covered the edge of the new panel with a split piece of hose to protect the cables. (Due to proximity to the exhaust, I covered the engine side of the wooden panel with aluminum sheet and I used a piece of aluminum angle for the back corner.) 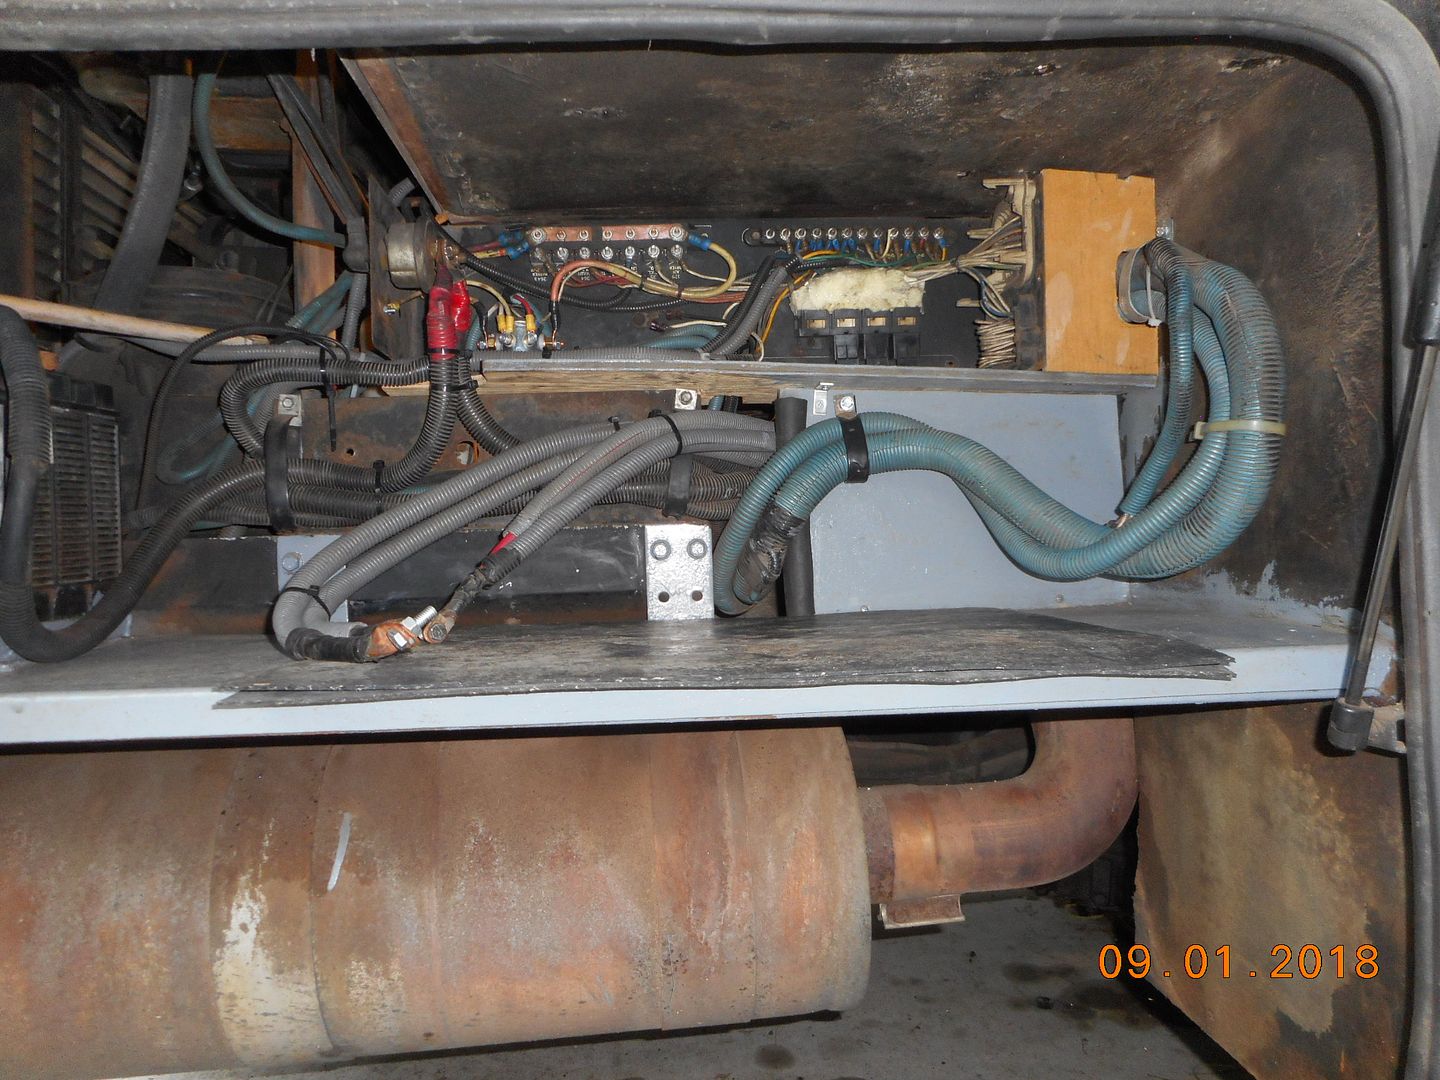 I covered the front of the electrical box with a piece of Plexiglas I had handy. This should keep the wiring and relays cleaner. 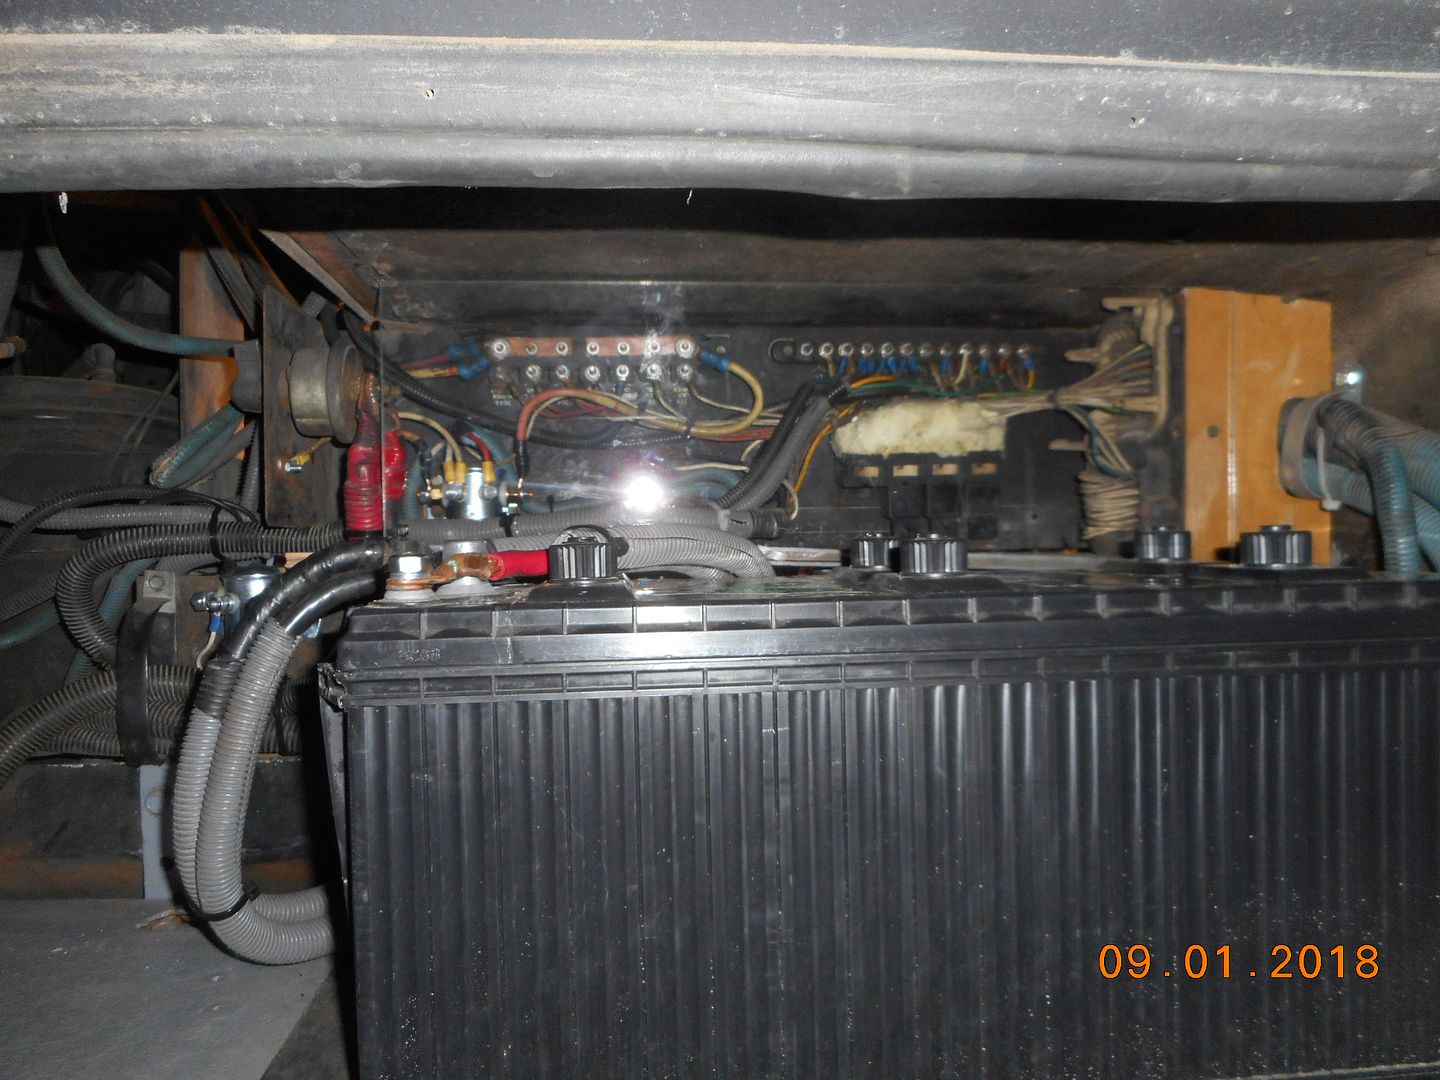 The battery fits on the shelf nicely. I still need to install a battery hold down bracket and complete the installation of the "aux start" bridging relay. 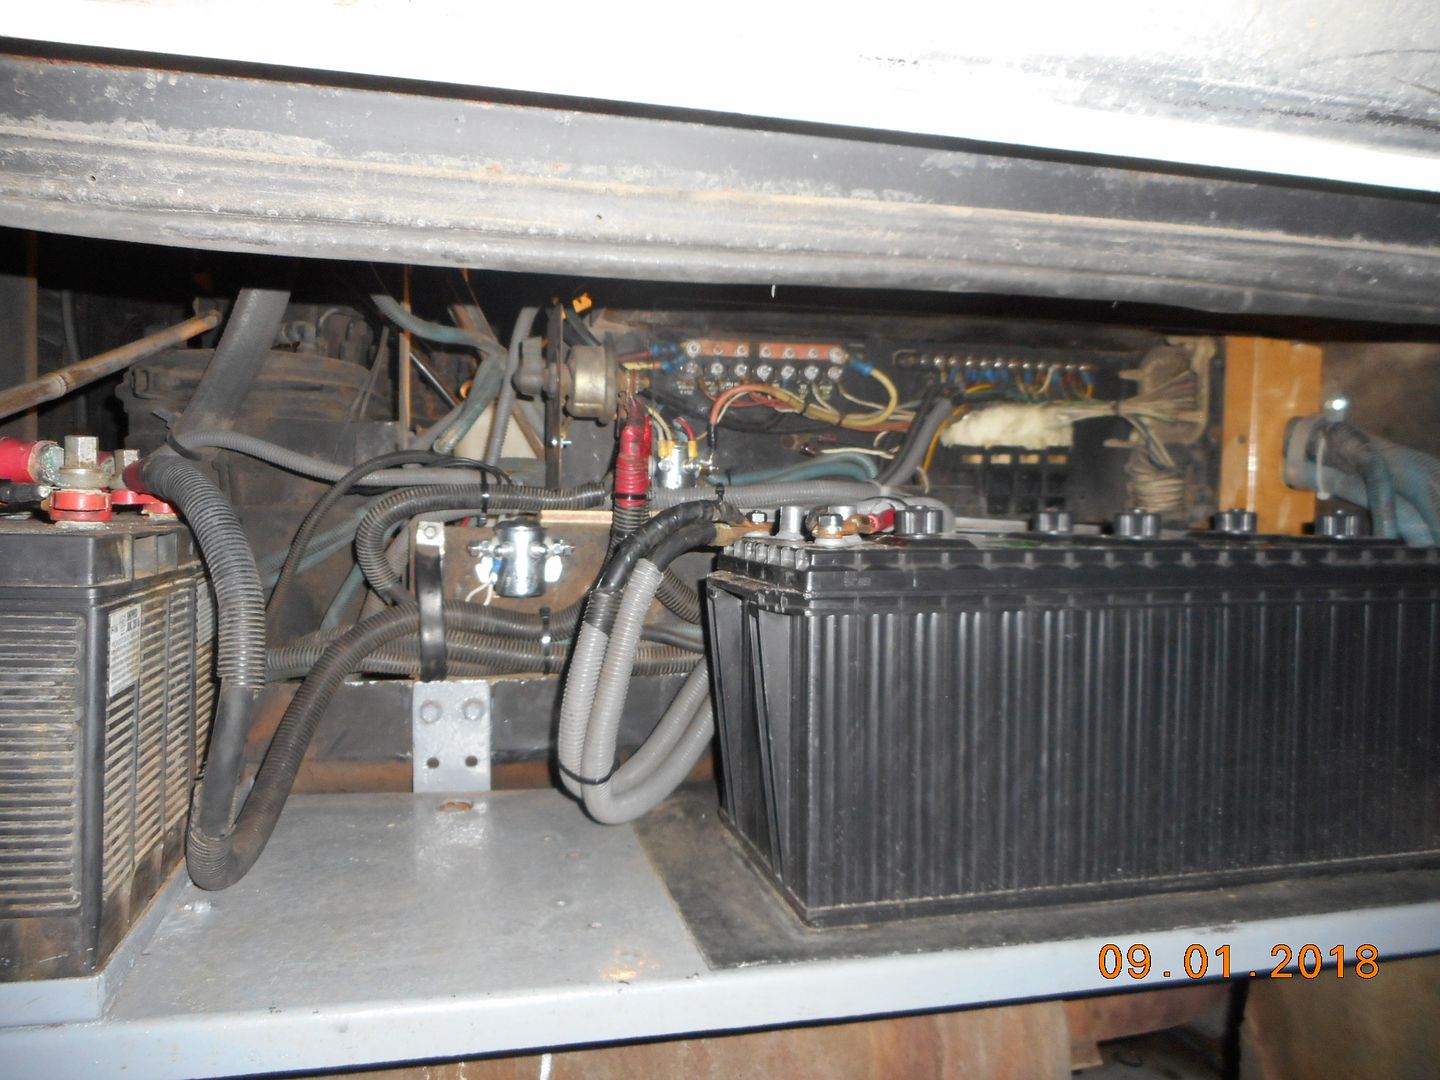 I installed the new Progressive Dynamics 60A charger where the 2000W invertor used to be. The cables for the invertor are rated for 200A, more than adequate! The invertor also had a 30 amp 110AC feed from the main power box. When not using the invertor, the current passed on through to another 30A load center for the circuits supplied by the invertor. I removed the loop out and back and wired the former invertor load center directly into the main power box. Must have done something right. So far everything is working perfectly. The starter is getting full current. I couldn't really tell how fast it is cranking because the engine started instantly! A colder day will tell more. Almost done. This all got started because I was removing some left over wire from the engine bay and kept finding more strange wiring. It is almost all orderly now and I know what almost all of it does. 9708-M0037-37MM-01 "98" Monarch 37 Spartan MM, 6 spd Allison Cummins 8.3 325+ hp | |||
|
 3/22 3/22 |
By Bulkhead connector I am assuming you are talking about the many wired connectors at the upper right. I have almost the same in my Monarch. My electric is right at the back door grate. There was not a single wire being used in the bottom connector. I took the bottom one out to clean up part of that mess. Mine is a lot easier to get to. Good job Steve looks a lot better. Dana & Lynn 1997 38ft Monarch front entry Spartan Mountain Master Chassis Cummins 8.3 325hp Allison MD-3060 6 speed 22.5 11R Cummins Factory Exhaust Brake 8000 watt Quiet Diesel Generator 9608-M0022-38MI-4C Christened Midnight 1972 22ft 72081169MC22C Christened Camp Barth | |||
|
| Powered by Social Strata | Page 1 2 |
| Please Wait. Your request is being processed... |
|
This website is dedicated to the Barth Custom Coach, their owners and those who admire this American made, quality crafted, motor coach.
We are committed to the history, preservation and restoration of the Barth Custom Coach.
We are committed to the history, preservation and restoration of the Barth Custom Coach.

