Go to...  | Start A New Topic  | Search  | Notify  | Tools  | Reply To This Topic  |  |
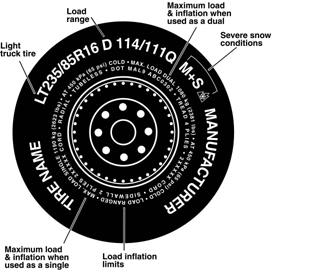
Great Tire Information
9303 3855 33BS 1B Bruce & Kathleen 1993 33' Front Entrance Breakaway 230HP Cummins 5.9, Allison 6 speed, Spartan Chassis, Nicely Optioned | |||
|
Going to Seal Your Roof? Originally posted by Jim and Tere Formally known as "Humbojb" Posted 10-17-2009 01:21 PM 1.Clean roof with dawn soap & clorox & stiff brush. I had a broom handle & a scrub brush attached. Rusty used "Purple Power". The dawn & clorox were on hand so that is what I used. Probably 3 or 4 scrubbings & rinsings. 2)Take a firm wire or hard plastic brush & a 1 1/2" wide putty knife & “remove all mildew, dirt, rust, loose coating or other contaminants which would prevent maximum adhesion of the Anvil roof coating”. I used a paint removing tool & in some spots I put all I had into scraping down to aluminum. The seal around some of the rivets had deteriorated & was loose but not too loose. I used a lot of elbow grease getting around these rivets because I didn't want it to haunt me in the future. There were some rivets that were worn out & need to be replaced or just not there. Drill them out & replace. Aluminum w/aluminum mandrels. I have what you need if you want me to send you some. Rivet tool is under $25. 3)Get some TSP Trisodium Phosphate at hardware store. I think it's 2 Tablespoons to a gallon of water. Apply this a couple of times by scrub brush, then rinse. You're supposed to check the roof after it dries & be sure the chalky residue left by the TSP is gone or minimal. I started working on mine & there was still a chalky residue but I couldn't get it to go away. I'll check it in 5 yrs to see if there was any adverse affects 4)Buy some spray on self etching primer “SMS” @ NAPA. Take a rough grade of Scotch Brite pad (NAPA) & scuff up the aluminum that is now exposed & apply primer to any bare aluminum. a)After I primed the bare aluminum spots(gray self etching primer)I let it dry then went over primed spots with a coat of anvil before rolling whole roof. 5)Buy Grey Seam sealer in quart can (NAPA brand) It is for sealing seals of semi truck trailers. Note: The first can was easier to apply than the second one because it was thinner. This was a little frustrating. 6)I taped off the perimeter of the roof for neat lines. 2” left of seam & 2” right of seam.* The seam itself had the most sealer & I tapered off to the edges for a convex application. I was being much neater than original application because I was going to paint just up against the roof so I taped my lines. I would recommend anyway. a) If there was any roofing material or sealant I could not manually remove with some serious elbow grease I decided not to remove it. I figured if it had managed to survive 25 yrs it would make it another 25 with new sealer on top of that. The more the merrier. Apply thick. 1/4". If you tape it give it about an hour to cure & remove the tape. Slope away from the vents so water will flow off. 7)I took some self leveling product; dicor self leveling sealant, “painted” thin coat with a brush over the DRY gray seam sealer vent openings, roof rack anchors, and old covered air horn hole. I did this after the 1st coat of Anvil. This was probably over kill. I did this so I could get down into the cracks & seals that the firmer gray sealer may have missed. I did not go over the perimeter seams with this product. Let dicor dry thouroughly before 2nd coat of Anvil. Day or so. 8)Call Sherwin Williams & ask them to special order a gallon of bright white Anvil multi-purpose Elastomeric Roof Coating. It is about $35. Paint your vent seams & roof edges with a paint brush & roll on the rest. It goes on like a dream. I put on two coats & still have some left over. Depending on the temp & humidity will determine the drying rate. Ideal conditions temp above 70* & 50% or less humidity. If conditions are favorable coat once wait 2 hrs & recoat. If you have a hot sunny day or two or three park in sun & allow to really dry. Our weather was extremely humid & it took a month for it to dry. Wear white soled shoes, the black soled tennis shoes leave foot prints. 9)Anvil Paints & Coatings, Inc. 1255 Starkey Road Largo, FL Anvil makes a seam sealer but I didn't know that until I had already done all of my sealing. Don't know anything about their product. Some of my applications were not recommended by dicor company. Applying elastomeric to dicor not recommended. We'll see. 10)Barth originally used Anvil on it's roof application. Someone added sand to it. I checked into this & Anvil did not recommend it. I painted over the original application without sand because most of the sand remained on my roof. If you have a smooth aluminum roof I would suggest some sand but make sure it is clean sand check for chemical reactions. 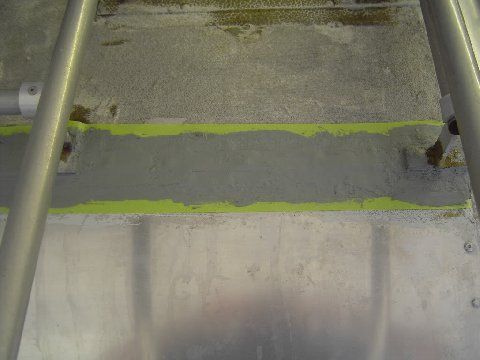 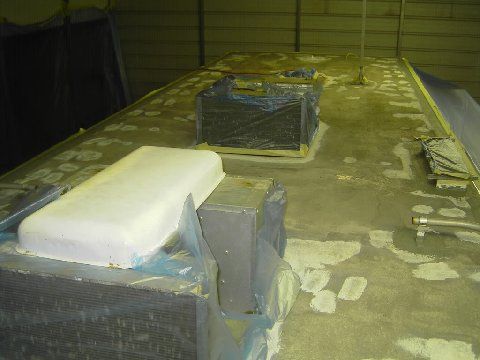 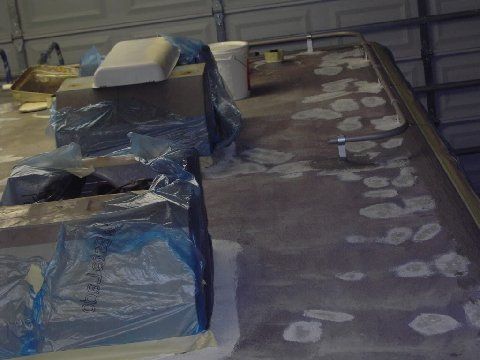 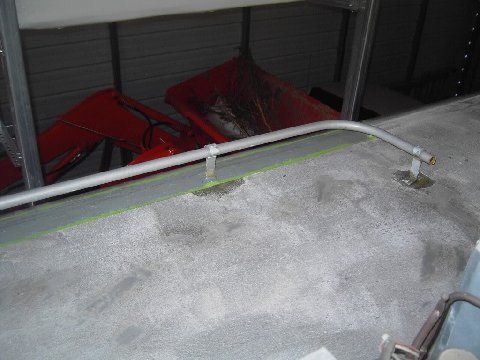  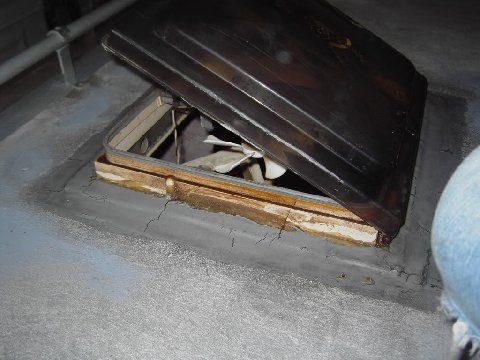 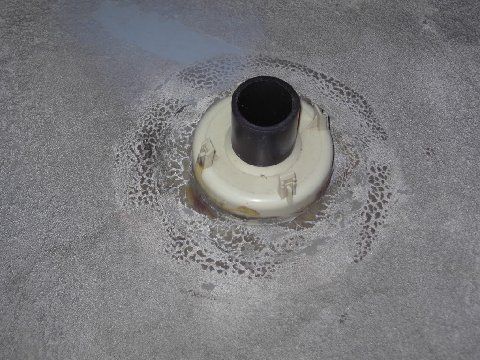 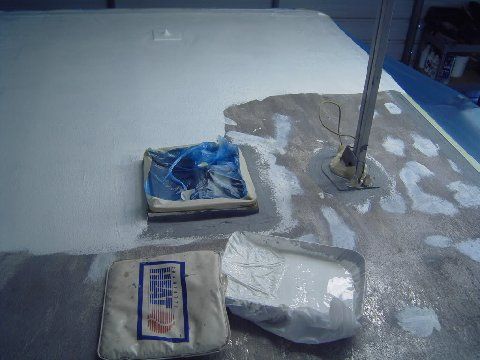 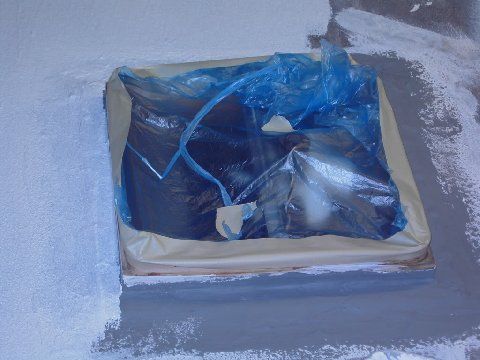 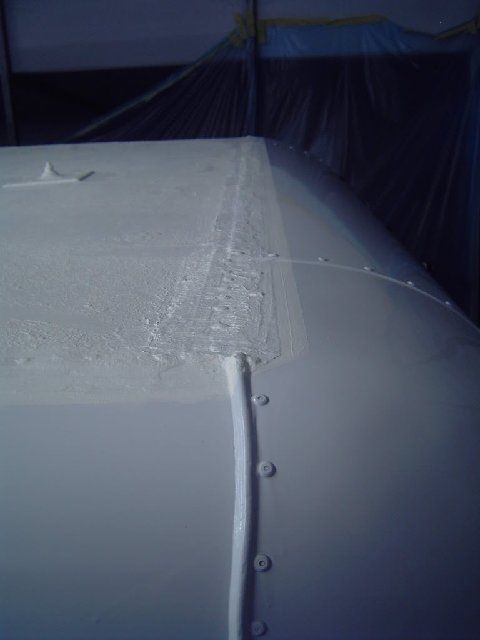 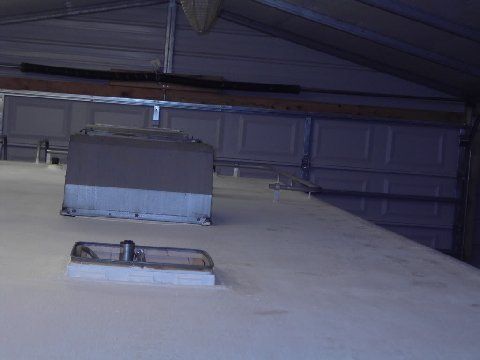 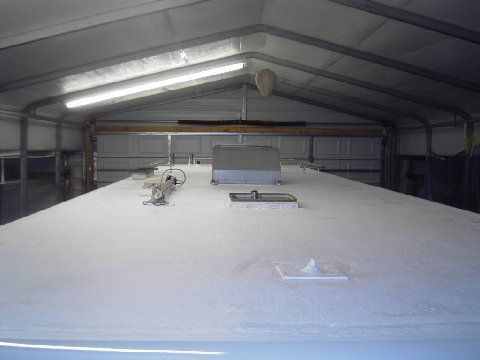 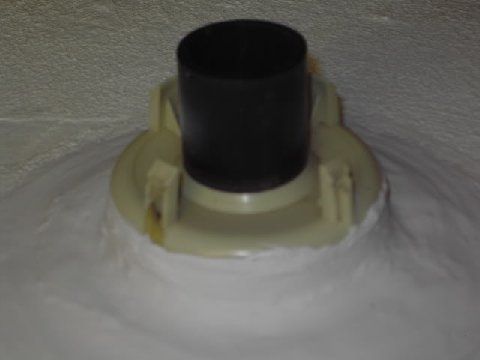 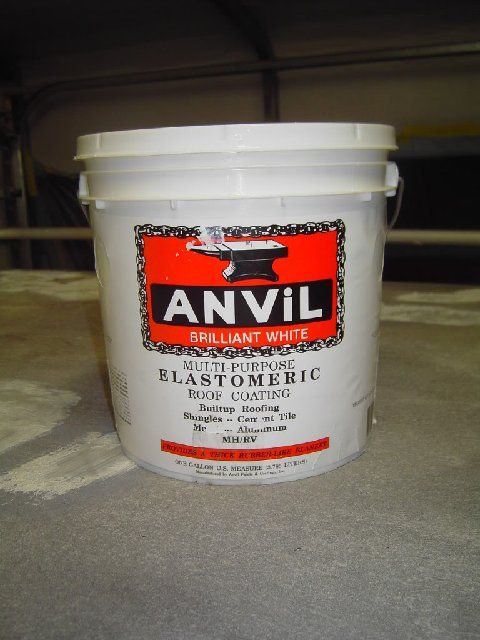 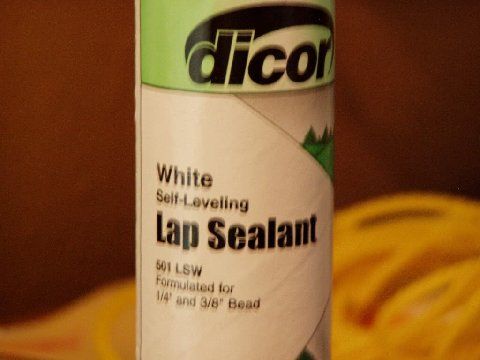 9303 3855 33BS 1B Bruce & Kathleen 1993 33' Front Entrance Breakaway 230HP Cummins 5.9, Allison 6 speed, Spartan Chassis, Nicely Optioned | ||||
|
Replacing your Kitchem Faucet This project involved removing a Moen faucet that was mounted in a Moen double bowl sink and replacing it with a newer style Moen Camerist CA7825CSL faucet. Both the new and old faucets mount in a single hole on the flange of the sink. I apologize for my following long post on the faucet replacement... I meant to take photos of this project, but forgot the camera and didn't have the time to go back to get it. After finishing the job I realized that if I just told you what took place you would understand everything as you went along with this if you did it yourself. Removing the sink: Disconnect your water lines. Make sure you mark hot and cold lines for proper re-attachment. Disconnect your drain lines from the sink bowls. Now for the fun part. You have channels mounted around the perimeter of the sink under the counter top. You can see these by looking up to the bottom of the sink from the cabinet under the sink. These channels should have 10-12 clips that are in the rails at different points under the sink. There should be at least two at 90 degress at each corner and then one each at half way down each side. These clips have small screws that thread through the middle of the clips and are used to tighen down the sink to the counter top. This is where it gets a little tricky because you need to loosen all those clips and slide them out of the channels at either end of the channel. Patience is needed here, as some are a bit tricky to get to. Once all the clips are removed you can now lift the sink out of the counter. NOTE: I will say here that I now understand how the plumbers sink wrench that Corey spoke of (and I had) would work. The back edge of the sink opening in the corian counter top has a "cut out" in it where the faucet mounts in the sink flange. This gives you room to get that wrench up there to take off the mounting nut from the faucet shank. This would work if you can get all the way under your sink to get to the nut, can get the nut off with that wrench AND if you are replacing the faucet with an exact replacement. If you are going to be using a newer style replacement faucet, you need to keep doing what I did. Here is why..... After removing the sink we found it to be MUCH easier to remove the nut from the shank of the old faucet. You can easily get wrenches on it now. Ours had some thread damage on the shank along with some corrosion issues that made it basically impossible to get the nut off the shank. We ended up cutting it off. Here is where the new faucet compared to the old faucet meant making alterations. When we pulled the old faucet from the sink we found that the faucet had been matched up to the sink by way of two flat edges on both the shank and the hole in the flange. The new faucet has a 360 degree round shank. Add to that, the hole in the sink flange was about 1/8" too small for the new shank. And I already knew that when the new faucet was mounted in the hole that was there, it was possible there was going to be about an 1/8" overhang on the rear sink flange. So we planned to kill two birds with one stone. We decided we would "round out" the flat sides of the opening and at the same time move the hole opening closer to the bowls of the sink. So with files, grinding stones and lots of trial "fittings" of the new faucet, we did this. Once we got the hole opening larger and closer, we then mounted the new faucet, per the directions, into the sink flange. Looked good at that point. We then went to drop the sink back into the opening to make sure everything fits and found that because of the new location of the hole along with the larger nut on the larger shank, it hit on the back edge of the opening and the flange would not lay flat on the counter top. Pulled the sink and enlarged the "cut out" on the back edge of the counter top. Now the sink fit properly. We penciled the outline of the sink flange all the way around the sink while it was sitting in the opening. We removed the sink and then took some clear silicone and put a large bead around the inside of the line and did the same all the way around the flange of the sink. We then put the sink back into the opening and then proceded to reinstall the 12 clips we had removed by sliding them back into the channels and tighening them in place. The sink was now reinstalled. We had to get adapters to hook up the water feeds, as we had female connections on both the water feeds and faucet flex hose connections. You can pick them up at Home Depot or Lowes. Then we re-attached the drains and we were done. Oh, and another NOTE: It was much easier doing this with at least two people. 9303 3855 33BS 1B Bruce & Kathleen 1993 33' Front Entrance Breakaway 230HP Cummins 5.9, Allison 6 speed, Spartan Chassis, Nicely Optioned | ||||
|
Captain Doom |
Windshield Wiper Motor R&R Headlight Relay Installation Rusty '94 28' Breakaway: MilSpec AMG 6.5L TD 230HP Nelson and Chester, not-spoiled Golden Retrievers Sometimes I think we're alone in the universe, and sometimes I think we're not. In either case the idea is quite staggering. - Arthur C. Clarke It was a woman who drove me to drink, and I've been searching thirty years to find her and thank her - W. C. Fields | |||
|
Turbo 400 Trans Fluid Change The following was provided by Gunner on 2-7-08: 1) Does the fluid (on the stick) look burned, i.e. brown or ugly-dark-red? Does it smell "burned"? If so, it has been too hot and must be changed. 2) First thing, even if it appears okay: go to Pep Boys and buy a new filter & Dexron fluid. SHADETREE MECHANICS STOP READING! You have a Turbo400 trans -as opposed to a (passenger car) Turbo350- and it has no drain plug, so loosen about a dozen small bolts from around the outside flange of the xmiss pan, break the gasket seal with a small screwdriver between the flange and body, and tilt the pan to drain the fluid into the catch container you've placed underneath (splashing smelly fluid all over yourself). Remove all bolts, then remove the pan. The filter is a flat, thin aluminum-framed thing about 8X10", held up by one small bolt near the front. Remove the bolt, then the filter by pulling it down. A 1"dia tube extends from the front of the filter up into the trans; pull it down and out if it doesn't come off with the filter. Now (important): stick your finger up into the receiver hole the tube came out of and remove any O-rings left in there. The new filter will have a new O-ring for the upper tube neck to seal it, and often the old ring will remain in the cavity (in a 20-year old trans, maybe 2 or 3) when the tube is removed. Clean the flange face on the body and on the pan. Install the new tube with O-ring, then the filter by inserting the one bolt through it into the body; place the new neoprene gasket on the pan, held in place by a LIGHT coating of gasket sealer; hold the gasket in place by pushing bolts through the pan holes into the gasket while sealer dries; then place the pan on the body and screw in the bolts. Don't overtighten, as the body is aluminum. Fill with new Dexron, drive until operating temperature is reached and check fluid level. It's real easy to change fluid/filter - about like an oil change. Next: Your trans fluid circulates through the radiator. Probably has two stainless 1/4" lines entering and leaving the radiator on the rear face, on the passenger side, high and low. You may wish to unscrew them one at a time (carefully!), start the engine, and see if fluid is circulating. Sometimes one of these becomes crimped (usually up close to the trans where you can't get to it) and fluid circulates slowly or not at all. You can see both these lines from beneath the engine. 9303 3855 33BS 1B Bruce & Kathleen 1993 33' Front Entrance Breakaway 230HP Cummins 5.9, Allison 6 speed, Spartan Chassis, Nicely Optioned | ||||
|
| First Month Member |
The trans cooler lines like to rub on each other or the clips can wear the lines. Check for wear along their full length. . 84 30T PeeThirty-Something, 502 powered | |||
|
What is the exact translation the ancient tire designation : 7.5X16 to the modern metric i.e 225/75R16 or whatever ? is there a conversion chart somewhere? #1 29' 1977parted out and still alive in Barths all over the USA | ||||
|
| First Month Member |
Page 3 of this doc has a chart. . 84 30T PeeThirty-Something, 502 powered | |||
|
Bill H thank you. #1 29' 1977parted out and still alive in Barths all over the USA | ||||
|
| Powered by Social Strata |
| Please Wait. Your request is being processed... |
|
This website is dedicated to the Barth Custom Coach, their owners and those who admire this American made, quality crafted, motor coach.
We are committed to the history, preservation and restoration of the Barth Custom Coach.
We are committed to the history, preservation and restoration of the Barth Custom Coach.

