Page 1 2
Go to...  | Start A New Topic  | Search  | Notify  | Tools  | Reply To This Topic  |  |
Official Barth Junkie |
As we all know, aluminum pop rivets have a tendency to corrode over time. We have all had to replace rivets from time to time. The side trim strips on the Monarch cover the seams between the upper and lower aluminum skins. There is an aluminum spline that fits into the strip to cover the rivets that hold the strip in place. If the rivets corrode and fail, the side strip becomes loose and pulls away from the skins, leaving a gap. The normal fix is to remove the cover strip, drill and replace the rivets, then replace the spline. Not so on my Monarch... some IDIOT decided to fix the problem by drilling through the both strips and installing longer rivets right through both. This has bothered me for some time. I finally decided to try to fix it. Several problems: the original rivets are still not fixed. The IDIOT who installed the longer rivets didn't even drill them evenly or centered. The color matched cover strips are ruined. 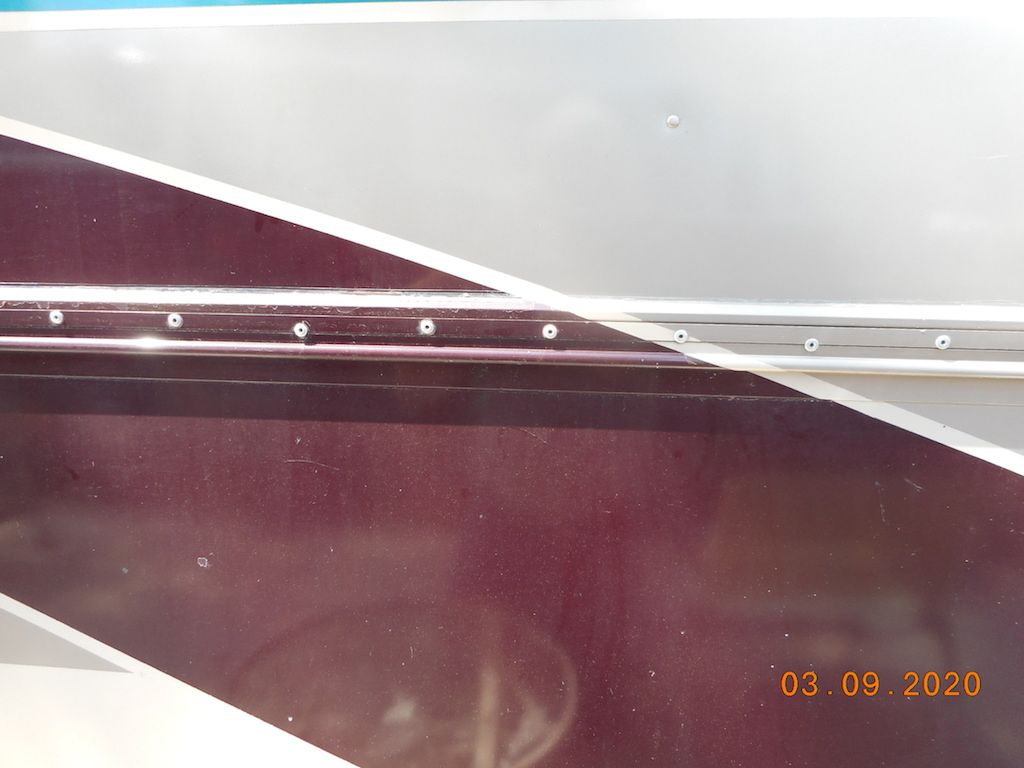 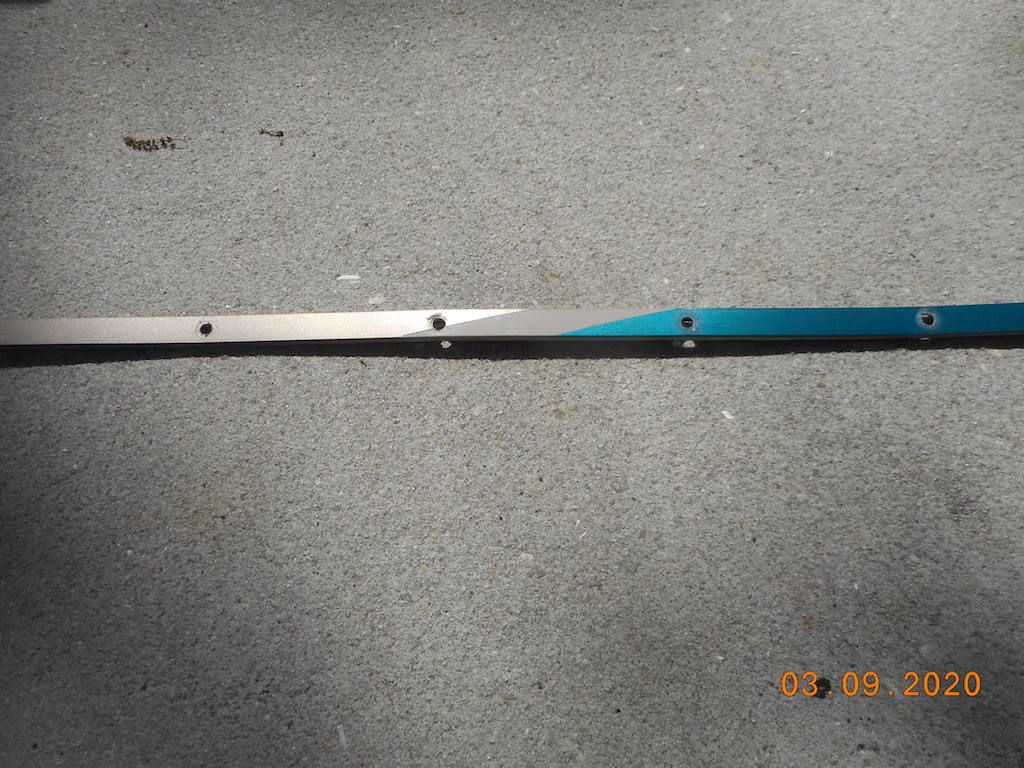 The side strip above the front left wheel was loose. In order to remove the cover strip I had to drill out the longer rivet heads, then remove the cover strip, then drill out the original rivets and the extra longer ones. Instead of just replacing the original rivets then replacing the cover strips I had twice as many rivets to replace and ruined cover strips. This what it should look like with original rivets replaced. 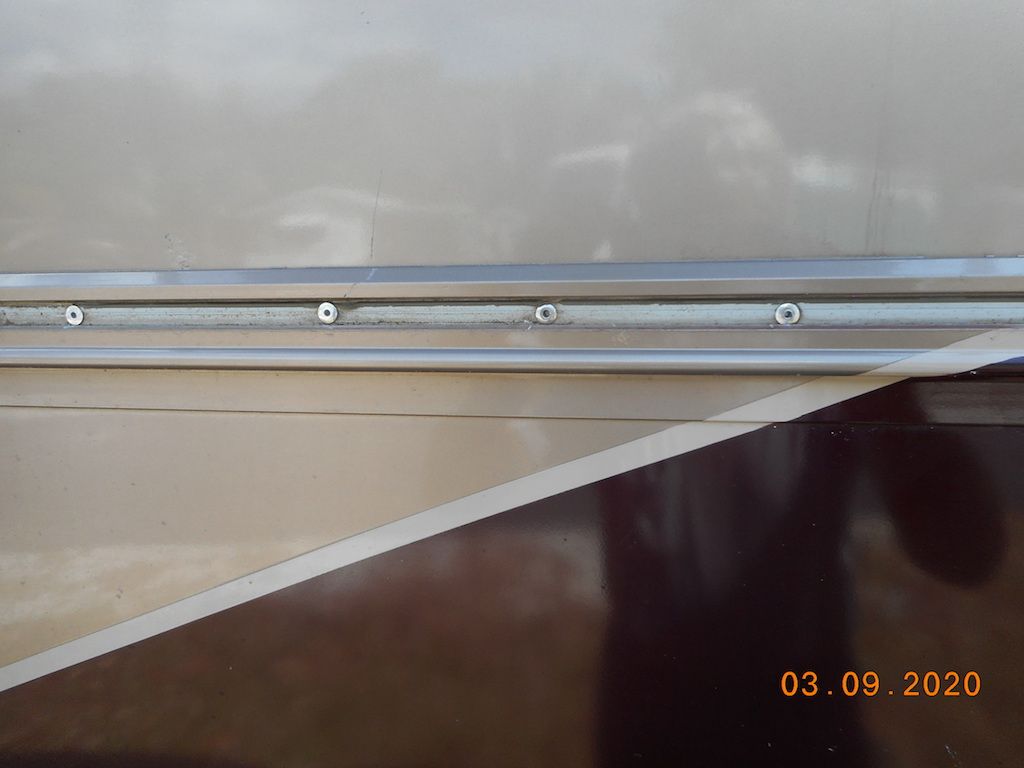 This is what it looks like now. 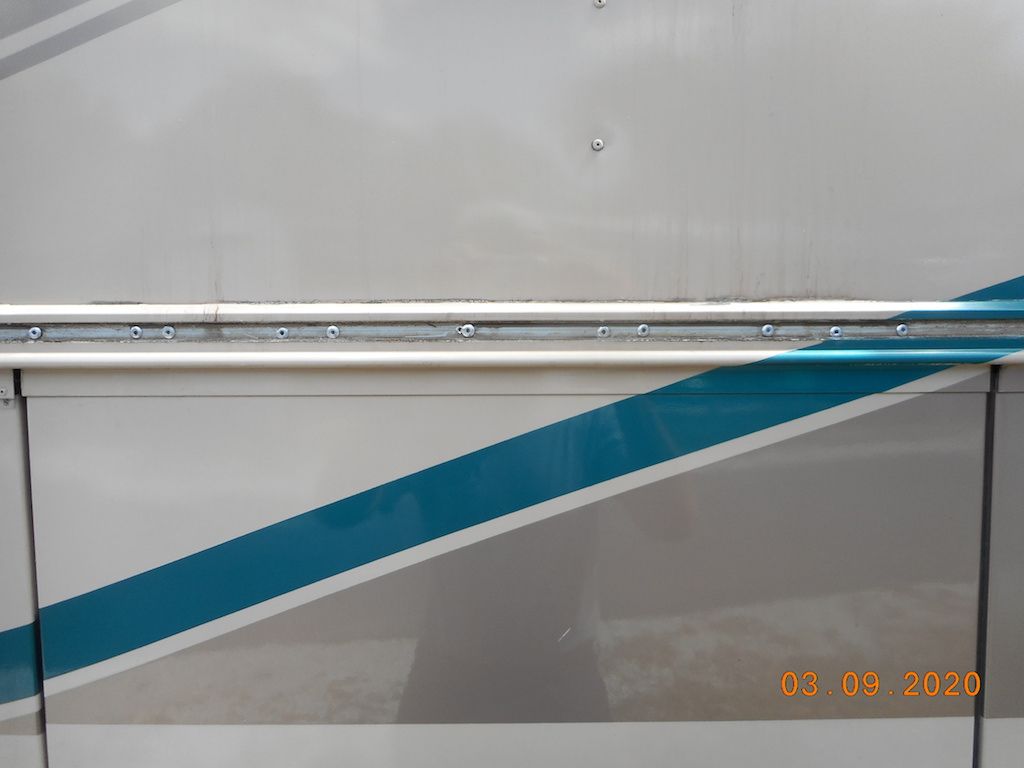 Once I got started I kept going until I ran out of 50 rivets. I will have to do the entire strip on both sides since they were "repaired" in several places. If I knew who did this I would slap them so hard I'd hurt their whole family. Now I need to find some replacement strips to cover the rivets. Has anyone sourced these aluminum strips before? They are 1/2" wide by 1/4" deep. I may have to get some generic plastic strip to cover the rivets... 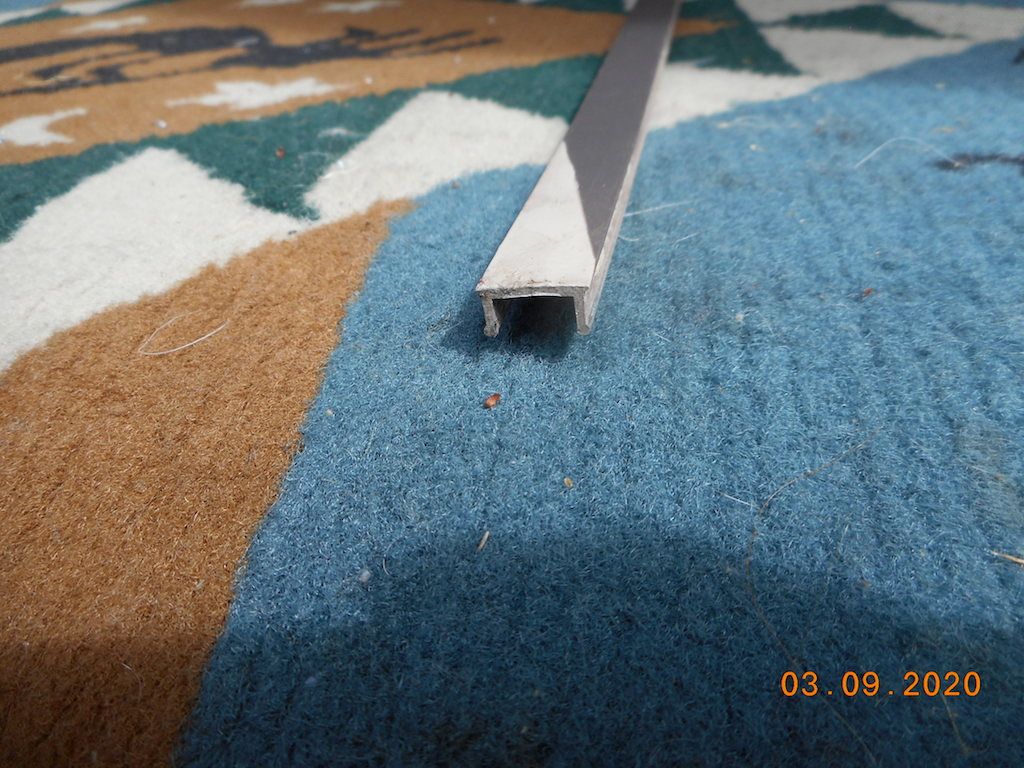 9708-M0037-37MM-01 "98" Monarch 37 Spartan MM, 6 spd Allison Cummins 8.3 325+ hp | ||
|
 3/23 3/23 |
It sure is funny what bothers us and makes us repair or replace stuff. Steve it would never even have occurred to me to replace those rivets and trim strips. To each their own!! Perfection in the eye of the beholder!!! Good luck. 1971 24 ft Barth Continental P30 chassis 350 engine | |||
|
Official Barth Junkie |
Problem was that the strips were coming loose from the side. There was a gap behind the strip and the whole panel above the tire was moving around. Also it allows water to run in behind the strip. 9708-M0037-37MM-01 "98" Monarch 37 Spartan MM, 6 spd Allison Cummins 8.3 325+ hp | |||
|
 3/23 3/23 |
So not only visual but possible corrosion, Ok I understand your frustration!!! With the exception of color matching a plastic extrusion might be better. 3M tape it in place. 1971 24 ft Barth Continental P30 chassis 350 engine | |||
|
 3/23 3/23 |
If you can deal with 1/2"x3/8" this might be a source unless they want to ship a minimum of too much. https://www.easternmetal.com/s...roducts-channel.html https://www.easternmetal.com/p...annel-extrusions.pdf The second is the pdf with channel sizes | |||
|
 3/22 3/22 |
Steve is that also holding the hinge for the storage doors? Have to look back in the GTG posts from last year. I believe I found a place not far away that makes aluminum extrusions. I figured it would take a physical trip with a piece of the extrusion to find out if they could match or had something. Do you have a piece you can send me? Or we could try and do a road trip over when you come for the GTG. How was it getting it out. Midnight has some failure also so it is also on my list. Damn that list keeps getting longer not shorter. Dana & Lynn 1997 38ft Monarch front entry Spartan Mountain Master Chassis Cummins 8.3 325hp Allison MD-3060 6 speed 22.5 11R Cummins Factory Exhaust Brake 8000 watt Quiet Diesel Generator 9608-M0022-38MI-4C Christened Midnight 1972 22ft 72081169MC22C Christened Camp Barth | |||
|
Official Barth Junkie |
The lower strip does support the cargo bay hinges. That is one of the reasons why I am worried about water leaking in behind them. I will have to rerivet both the upper and lower strips. Both have about half the rivets loose. I drilled them out 2 at a time. 50 rivets did about 1/2 of the lower strip. It looks like about 90 will be needed for each of the four strips. I can wait until the GTG to find some new trim strips. They come out fairly easily but tend to bend a bit. If mine were not drilled out I am sure they could be straightened and reinstalled. Meanwhile I may find some plastic strips. Might be cheaper and easier to install than the metal ones. Hope to see you soon! Have Barth, will rerivet 9708-M0037-37MM-01 "98" Monarch 37 Spartan MM, 6 spd Allison Cummins 8.3 325+ hp | |||
|
Official Barth Junkie |
I thought I had seen it all. As I continued the job of removing the trim strip and replacing rivets, I discovered another "repair." This one was not as bad as the others, ie the workmanship was fairly good but it was still a screwup. The trim strip was undamaged but when removed, it showed that someone had drilled out the rivets (no problem there) but replaced them with plain steel screws. If they had used stainless screws it would have been a good job. Not only are the screws corroded but this probably explains why I have corrosion pits along the side right above. Oh well.... 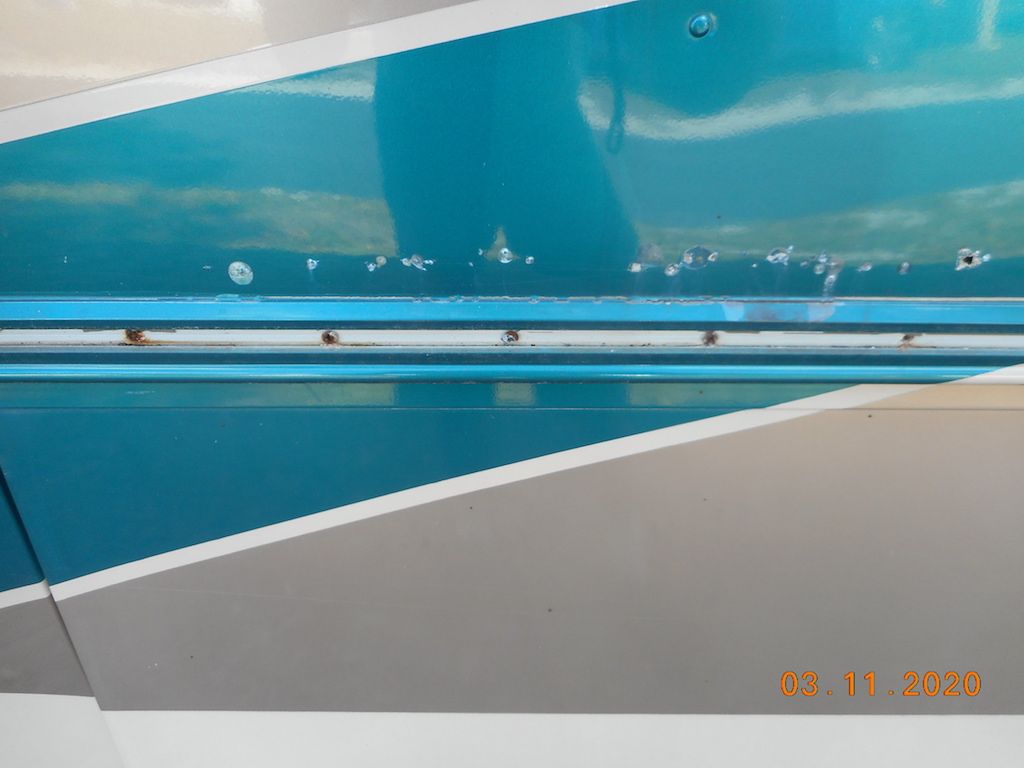 9708-M0037-37MM-01 "98" Monarch 37 Spartan MM, 6 spd Allison Cummins 8.3 325+ hp | |||
|
 |
Bill-NY had a post about aluminum body side molding and he mentioned a plastic screw cover strip made by AP products item # 011-355-05. I have a Barth Regal and the aluminum molding has a snap in plastic strip to cover the rivets and it looks a lot like the AP products strip. It comes in 8 foot lengths 5 to a pack. May be what you're lookin for. | |||
|
Official Barth Junkie |
Thanks! That looks like it may be the right stuff! I will check it out further and report. I have replaced all the rivets in both the lower and upper driver side strips, around the back, and the lower strip on the pass side (about 300 rivets) I will finish the pass side upper strip next. 9708-M0037-37MM-01 "98" Monarch 37 Spartan MM, 6 spd Allison Cummins 8.3 325+ hp | |||
|
Official Barth Junkie |
Finally finished the rivet replacement project. All four side strips, several around the back end and five rivets around the front door. 395 rivets total! Thankfully Barth used solid bucked rivets on the main side panels. All of those were in good condition. The trim strips were fastened with pop rivets. Unfortunately, it appears they used steel mandrel rivets. This was the root of the problem. Due to galvanic corrosion, most of the steel mandrels have rusted away, and the aluminum heads were corroded as well. About half of the rivets had lost their heads completely, the others were quite flimsy. Those without mandrels were easily drilled out. Those with remaining steel mandrels, I drove out the mandrels with a punch before drilling. About 20 rivets had been replaced with steel screws which were also corroded badly. I was able to tap the screws loose and remove most of them with a screwdriver. Some had lost their heads and I was able to punch the shank through. I still have 3 to drill out. I had several places where the side strips were completely loose for 2 feet or more. This is what got me started on the project in the first place. The replacement rivets which were drilled right through the cover strip were all aluminum and generally in good shape but had to be drilled out to remove the strips to access the bad ones underneath. I am not sure if earlier coaches had steel mandrel rivets but if your coach has them you should carefully inspect those areas where they were used. I used all aluminum rivets for my replacements. 3/16" diameter with 1/2" grip range seemed to work very well. Since the majority of the rivets are covered by the the outer trim strip I did not use closed end rivets. Most of the rivets I saw on the web were 10-12 cents each except in vast quantities. Home Depot has Arrow brand rivets 50 for $5.95 so I went with those to avoid shipping cost and delay. I will put a small dab of caulk over the heads before I replace the cover strip. Last step will be to replace the outer trim cover strips. Hopefully this will last the life of the coach. 9708-M0037-37MM-01 "98" Monarch 37 Spartan MM, 6 spd Allison Cummins 8.3 325+ hp | |||
|
 6/19 6/19 |
Sounds like quite the project. Harold Cat Sam Miniature Schnauzer 3.8.2009 - 9.24.2021 93 30ft Breakaway 9209-3823-30BS-11B KE5WCW | |||
|
Official Barth Junkie |
Got back to my side molding project. When I saw Kevin in October, I cleaned out his stash of the plastic molding strips. (Discussion here) https://www.barthmobile.com/eve...913958787#3913958787 I have finished the pass side and part way the drive side. It will be nice to finally finish the job. photos someday.... 9708-M0037-37MM-01 "98" Monarch 37 Spartan MM, 6 spd Allison Cummins 8.3 325+ hp | |||
|
 3/22 3/22 |
Well as I was working on other items I noticed more of the bottom molding loosening. After Bobs adventure https://www.barthmobile.com/eve...693934697#9693934697 I figured I better at least hit the bottom After researching some riveters and the recommendations on that post (my joints are screaming at me a lot lately). In the following of “work smarter not harder!” I ordered a much cheaper cordless riveter. 39 rivets in and all I can say is wow wow wow wow Less that 20% of the rivets were holding anything. Most I was able to pull out with my fingertips. They had been done correctly(well I used marine closed end rivets) I had seen some and imagined all. The top strips are all loose. Dana & Lynn 1997 38ft Monarch front entry Spartan Mountain Master Chassis Cummins 8.3 325hp Allison MD-3060 6 speed 22.5 11R Cummins Factory Exhaust Brake 8000 watt Quiet Diesel Generator 9608-M0022-38MI-4C Christened Midnight 1972 22ft 72081169MC22C Christened Camp Barth | |||
|
 8/19 8/19 |
It must be the age of our coaches. My same problem is on the driver side. Moth of the curb passenger side is rebuilt from the water tank repair. I drilled some new holes and installed a few extra rivets in between the other rivets. I replaced some of the really loose rivets with larger 1/4 inch rivets. Some of the 3/16 inch rivets were not gripping anything but air. | |||
|
| Powered by Social Strata | Page 1 2 |
| Please Wait. Your request is being processed... |
|
This website is dedicated to the Barth Custom Coach, their owners and those who admire this American made, quality crafted, motor coach.
We are committed to the history, preservation and restoration of the Barth Custom Coach.
We are committed to the history, preservation and restoration of the Barth Custom Coach.

