Go to...  | Start A New Topic  | Search  | Notify  | Tools  | Reply To This Topic  |  |
I discovered this panel just recently while chasing another problem with my engine temp gauge and thought that I would post the pictures in case (not hopes)there is someone else out there that was as stupid as me and didn't know the panel existed. I had been removing the whole panel via about 8 screws to access the gauges ---- this newly discovered access panel makes the job a whole lot easier. Note the neat paint codes attached to the back of the panel. I hope this info helps many others --- 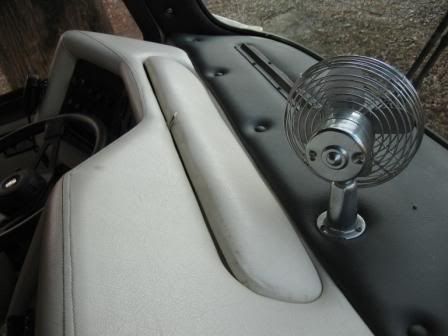 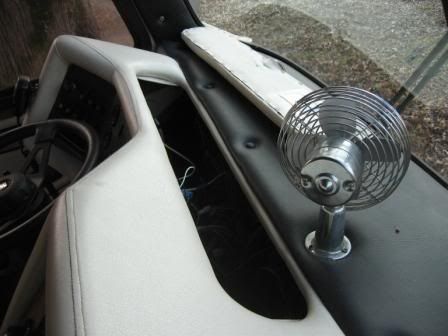 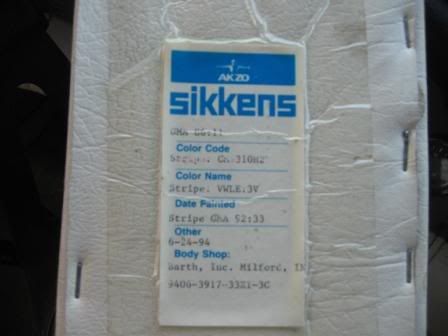 Frank Strong 1994 Regency 34ft 300 HP Cummins, 6 spd Allison Spartan MM Chassis | |||
|
 9/09 9/09 |
I just spent 6 months renovating our 1993 Barth Regency. I have removed and replaced the dash way too many times. We finally took our first trip from Florida to Texas over the holidays. During the trip I had to remove the dash to: first, reconnect an instrument connector; second to reinstall a speedometer light; and, third to repair a leaky airline. Upon the third removal I was contemplating how I was going to modify the dash to install a removal panel for easy access. It was then that I finally took a real good look at the console over the dash and noticed some interesting upholstering. I used a screwdriver and to my surprise the panel popped right out. Imagine my dismay that it took over six months and many curses to notice this. You are definitely not the only dummy out there. Additionally, my dash has eighteen screws holding it on. If yours is like mine there is a minimally sized block behind each screw and it is amazing how the majority of the screws either don't want to line up with these blocks or I can't locate the previous hole. Thank God for small favors, even if it takes us too long to notice them. Lance & Sue Walton Previous owner of a 1993 38ft Regency Cummins 6CTA8.3 300HP Allison MD3060 Transmission Spartan Chassis Loveland, CO | |||
|
I have a somewhat related question to removing the dash. I have a 1984 Regal. Is the dash that difficult to remove and replace? I've thought of removing it and trying to seal and insulate more to lower the engine noise intrusion. Thanks, Kive | ||||
|
 9/09 9/09 |
Here are the difficulties I encountered. 1. The park brake lines are short and thus make it hard to gain much access behind the dash. 2. The air lines to the two wiper air switches are impossibly short. The switches have to be removed before any access is achievable behind the dash. 3. The screws attach to small wooden blocks mounted to the console. It is amazing but I am lucky if more than three screws manage to find any previous hole in the wood block. I am also lucky if no more than two or three screws fail to find a wood block at all. This all makes it very difficult to re-mount the dashboard. 4. Because of the difficulty in attaining any clearance behind the dashboard the possibility of finding out, after re-mounting the dash, that you have inadvertently pulled off a connector, wire or light from one or more gages, etc. 5. The corners of the dashboard are all broken or cracked due to the many manipulations the dash has gone through. I hope this helps in understanding the "fun" of working with this dash. I hope you also have an access panel. In the future I may remove the dash so I can provide a more suitable mounting surface for it. That will probably be in the distant future. Lance & Sue Walton Previous owner of a 1993 38ft Regency Cummins 6CTA8.3 300HP Allison MD3060 Transmission Spartan Chassis Loveland, CO | |||
|
 3/11 3/11 |
Similar experience with my 1993 Regency. Finally I removed the plastic dash and had three sections laser cut out of 11ga aluminum and then powder coated. Now I can remove each individually, if necessary, and I remade the stereo cutout, eliminated the Sony camera for an integrated Pioneer head unit and deleted the old three switch cruise control. If I replace it it will be with a Cruise King electronic system anyway. That plastic stuff can't last more than one or two service removals. 1993 32' Regency Wide Body, 4 speed Allison Trans, Front Entry door, Diamond Plate aluminum roof & 1981 Euro 22' w Chevy 350 engine and TH 400 tranny | |||
|
 |
Tom, did you rearrange any gauges or switches other than the cruise control. Would love to see pictures of your new dash. As you can imagine I'm looking at the same project this spring. Nick | |||
|
Hi Nick and Donna, hope things are going great for you all. Nick check out Ed's click on that. sky Ed's New Panel 1990 Barth Regency 32RDGB1 Wide Body 3208 Cat 250 HP Gillig Chassis Center aisle | ||||
|
 3/11 3/11 |
Hi Nick: Yes I rearranged them in two ways: to eliminate the problems of dealing with the air pressure gauges I mounted them in a lower strip on the left side; then I also moved the EPM and AUX Start off of what is now the entertainment and navigation panel, I can remove each panel individually to replace anything or add new items. 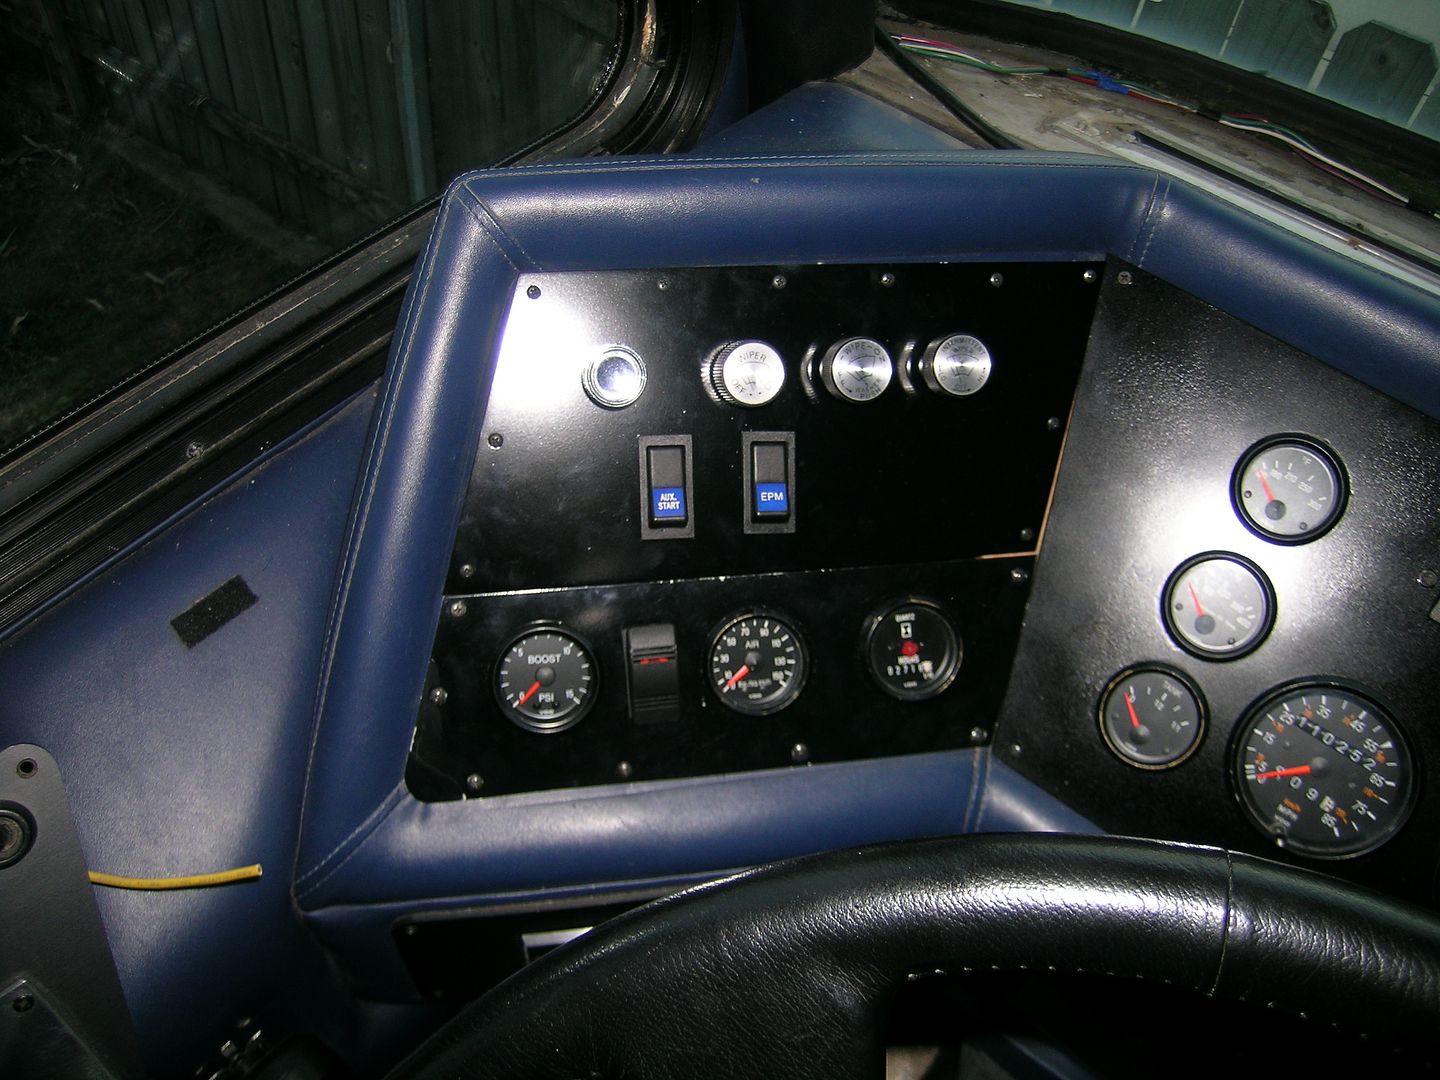 ; ;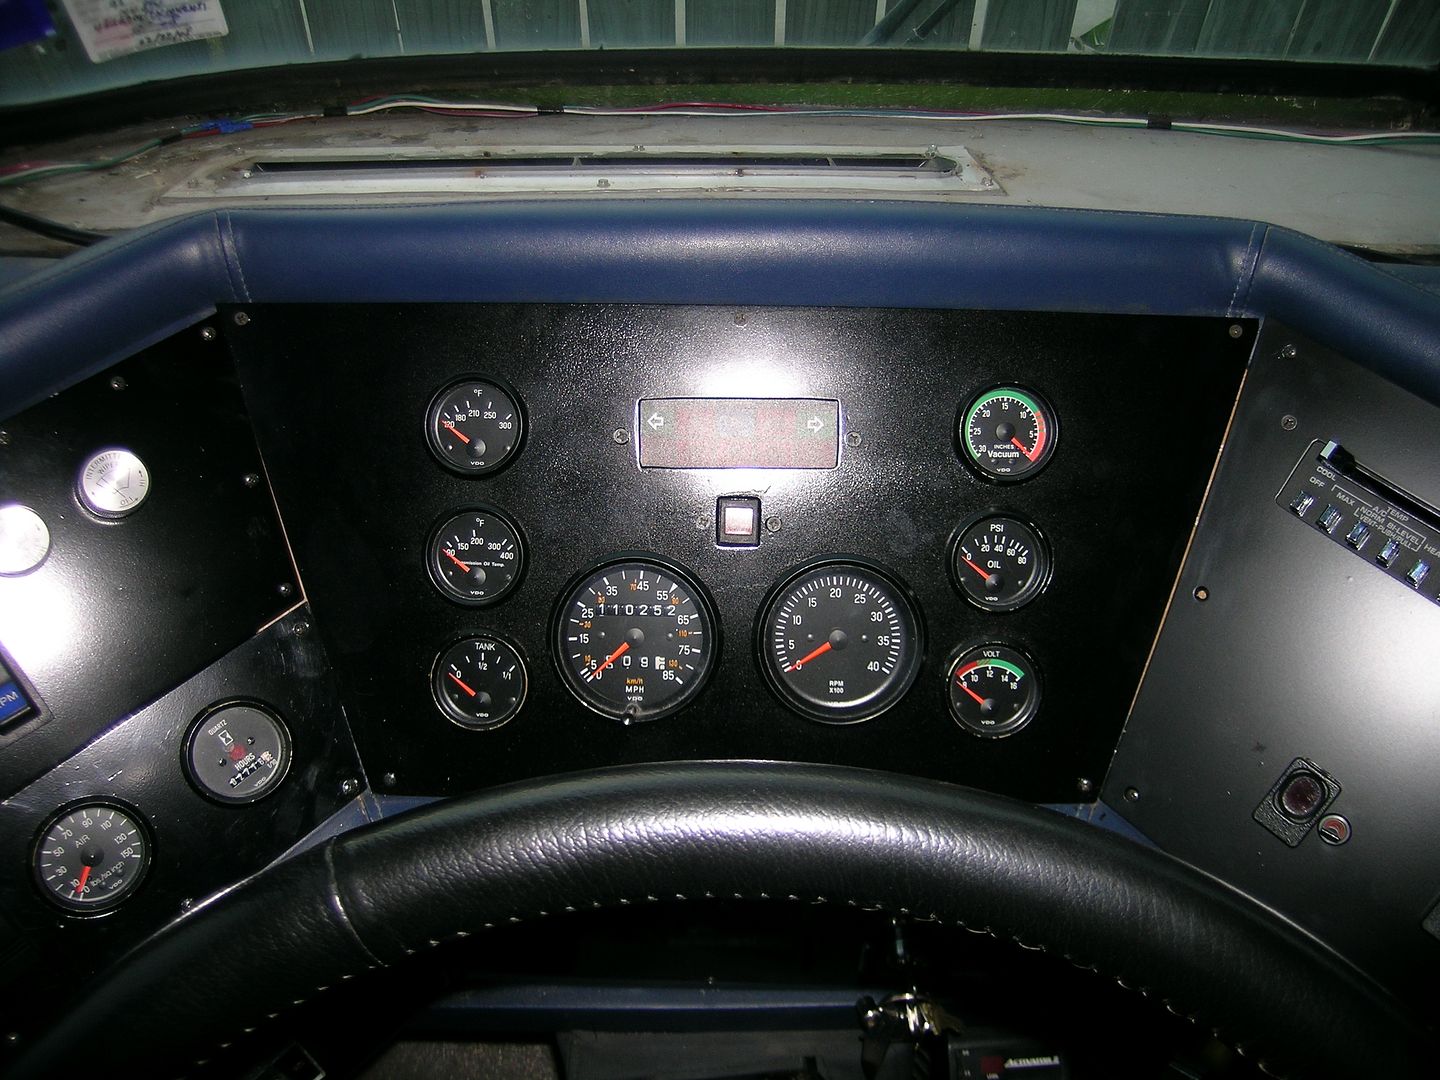 ; ; 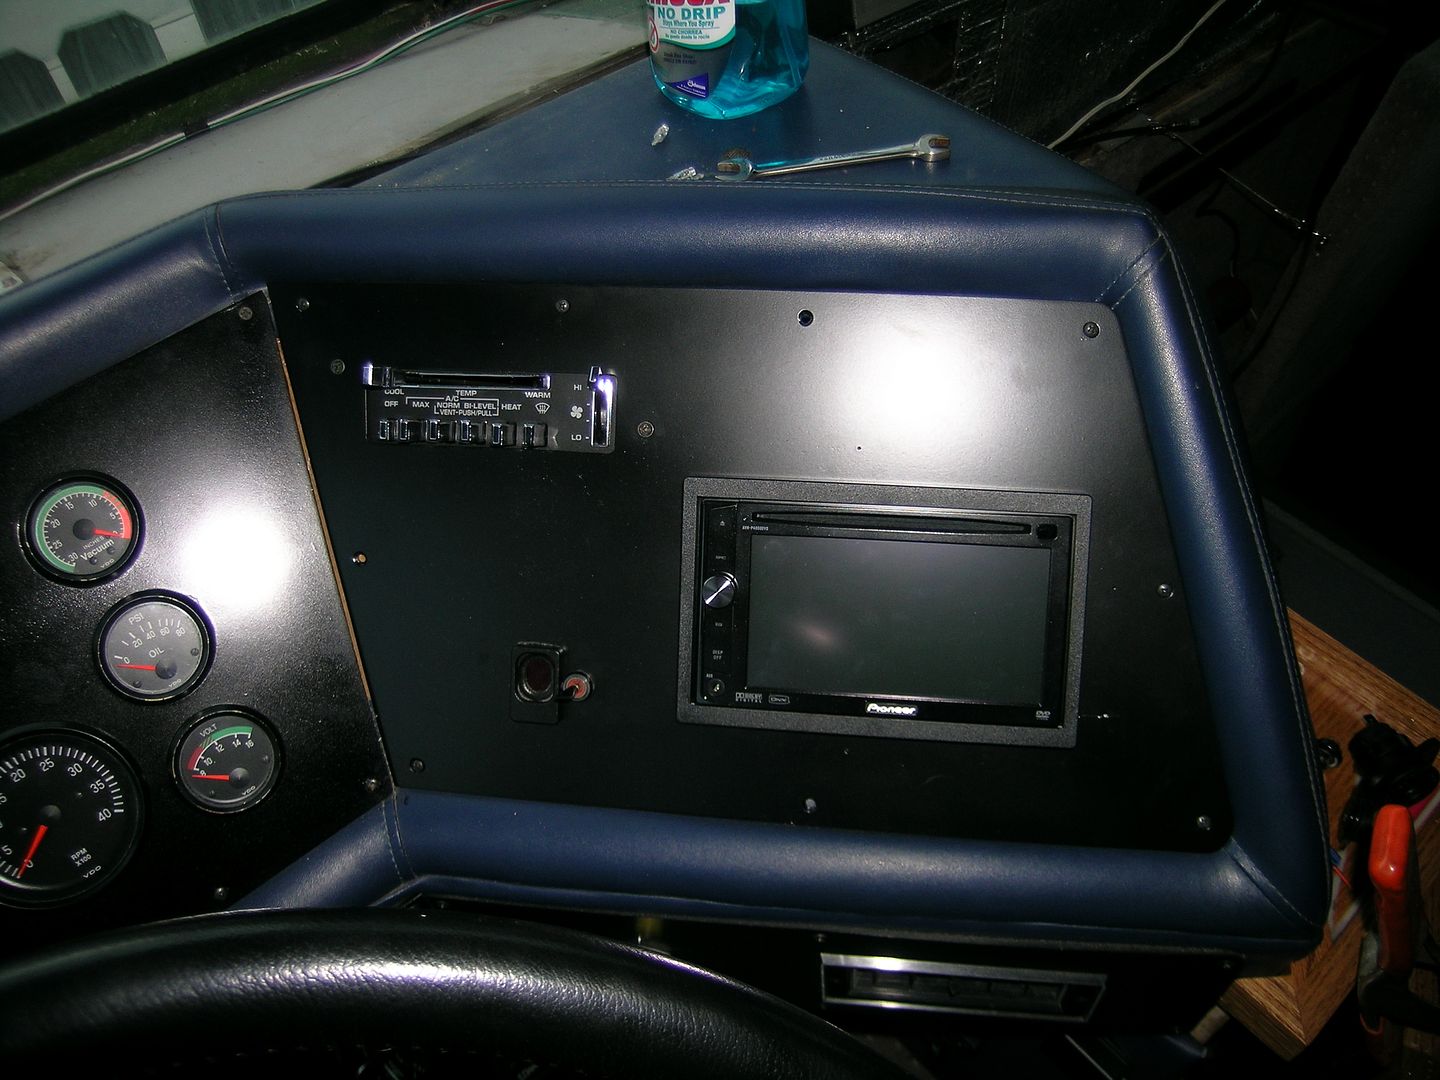 I hope I followed Bill's tutorial correctly on the pictures. Tom 1993 32' Regency Wide Body, 4 speed Allison Trans, Front Entry door, Diamond Plate aluminum roof & 1981 Euro 22' w Chevy 350 engine and TH 400 tranny | |||
|
 |
Thanks, Tom. Good ideas. Nick | |||
|
| Powered by Social Strata |
| Please Wait. Your request is being processed... |
|
This website is dedicated to the Barth Custom Coach, their owners and those who admire this American made, quality crafted, motor coach.
We are committed to the history, preservation and restoration of the Barth Custom Coach.
We are committed to the history, preservation and restoration of the Barth Custom Coach.

