Page 1 2
Go to...  | Start A New Topic  | Search  | Notify  | Tools  | Reply To This Topic  |  |
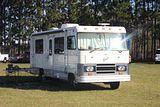
We are well into fall in north Idaho and the rains they are a fallin. Went out to the MOHO the other day and found the floor to be soaked. The wet area is the first step and the area below the doghouse on the floor, also the riser between the lounge floor and the floor under the passenger seat. I have heard rumors of the Euro style having leak problems at the metal to fiberglass interface but I sure can't see where it is coming from. I know water can travel and be tough to locate but does anyone have any info on where the Euro was prone to leaking. I have looked at all the seams on the top as well as the door and passenger window and all looks sealed up just fine. I'm kind of at a loss as to my next step, any suggestions? Thanks.........Tim | |||
|
| First Month Member |
Sometimes you can find a leak by sitting in the MH during heavy rain and observing closely. | |||
|
| The Old Man and No Barth |
The joint between the end cap and the coach body is always a candidate for leakage. My previous all fiberglass S.O.B. leaked at that joint in the rear. A few days after we brought our current Barth home we had a terrific rainstorm at night & I found the cab area soaked, the headliner full of water and sagging. There was evidence in the form of rusty instruments that the problem had been there awhile. I found no specific area on top where leakage was obvious so I gooped up every place that looked like it could be a candidate - rivet heads, panel seams, the screws holding the running lights, around their bases, etc. - every place anything penetrated the roof. Problem solved. I've had leaks while underway around the vertical sections of the end cap as well. I don't know about the glass noses, but the factory used something to seal the aluminum cap that dries up and cracks out. Also the rivets corrode from galvanic action. They loosen, and need regular attention & replacement. Leaks are always a problem in RVs & boats. Don't get me started on boat experiences with overhead leaks. Keeping the hull watertight is a cinch, but not the topsides. IMHO if you have a mysterious leak, don't bother searching it out. Get up on top, & goop up every seam, everything that penetrates the roof, & everything that is bedded to the rooftop. Clean everything well before you do. Dust and dirt prevent adhesion. Window frames are candidates too, & if your unit doesn't sit level in storage you can get all the runoff in one corner. That happened to me last winter, & water flowed in over the top of the glass on the driver's window. The frame was OK, it came right through the top window channel. Solved that one by installing drip rails on the driver & passenger windows. If you want to spend money, go for a polyurethane marine sealant like 3M 5200, but don't use it on anyrthing you'll ever want to remove. I've used an RV store sealant called Dicor, a little cheaper, but both are difficult to work. My favorite is an inexpensive hardware store product called Dap. They have a dozen varieties, colors & prices. I use the clear one with a 50 year guarantee. Tool it with a finger, & clean it up with water before it sets, but once it dries, if you haven't cleaned the excess perfectly, it will show up later as a grimy spot. A problem on the sides, but not the roof. Camping World has a product called Proflex available in caulking gun tubes, or in cans with a brush-on consistency. I've used the latter to seal a mysterious leak on the S.O.B. Easy to work with, effective, modestly priced, but I know nothing of longevity. DON'T USE SILICONE. It eventually loses adhesion where you don't want it to, it's near impossible to remove the rest of it, and no other sealant will stick to it, not even other silicone. Been there, done that. | |||
|
| 1st month member |
I've found a product that will cause will remove silicon, so watch carefully where you apply it (it also will remove paint, skin, etc.). Straight Castrol SuperClean will kill silicon adhesion. Apply it full strength and leave it awhile. You can buy it by the gallon at Wal-Mart automotive section. | |||
|
I found a device for sale at a local hardware store for $10. It is a moisture detection alarm. It has two exposed wires (no insulation) wrapped around the small rectangular device and includes a 9 volt battery. In theory you lay this in an area (I put mine next to my water pump) where you're most likely to experience a leak. When water touches both contacts, a loud alarm goes off. It's somewhat intelligent in that it shuts off after 10 minutes and restarts every hour until you acknowledge the alarm. I put the device to my tongue and it sounded pretty loud.. I figured for $10 what the heck... ------------------ Larry and Heidi from CA   | ||||
|
Glassnose Aficionado |
My first thoughts reading your thread were why are you looking overhead when the moisture is on the floor? Yeah, water flows downhill, but it will leave some kind of trail on the way down, usually involving the headliner. My Euro has a pannelling type headliner that might not show a problem immediatly but surely would get ugly with time. The glass-metal seal might not be the best, I put down a smooth thick coat of sealant over the entire joining area, but a quick and relatively painless alternative may be installing Max Airs over your roof vents. I did it with lots of sealer and rivets and have no doubt it will handle anything the road or mother nature can throw at me. As far as silicone based sealents, I'm gonna check out a few things, but I've never found anything that compared to them, when used as a permanent sealant. ------------------ Dan & Suzy Z '81 Euro 28  | |||
|
 6/12 6/12Formally known as "Humbojb"  |
Hey Larry and Heidi Are you guys now "speechless" over your new 'alarm toy'? JIm ------------------  | |||
|
I had a leaky drivers side window on my bus that i sealed and resealed with different products about 4 times last year with no luck until i used the same stuff that Peninsula Glass uses to seal between their double pane windows....no more leaking. On our way out of WA. last month i made a point of stopping by their place and buying more 8 tubes from them as i am going to reseal my front windows. Have only seen this stuff once in an rv store in Yuma and they only had one tube left at that time. I know it comes in black which is what i needed, and i think it comes in clear too. It is made by the C.R. Laurence Co. out of Los Angeles and is called Industrial and Construction RTV Silicone. Also the day i sold my patio awning off of the bus i had about 50 screw holes on the roof to seal. All three of the different types of sealants that i had on hand said not to use if there was a chance of rain in the next 24 hours....and of course it was raining on and off at the time. But i had some stuff that i had used when i put my tv dome on that dries fast but stays flexible so i used that and haven't had any leaks. I am going to get some more of it and buy a bunch of stainless sheetmetal screws to fill the holes and redo it so it looks better. Can't recall the name of the stuff right now but will probably be getting it tomorrow. | ||||
|
| First Month Member |
I had a Southwind that had that marque's chronic leak at the front and rear cap junctures. I finally fixed it for good with Liquid Roof. It is also called Liquid Rubber. The coach is across the street, and still doesn't leak. | |||
|
Ok just got back from town.....the other stuff is made by the Dicor Corp. out of Elkhart In. and is called Lap Sealant. 501 LSW White, self leveling. This stuff is flexible, waterproof and designed for sealing EPDM rubber, TPO, fiberglass, wood, aluminum, steel or masonary and may be painted over. | ||||
|
| The Old Man and No Barth |
The Dicor product is what I used after the rainstorm that brought the headliner down. I plugged everything I could find that penetrated the rooftop. Messy to use, hard to clean up, but effective so far. Readily available at RV stores. | |||
|
| First Month Member |
I have been reluctant to bring this up, but a good way to find a leak is to use an electric leaf blower to pressurize the coach. It takes a bit of taping to close off all the legitimate holes, but a little soapy water will show where the air is escaping. I had to do that to a class C Newport that was driving me CRAZY. | |||
|
Captain Doom |
I hope none of the neighbors saw you do that.... | |||
|
especially if you hooked it up to the tail pipe :>) | ||||
|
Lots of good input. I think I will go with the "don't try to find the leak just re-seal the whole thing" theory, Although I really like the leaf blower idea. Thanks All | ||||
|
| Powered by Social Strata | Page 1 2 |
| Please Wait. Your request is being processed... |
|
This website is dedicated to the Barth Custom Coach, their owners and those who admire this American made, quality crafted, motor coach.
We are committed to the history, preservation and restoration of the Barth Custom Coach.
We are committed to the history, preservation and restoration of the Barth Custom Coach.

