Go to...  | Start A New Topic  | Search  | Notify  | Tools  | Reply To This Topic  |  |
Captain Doom |
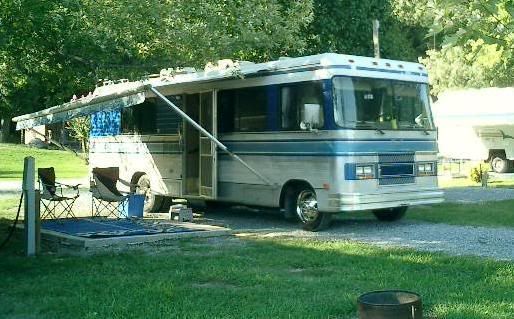
Part 1 - Removal and Diagnosis The windshield wipers on my Breakaway were pretty sloppy; I had to use a 2" shorter blade on the passenger side because the standard 20" kept hitting the molding and ripping. 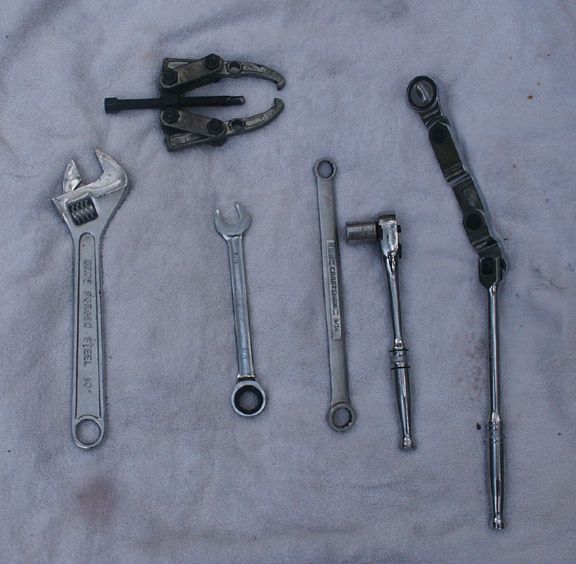 These are the tools (and then some) you'll need (left to right): 10" adjustable wrench, 9/16" ratchet box, 9/16" box, 9/16" socket and drive, and 3/8" articulated drive. Top: Small gear puller. The 9/16" box is useful for starting the bolts; the 9/16" ratchet box makes removal quite easy. The sockets are hard to use because of clearance and workroom. 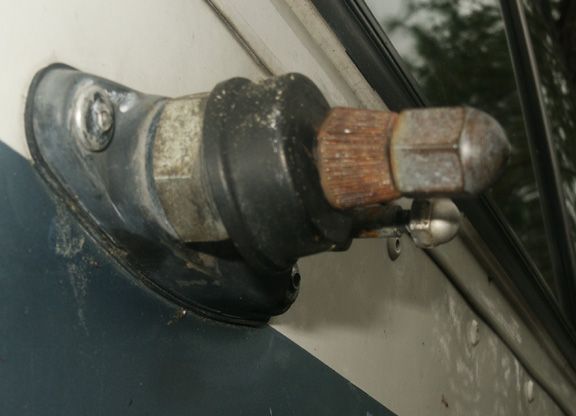 Step 1: Remove the two nuts holding the main arm and follower arm on, and use the gear puller to remove the arm itself (the follower arm will come right off). Then use the gear puller to remove the splined cone. Pull the gasket and loosen (but do not yet remove the shaft securing nut. 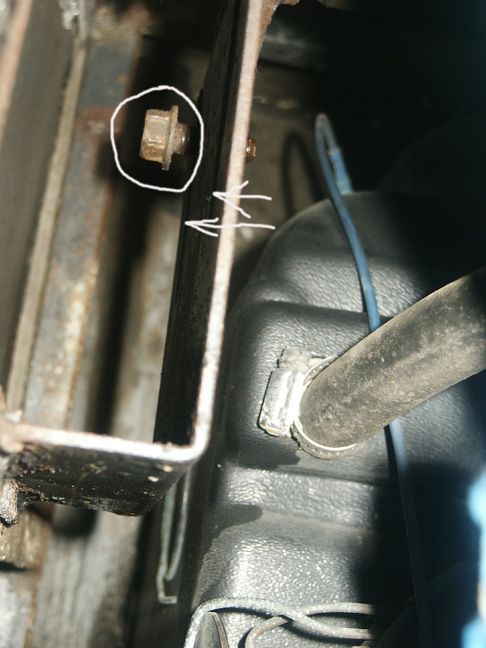 Step 2: The motors are secured using the shaft securing nut and two bolts threaded into nuts welded onto the motor mount. The photo shows the passenger side motor with the inside (near) bolt already removed and the far one backed out. Note that these bolts are in slots (arrows) in the bracket for adjustment - they're open at the top - and you may be able to remove the motors without totally removing the bolts. Also note that the front of the coach is to the left in this photo. Remove the shaft securing nut, and remove the motor. Disconnect the wires, noting the position of each color. 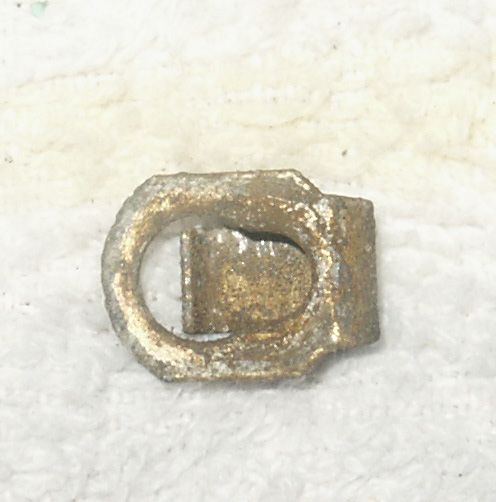 Step 3: The drive link is held on by keyhole clips (Bottom side shown); lift the tab with a small screwdriver and slide back. They and the link have already been removed in the next photo. 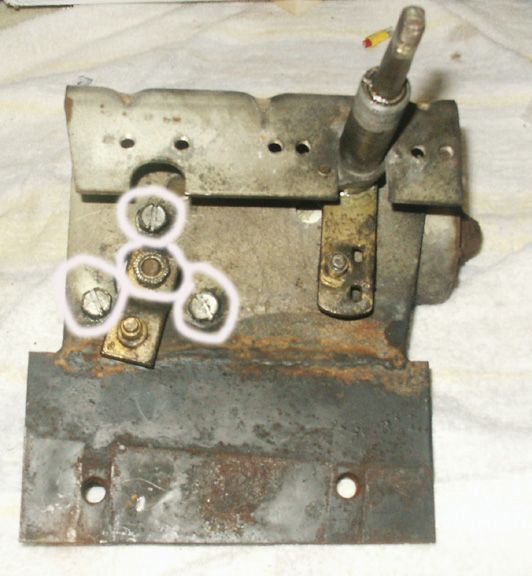 I discovered the slop in my wipers was not totally caused by the drive link bushing wear. There were three locations with loose connections; 2 are shown here, the 3 motor mount bolts and the drive shaft nut were all quite loose. Here the wiper shaft arm has been rotated to clear the motor mounting bolts (See below). 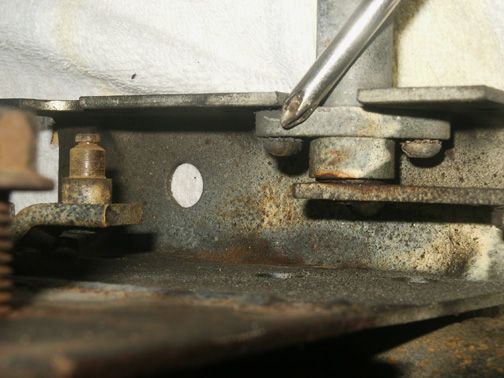 In addition, the wiper shaft securing screws were loose. Both these screws, the drive shaft nut, and the motor mounting bolts were dressed with Lok-Tite blue and tightened - after cleaning and lubing the wiper shaft, which will be in Part 2 (Step 4 and following). 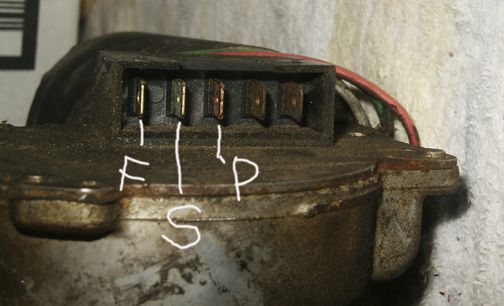 This shows the electrical connectors; mine don't have intermittent, so only the left three are used. The ground is the motor case; these are all power. F: Fast speed (red wire); S: Slow speed (white wire); P: Park (black wire). If the wiper shaft arm doesn't clear the motor mounting bolts, touching 12VDC to the "S" termnal will allow you to nudge it out of the way. Coming: Part 2, Cleaning, Lubing, Repair, and Reassembly. BTW, if you're going to do this, order the 3.38" wiper links #49-217 from Rust Repair a/k/a Mill Supply Rusty '94 28' Breakaway: MilSpec AMG 6.5L TD 230HP Nelson and Chester, not-spoiled Golden Retrievers Sometimes I think we're alone in the universe, and sometimes I think we're not. In either case the idea is quite staggering. - Arthur C. Clarke It was a woman who drove me to drink, and I've been searching thirty years to find her and thank her - W. C. Fields | ||
|
Captain Doom |
Part 2, Cleaning, Lubing, Repair, and Reassembly. 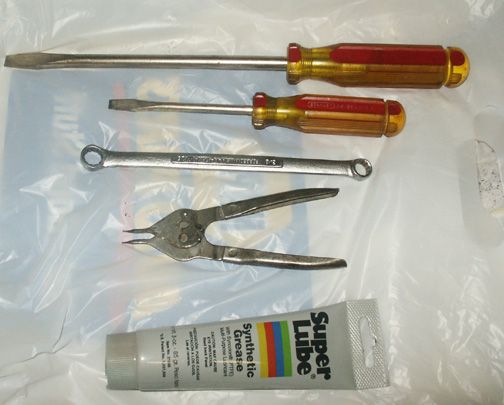 Tools for Part 2 are simple: Large flat blade screwdrive, a smaller one, 7/16 wrench, small snap ring pliers, and Super Lube General Purpose Grease ($5 Harbor Freight - grab some of this whether or nor you're doing the wipers - is excellent stuff!) 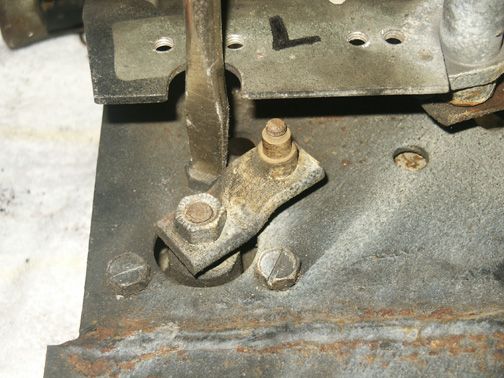 Step 4: With the 7/16" wrench. loosen the 3 motor attachment bolts; you may have to nudge the eccentric crank out of the away. Use the large screwdriver to remove. 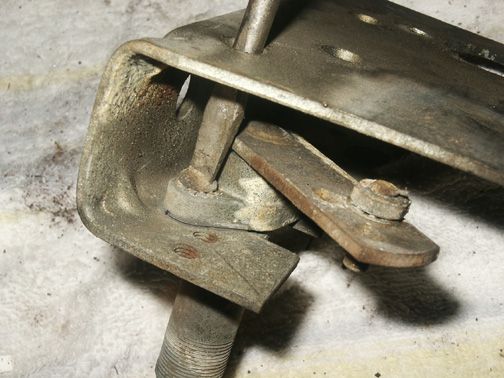 Step 5: With the smaller screwdriver, remove the 2 shaft attachment screws. 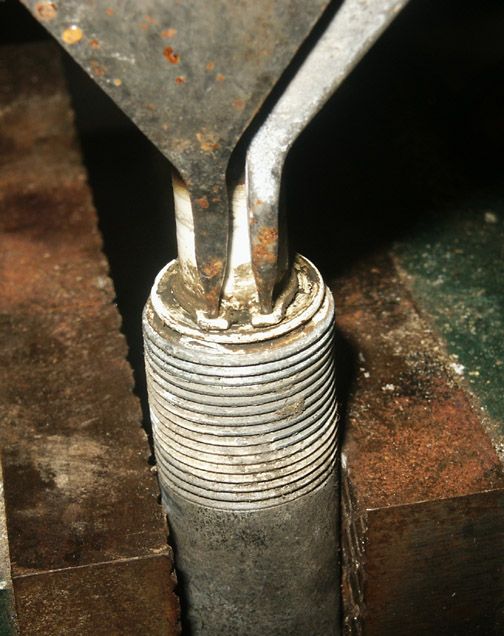 Step 6: With the snap ring pliers, remove the snap ring. The shaft can now be removed. There will be at least one wavy washer and a flat washer. My two shafts were different. One had a wavy washer at the crank end; the other had a wavy and flat washer at the wiper end... Step 7: a. Clean the shaft with acetone, then b. burnish with ~#400 sandpaper. c. With a Q-tip dipped in acetone, clean the inside of the shaft housing. Note that the shaft rides on a bronze bearing at each end of the housing. d. With another Q-tip, apply grease to each bearing. e. Coat the enitre shaft lightly with grease. Reassembly reverses the disassembly process. Check the nuts holding on both cranks/levers. Step 8: Coat the posts on the cranks/levers lightly with grease; install the wiper link. The best way to reinstall the keyhole clips is to place one over the post (don't forget the washer) and hold the open end down with your thumbnail; with your other hand, slide the clip into place.  While the motors are on the bench, chase the mounting bolt holes with a 3/8"-16 (NC) tap. Rusty '94 28' Breakaway: MilSpec AMG 6.5L TD 230HP Nelson and Chester, not-spoiled Golden Retrievers Sometimes I think we're alone in the universe, and sometimes I think we're not. In either case the idea is quite staggering. - Arthur C. Clarke It was a woman who drove me to drink, and I've been searching thirty years to find her and thank her - W. C. Fields | |||
|
 6/12 6/12Formally known as "Humbojb"  |
Talk about technical support. This is awesome detail Rusty. How did you write on the pics? Tere
| ||||||||||||
|
Captain Doom |
I just used a small brush in Photoshop Rusty '94 28' Breakaway: MilSpec AMG 6.5L TD 230HP Nelson and Chester, not-spoiled Golden Retrievers Sometimes I think we're alone in the universe, and sometimes I think we're not. In either case the idea is quite staggering. - Arthur C. Clarke It was a woman who drove me to drink, and I've been searching thirty years to find her and thank her - W. C. Fields | |||
|
 6/17 6/17 |
Rusty, The procedure worked great, except for my shaft being pressed on (no retaining ring). Thanks again. R.P.Muise 1994 Breakaway/Cummins 5.9/Allison transmission/Spartan Chassis | |||
|
Hello everybody, I know that this is an old posting, I was wondering if anybody has a part number or info for these wiper motors ? Driver’s side been working but it quits after while and I want to replace both of them and then check the relays and wiring. Thank You | ||||
|
Official Barth Junkie |
There is some discussion here and some photos. A link to a supplier, Defender. https://www.barthmobile.com/ev...693976097#4693976097 Let us know what you find! 9708-M0037-37MM-01 "98" Monarch 37 Spartan MM, 6 spd Allison Cummins 8.3 325+ hp | |||
|
Hello All, Rico, approximately six months ago, I purchased a new Wexco Industries H131 wiper motor assembly from EBay for our '93 Breakaway. The EBay seller's name was "Ironwingsales". The cost was $50.00 plus $12.00 shipping. The motor appeared to be an exact replacement & after installation(with no modifications) worked as it should. You might want to put aside an extra $10.00 for band-ads & a tube of Bacitracin Zinc because as I recall, it's quite a long reach & our motor was nestled in a space surrounded by sharp edges. Good Luck, John | ||||
|
| Powered by Social Strata |
| Please Wait. Your request is being processed... |
|
This website is dedicated to the Barth Custom Coach, their owners and those who admire this American made, quality crafted, motor coach.
We are committed to the history, preservation and restoration of the Barth Custom Coach.
We are committed to the history, preservation and restoration of the Barth Custom Coach.

