Go to...  | Start A New Topic  | Search  | Notify  | Tools  | Reply To This Topic  |  |
 |
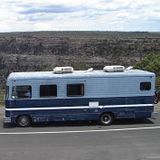
I wanted a receiver hitch on the back of the rig and I didn't want to pay the bucks that a good welding shop would want. Or what I thought they would want. I didn't actually check. I made some measurements and bought the Reese 37042 kit. You'd figure 4 bolts to the frame should take under an hour. I bought a hitch at walmart that is intended to go on the S10 pickup truck. Instead of an hour, let's say closer to 8!!!!! I first had to position the unit under the RV on blocks to make sure the geometries with the bumper, the frame, and the water drain tank would work. The hitch has brackets that mount to the frame, with carriage bolts through the frame and supports for the bolts. I wanted this kind, because the bumper is aluminum. Things start well. I position the unit, and mark the positions of the holes I have to drill. I love the titanium tip Dewalt drill bits. Half inch diameter. First hole goes well, and the bolt fits in easy in the frame, it is a C frame from Chevrolet. I am drilling holes straight up through the bottom of the frame. Time for the second hole. Oh, a complication! Barth added about a foot of framing to the tail of the Chevrolet RV frame. They did this to mount the bumper and to build an apparatus to hold the spare tire on a post. So, inside of the rear 9 inches of the C frame is also the home to a rectangular tube section of iron, to be part of the framing that Barth put in place. So that would mean, that when I go to position the carriage bolt in the hole from the top, I first have to feed the bolt down through a channel that I can not fit my hands down. I can use a "grabber" tool or a magnet tool, and in fact I also made a tool out of an old coat hanger to help and get it done. Oh, but even that has a complication. Part way down this channel is a bolt! Barth bolted their framing to the Chevrolet frame, before they welded it. So, I managed on the first side to drill this bolt out part way and it snapped. So I was able to get the first hard to reach carriage bolt in the frame with the coat hanger tool. On the second side, the assembly positioning bolt added by Barth didn't snap. It bent, and through the half inch hole, I managed to bend it out of the way further. But, it interfered with the coat hanger tool, the magnet tool, the grabber tool, and I couldn't get the bolt in place. I did find that I could get the bolt past the obstruction, but not in a controlled way to position it. I then thought of feeding a wire through the hole in question, and feeding it back through the channel, to the opening area. I used electrical tape to create a "butt end connection" between the half inch bolt, and the 18 gauge wire. This easily let the carraige bolt in to position. Done! Along the way I snapped two or three drill bits. I needed a trip to Home Depot for more titanium tip bits! One of my neighbors stopped over. He and I seemed to agree that if I took this to a welding shop, they'd end up wanting a thousand dollars to rebuild the rear framing and come up with a custom hitch design. 8 hours? 1000 bucks? Hmmm. Took much longer than I wanted, but it still comes out in my favor I think.... Well at least I like to think so. I am towing a 12' enclosed trailer, with a quarter midget race car inside. Happy Motoring! Matt 1987 Barth 27' P32 Chassis Former State Police Command Post Chevrolet 454 Weiand Manifold, Crane Cam, Gibson Exhaust | ||
|
 3/22 3/22 |
Well how about a picture of the completed project. Got to love a little time trumps a lot of that $1000. If you had a little xray vision you would have been able to miss those pesky bolts. Dana & Lynn 1997 38ft Monarch front entry Spartan Mountain Master Chassis Cummins 8.3 325hp Allison MD-3060 6 speed 22.5 11R Cummins Factory Exhaust Brake 8000 watt Quiet Diesel Generator 9608-M0022-38MI-4C Christened Midnight 1972 22ft 72081169MC22C Christened Camp Barth | |||
|
| Powered by Social Strata |
| Please Wait. Your request is being processed... |
|
This website is dedicated to the Barth Custom Coach, their owners and those who admire this American made, quality crafted, motor coach.
We are committed to the history, preservation and restoration of the Barth Custom Coach.
We are committed to the history, preservation and restoration of the Barth Custom Coach.

